So, you want to build your own adventure rig?

You’ve come to the right place! We are here to help you turn whatever van (or hatchback) you have into a home and get out there to freedom! This section is like “Van Building for Kookz.” If you have no building skills and all courage, well you’ll do just fine in vanlife and with this build. Here, you’ll find awesome downloadable infographics, such as wiring diagrams to electrify your rig and editable spreadsheets to help you create a realistic budget and help you stay in that budget. You’ll also find step-by-step guides, YouTube tutorials, detailed information about products we like or found trouble with, links directly to the products you’ll need, we’ll walk you thru how to install all of them and give you some construction tips, and you’ll find links to other helpful resources and more. We want to make it as easy as possible for you to get out on the road in your new home! Good luck kookz! If you have any questions, shoot us a message hello@vankookz.com.

It’s Finally Here! Enroll Today!


Watch this video that accompanies this blog: How To Build a Sprinter Van Step by Step Complete Van Conversion Timeline

This is a step-by-step guide to Van conversions.

WE HAVE ORGANIZED THE Van build INTO A sequential TIMELINE for you kookz

CLICK THE LINKS BELOW TO SKIP AHEAD or keep scrolling to read in order.

 
Step 1 - Find a Van Step 2 - Prepping the Van Step 3 - Planning the Layout Step 4 - Cut Holes Step 5 - Wiring Step 6 -  Insulation Step 7 - Framing Step 8 - Plumbing Step 9 - EZ Solar & Electrical Components & Extras

Check oUt Our Van Conversion EBooks


Black and White Piano Keys with Quote Sound General Cloud Banner.png


CHOOSING A VAN

The result of choosing a van and building it out can be as unique as a fingerprint. If you have been researching this topic for a while, as you gather inspiration and information about the way others have built out their van in the past, you will see how there are infinite possibilities of types, styles, and build outs that all these kookz are coming up with. It is really inspiring. If you find and proceed with an existing layout that works for you, we can almost guarantee that it will still be unique, to you. Every DIY build is a unique creation that someone manifested through time and energy.

Choosing+a+van+to+convert

What is your Budget?

One of the main deciding factors of your van choice is: What vehicle falls within your budget?

If you are wondering, “How much should I budget for a DIY Conversion?” We have created just the tool for you! We kept track of every van related purchase and made a downloadable budget spreadsheet to give you an idea of the expenses you should account for when framing a realistic budget. Also, you can use it as a tool to stay on track, by keeping track of every purchase in the van with this spreadsheet. It will tell you where you are over budget and where you have some money left over to use towards other things. You can download that below!

Download Free Budget Tool!

This free spreadsheet is the spread sheet we used to build a VW Vanagon on a budget. It is a great starting point. We are coming out with a Sprinter size spreadsheet soon!

Start with what you have

Also, if you are into this life and don’t have a van or the money to buy one, you don’t necessarily need a van to live the life on the road. You can always start out road tripping in what you have, find out what you want and must haves, or see if you even like the lifestyle, or save for your next rig, if it seems adventurous enough for you!

There are truck campers, truck camper tiny homes, tear drops…we’ve even seen some really cool Honda element build outs—they are actually some of our favorites! We had a friend @lyncesweet that lived in her Toyota Yaris. In our early days in America, to build back our saving from traveling abroad, we started out in a Subaru Outback, before we found a Sprinter that was within our price range and had low miles. It really felt like a mansion after doing #Subylife. If you are keen on this lifestyle, you’ll definitely make it happen with whatever you can.

If you are keen on this lifestyle, you’ll definitely make it happen with whatever you can. In this section, we will go though all of the research we did before choosing a model that fit our lifestyle.

Got a Subaru and want to get on the road fast? We have all the measurements and supplies you need to build it out and get on the road quick, here.

Got a Subaru and want to get on the road fast? We have all the measurements and supplies you need to build it out and get on the road quick, here.

VW Van

If we are talking camper vans, the nostalgic VW most likely comes to mind. It comes to mind because it is the O.G., it’s iconic! They have a cult following for a reason. These things are great. We had a 1987 VW Vanagon and built it out on a budget.

We’ve never experienced so many genuine stoked strangers smiling and waving or throwing the peace sign when we would roll thru. People love the VWs! So these vans hold their value. Expect to either put in some love and mechanical work for a great deal or throw down a pretty penny for an “older” vehicle.

If you are mechanically inclined or desire to be, this could be for you. A lot of VW owners are pretty familiar with the engine compartment. It’s not that they aren’t reliable, they are. It’s a simple engine, before they got all techy, with their sensors and computers.

If you can get a Westfalia with a pop-top, your van will be move-in ready. You won’t have to build anything. We’ve met 3 Boys on the road with a Mastif in a Westy traveling all the way to South America. So you can fit, at most, 4 people both driving and sleeping, which make them pretty awesome to get started. But these can run anywhere from $8,000-$25,000…I’ve seen some models (Syncro, 4x4, with a Subaru Engine) of the VW van go for $70k+. And while you can get some deals, I wouldn’t say these are the most budget friendly. But if you are into mods, and heaps of available aftermarket accessories to pimp it out, this is for you!

Sprinter

Whether it has a badge of Freightliner, Dodge, or Mercedes, they are all Mercedes, wearing domestic badges. Mercedes would have their vans built in Germany, disassembled, and shipped to South Carolina to be re-assembled to avoid the 25% chicken tax imposed on imported Sprinters. Chrysler, Dodge, and Mercedes were all owned by the same people for a little bit, which also helped with avoiding the import tax, if they assembled it locally and slapped a domestic badge on it. We found this out the hard way. Our EIS (Electronic Ignition System) went out. Our key wouldn’t turn over. It was like we had the wrong key. We had to get it towed. We called a nearby diesel mechanic and they told us to call Dodge, since it was a Dodge, because they don’t work on Sprinters. We called Dodge, they told us to drop it there and they would have a look. They called us back to tell us we would need to have it towed to Mercedes, because they don’t work on Sprinters. He explained, when they broke up with Mercedes, all the computers to diagnose them were taken back in the split. So we used the last tow with AAA to get it to Mercedes.

Are all sprinters mercedes?

As you can see, these guys need some specialized mechanics, if they are needing repairs. Sometimes the repairs can seem to break the bank, as well. So have a nice cushion in the bank for untimely breakdowns. We haven’t had too many, but when we do, we say, “Sometimes rent is due.” This forum is a great resource for all things Sprinter, including community recommended mechanics WORLD WIDE!

These vans have been around for a while, they are kind of the O.G. boxy high-top van of their kind, which means, if you are shopping used, you can sometimes find these within your budget. These are all diesel engines too. So, when you see a near 20 year old van with 200K+ mileage and the van seems kind of expensive. Just know that diesels hold their value because they are known as, “Million Mile engines.” Most Diesel Mechanics will say at 200K, the engine is just breaking in. So expect to pay a bit of money, if you are looking at these. But, you get a reliable pretty customizable van, with headroom and plenty of room for storage, as well as a vehicle/home for the long term.

2019 Sprinter Dimensions

Dimension graphic via: Sportsmobile.com

If you are looking for specific van dimensions on these high tops, Sportsmobile.com has great infographics on all current high top vans. This is their 2019 graphic for a Mercedes Sprinter.

Again vanlife is what you put in, and these can be a pretty big project, if you plan to DIY your van build. We have plenty of T1N and NV3 Sprinter Build resources here to make the project easier on you!

If you are on a budget, Sprinter may not be the ideal choice. They have a higher upfront cost and higher repair cost, as well as needing a specialized mechanic. But, we are usually on a pretty tight budget (because that elongates the trip) and we make having a Sprinter work. I like to think because it is relatively efficient on gas. So, it will save you money over time or balance out. I always think about that when our van homies are in their Econolines or other cargo vans, they always complain about gas prices and their embarrassing MPG. But hey, who knows?!

Other High-Top Vans (TransiT & Promaster)

The Ford Transit and Dodge Promaster are the US domestic versions of a Sprinter. They both have enough head room for Tall people to stand up in and they too have tons of customizable space for any layout you choose in Step 2. While these models are newer and haven’t been on the market as long as the Sprinter, it may be harder to find one, used, in your budget. If you are planning on building your van from brand new, these are much cheaper, upfront, than the Sprinter. Unless you pay more to get an Eco-Diesel model, these are all pretty much gas engines, which means, they are known to not go as far as a diesel engine. But, they require a less “specialized diesel or Mercedes mechanic.” We’ve noticed that the Promaster and the Transit do not have as much clearance, as the Sprinter. The Sprinter is king when it comes to ground clearance. Especially in the Promaster, something on their rear axel hangs way down taking away a lot of ground clearance. The 2020 Transit now comes in AWD, for all those that want a high top, gas, domestic engine, that is AWD. The Sprinter use to own this market, but it looks like Ford has finally put out an affordable competitor. We were so excited about it that we went and test drove one and made a vlog about it here comparing the 2020 AWD Transit with the 2020 4x4 Mercedes Sprinter. We were excited about these because they are Ford’s; most all mechanics can work on them, they are cheaper to repair that import vehicles, and because they are gas engines, no DEF system, because Diesel is already expensive so why pay for another fluid on top of that every time you are at the gas pump. If you want 4x4, not AWD, Quigley is still doing conversions for them. Plan to pay around $10k+ for the off-road conversion.

2020 Ford transit- Dimensions

Dimension graphic via: Sportsmobile.com

If you are looking for specific van dimensions on these high tops, Sportsmobile.com has great infographics on all current high top vans. This is their 2019 graphic for a Ford Transit.

2019 Dodge Promaster - Dimensions

Dimension graphic via: Sportsmobile.com

Here we show you how we built our van for under $6,000, including the purchase of the van. We break it down in sections to make it easier to follow along.

Here we show you how we built our van for under $6,000, including the purchase of the van. We break it down in sections to make it easier to follow along.

NVC3 Sprinter Van ConversionHere, you can browse through all the topics and phases of our Sprinter build. And you can find just about everything you need to know about converting your Sprinter. We have links to products and step by step how to's and…

NVC3 Sprinter Van Conversion

Here, you can browse through all the topics and phases of our Sprinter build. And you can find just about everything you need to know about converting your Sprinter. We have links to products and step by step how to's and videos. Be sure to check out our YouTube channel for more videos!

VAN TOUR: Engineer Builds Ultimate DIY 144" Sprinter Van | Shower, Hot Water, Guest Bed, Bikes & More!

Because these are domestic vehicles, they are cheaper to get parts and find a mechanic as they are more simplistic and require a simple mechanic, rather than a specialized mechanic. But, as we have been doing this lifestyle for almost 4 years, at the time of writing, and we have met quite a few vanlifers that bought a Transit, off the lot, and a couple in particular had quite a few issues with them. One friend’s van, wouldn’t even shift into first to accelerate at a green light, randomly at 6,000 miles. The diagnosing took a while and it had to go back several times to finally get it resolved. They had to Air-BNB a place to live while it was in and out of the shop. While some people choose to buy brand new vans to have the piece of mind that they have a reliable, modern, new vehicle, that is just part of the vanlife. There will be untimely breakdowns and mandatory repairs, in any vehicle, right when you aren’t ready for it. You will just have to roll with it.

The Standard CArgo Van

These are all over the road so they are easy to blend in if you are trying to go stealth and do some urban living. The standard cargo van category includes the popular Ford Econoline, Chevy Express, GMC Savanna, Chevy G20, old Dodge Ram, and the old Chevy Van. Most of these vans haven’t changed much and share parts for generations of models. So parts and service are relatively cheap and easy to find a mechanic. We have a friend in a G20 that says, “When a part goes out in my van, I can just go to NAPA and empty out the change in my pockets for the part. Bet you can’t do that in your Sprinter!”

In searching for these types of vans, we realized it is so hard to find a van with under 100k miles. There isn’t a ton of head room. So plan on sitting while in your van, unless you get an aftermarket high top installation, which will really increase your living space.

If you are looking for an AWD/4x4 off road cargo van edition, Chevy Express and GMC Savana, sometimes come in AWD. So look out for those. Also, the Ford Econoline will sometimes come in a 4x4 (sometimes diesel 4x4), but be prepared to pay a pretty penny for even a 1997 model.


Kieth (@vanjesus666) and Emily (@itsmeemmib) left South Carolina to adventure out and live life on the road. They bough the E-150 and did a DIY Budget Conversion to make the road feel like home.

High-Top Conversion Vans

Some of these are pretty cool, affordable, and ready to go. Most of the conversion vans are pre-fab travel vans. They have the bench to bed in the back, with two captains chairs, over head lighting, TV/VCR combo (you can remove and have lots of useable storage space). So if you are on the budget and would rather spend your money on traveling, these might be great vans to start with. Because there is some extra headroom, if you wanted to tear out and DIY your build, we’ve seen some pretty cool ones that are comfy within a nice budget.

@charcotravels graduated from University of Florida and decided to take a gap year traveling around in a van. He took a conversion van and did his own conversion perfect for him! We love this up-cycled budget build!

There are also, high top Econolines that in their past use they were an ambulance (these can be a nightmare electronically), a “church limo” or a handicap passenger van, complete with a high top and a lift. Because these vans have a lift and do serve a purpose outside of “lots of headroom in vanlife,” they are usually priced a little higher due to the working lift that you probably don’t want to keep, unless you don’t want to bother throwing it out and you leave it on to be an outdoor shower platform! Oh, I don’t know, there are infinite possibilities!.

Because these are “travel” vans, it seems that the owners really used them to go on occasional road trips, these vans seem to be relatively more common to find with lower miles, in a decent price range.

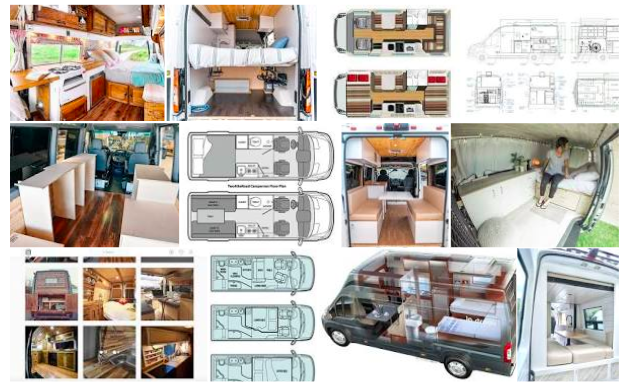
Class B&C Campervans

These are pre-fabricated, probably rarely driven campervans. What is the difference between a Class B and a Class C? Well, Class B campervans have RV amenities built within van bodies, while the Class C campers have an RV looking body built on a van or small truck chassis. They both have prefabricated layouts, with showers, water tanks, kitchens, sometimes multiple beds, fridges, everything that you would find in a classic RV, you will find in these. They are ready to be lived in with little to no modifications needed.

Some may have very low miles, but beware of neglected maintenance. Sometimes there is a lot and sometimes all you have is a dead battery.

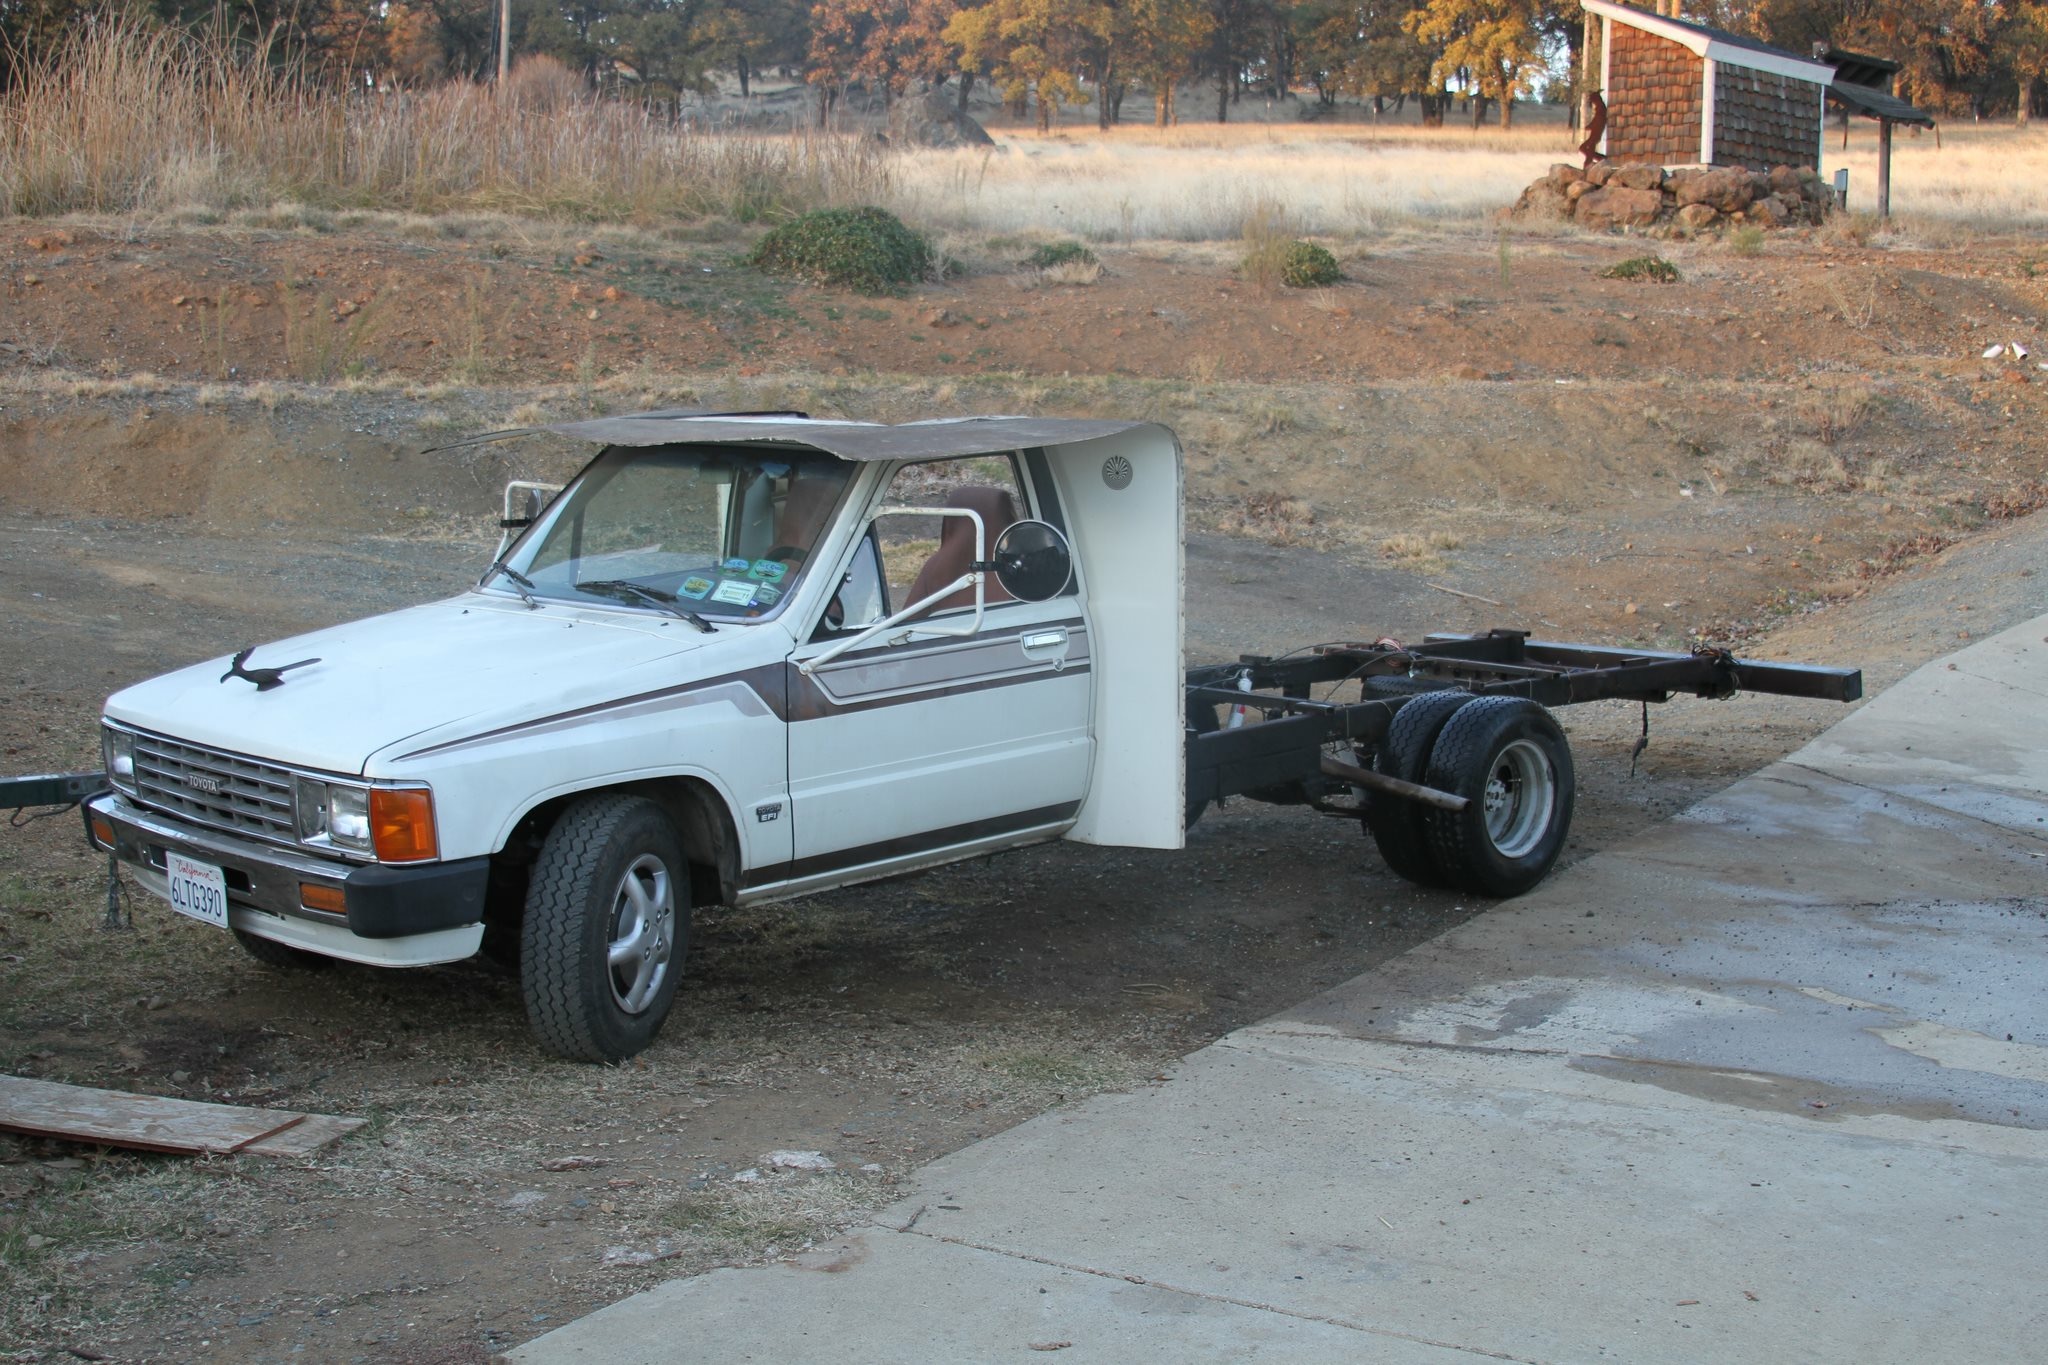
Our first attempt at nomadic living a while back we purchased a 1985 Toyota Dolphin, which I would classify as a C. We started to remodel the bathroom and soon figured out this low mile vehicle (only 50k) had been parked in the drive way more then it got out on the pavement. There was a couple leaks that rotted out most of the framing. So, we had to scrap the project once we tore it all down to the frame. One day, maybe, we can turn it into something.

School bus living

Skoolies seem like the most nostalgic gypsy wagons out there. The long ones have so much space to really customize a tiny home on wheels. While they don’t have a ton of headroom, most can stand up in a school bus. I have seen some modifications to raise the roof for taller people and a have a roomier feel.

While you can tetris in all the comforts of a real home, there are some downsides to having a long school bus. You may need a special license depending on what state it is registered. Traveling in cities and finding parking can be really difficult. It is obviously not very stealth, which further narrows your parking options in a city. Not the best for gas milage. These rigs are ideal for a more stationary vanlife, on some land.

Short Bus living is like van life with way more room. You can fully customize including a bathroom, kitchen, bed, and couch usually pretty comfortably. These don’t get the best gas milage on the block. But, you can usually snag one of these retired children movers to convert to a moving home for relatively cheap, but mechanically, I don’t think they are that cheap to repair. There is always a trade off somewhere.

Mini Vans

We have seen some pretty efficient and cool mini van build outs out there on the road. The mini van can be stealth to the max. If you can black out those windows, then you will blend right in for urban stealth camping. There are so many of these on the road, if nothing looks suspicious about your rig, then no one is going to suspect someone is living in a soccer mom van parked down the road. These can be an affordable jump into the van life. While there isn’t much headroom or customizable space, there are lots of things you can do with these vans for a solo traveler. These get great gas milage. They are relatively affordable just because there are so many of them on the market. Lower milage (under 150k) mini vans are not impossible to find at a decent price. Sometimes you get a double slider. (I would just avoid the auto slider doors. When those go out it can be $4,000+ to repair.)

Mini vans are great for those on a budget, traveling solo, wanting to save money on gas, and have a breezy daily driver.

Once you have a van, it is time to Gut, Clean and Paint the van to start your build. If you are happy with your Class B/C Camper or your stock conversion van and you want to just hit the road ASAP, you can skip a couple steps. Otherwise, move on to Step 2.

 
Step 2 van conversion
 
Step 2 van conversion TIMELINE cutout.png

Gutting The Van

Depending on what model you went with, the work may be just beginning. Sometimes the demolition can take a lot of energy and a big pile of junk to take to the dump or unload some seats, old shelving, or partitions on Craigslist or Facebook Market place.

Painting

Once you have everything out of the van and you have an empty shell, you will want to clean the van, get all the old grime out of there. At this point, you may need to paint the interior and get rid of scuff marks from it’s previous life.

We’ve skipped this step before thinking we were going to cover every surface with wood, but there are some parts of the metal that won’t get covered and you will see all those scuff marks and it will look funny next to all your newly built furniture.

At this point we like to Raptor Line our van as well. We do the exterior and line the floor on the interior, for some extra insulation, on the floor, because the cold really likes to creep up through the floor.

Raptor lining the van is a great way to up the curb appeal, for cheap, and protect your vehicle from rust, as well as, a way to address some existing rust issues. You can find information about how to DIY Raptor Liner your van here.

Take measurements for next step

Once you have everything gutted, cleaned and painted looking like new, you can start taking measurements of the interior. You may be able to find some interior measurements online for your vehicle, as well. Once you get your measurements, you can see what kind of space you will be working with in order to plan your layout in the next step.

This is a great budget friendly conversion guide for those of you converting small vans, on a budget.

This is a great budget friendly conversion guide for those of you converting small vans, on a budget.

 
Step-3-van-conversion
 

Planning your layout

If you are good at Tetris, you will probably be really good at laying out how everything is going to fit in such a small space. After you have cleaned and gutted out your van, you will want to take some measurements inside the van to see what kind of space you will be working with. You can gather inspiration and information from Pinterest, Instagram, YouTube, Reddit, the world around you, or where ever you draw inspiration from and think about how your living space could be laid out around your appliances, components, and the things that you have decided are going on this adventure with you.

Set 3 van conversion CUTOUT.png

Order your components to build around

First things first. Having all of your components ordered and present when you are trying to work out your layout is highly recommended. If you need some cliff notes on what products are best for van life, we have tried out our fair share and we have our favorites. There is some info here to get you started.

Once you have all of your appliances and components that you are including with your van, you may want to Tetris it all in there, according to your imagined layout to see if it is realistic and functional. If not, try a live game of Tetris by shuffling things into better places. Sometimes when you are in the van, you have a better eye for nooks and crannies that work perfectly for something needing a home. Once you find a functional layout, then, you can tape off the area on the floor around your appliances and things. Measure and draw out the area to put the idea on to paper, as a reference.

Planning your layout

This is a process that will continue to change as you build out the van, unless you have it all figured out on CAD. But, most times you will find little nooks and crannies, as you are building, to turn into something usable. You will need all the space you can get. 

It’s very important to have a layout in mind before you start wiring and building your cabinet frames.  There’s lots of ways to configure your van and all van layouts will be different.  Some vans are more geared towards adventure, while others are more for comfort.  The key here is how to make the van layout work, for you, and what’s important, to you, when it comes to living in your van.

Planning your layout

Here, we really encourage you to draw out your design, on paper, or if you are into CAD that works too. It may take multiple drawings to really get something you like. 

Some people like to tape out their layout to the van floor to get an idea of how much room they will have in the van and adjust the design as they go. Some re-use their Amazon boxes and mock up their design with cardboard to get all the depths and dimensions that their furniture needs to be. It’s the other kind of CAD, Cardboard Assisted design, for all those non-techy, hands-on builders out there.

The design will morph as you build and some of your original ideas might not work out or will need to be reworked.  We can’t tell you how many hours we’ve spent in the van reworking our design because a drawer won’t be able to pull or something is in the way of another mechanism from working.  This is one of the more back and forward processes in the van. 

A couple of things you will want to take into account when planning your design is making sure that there is weight distribution. You will want your water and batteries on the opposite side of each other, or have the batteries be in the center over the back axel is a great way to make sure you don’t overload one side or the other. You will need to know where your fuse panel and electrical system will live for Step 5, wiring. You will need to know where your windows, fans, solar wiring will come down from the roof into the van. You will also need to think about if you need to have shore power hook ups coming in the side of the van, or maybe a place to fill up your water holding tanks, if you choose to go with storage tanks.

Once you have the layout designed and know where everything is going to go, you can move on to the next step, cutting holes in the van!

Ultimate Guide How To Build a Sprinter Van Step by Step Complete Van Conversion Timeline

Layout Inspiration:

Inspiration of different layouts you may not have thought of like this one here. Photo credit: Guy Williams on Instagram

Inspiration of different layouts you may not have thought of like this one here. Photo credit: Guy Williams on Instagram

Inspiration of different layouts you may not have thought of like this one here. Photo credit: Van & Waves

Inspiration of different layouts you may not have thought of like this one here. Photo credit: Van & Waves

Option for bikes in the back in a 144” Sprinter, while maximizing the interior space. Photo Credit: Vankookz

Option for bikes in the back in a 144” Sprinter, while maximizing the interior space. Photo Credit: Vankookz


Step 4 Van build.png
 

Cutting holes in the van

A vent fan is absolutely necessary if you plan on living in your van. Some people have two fans installed to maximize airflow in the van. You can get by with one, but living without one may lead to a build up of condensation, cooking smells, and stagnant air. Condensation is the biggest thing you have to worry about while living in a van. This is something you always need to minimize. The vent fan will assist the most with this concern.

After planning your layout, you should know where your fan will be, where your solar panel wires will enter the van, etc. This is probably the most upfront intimidating part of the van build. I think that we measured a dozen times and we double checked out measurements all different ways before we wiped our sweaty palms on our thighs and sucked it up and drilled those pilot holes for the first modifications from cargo van towards a home. This seems more intimidating than it should be, but this task is well within any one’s wheel house that is taking on this DIY Van Build project.

 
Step 4 Cut install windows.png

We have a step by step video on your YouTube here and here to make this intimidating project easy on you. We also have a couple blog posts reviewing the install and reviewing the products we’ve used in our builds and why we used them.

Our Favorite Choice: MaxxAir Standard Model

If we made a “things I would change about my van build” list, this would be on it. We have installed two Fantastic Fans and both times we are asking ourselves, “why did we cheap out on the fan?!”

Since living on the road, we have met a fair share of vankookz living on the road too. And consensus has it; these are a favorite because they are quieter and seem to draw more air back and forth. There are rain sensors so you don’t have to panic if you leave the vent fan open and the weather changes. These also have a “ceiling fan” mode, which works with the hatch closed just for air circulation. This is the budget version of the MaxxAir Deluxe, which has a rain guard so you can keep the vent open, even if it is raining. Which is nice in the PNW.

Alternative Choices:

Fantastic Fan This is the fan we currently have in our rig and the most recent T1N build. This is a more budget-friendly option for a fan, but it is loud. It has manual controls with three speeds, intake, and exhaust settings, but doesn’t have the fancy rain sensor. This is perfect for shower fan applications because it doesn’t have that sensitive rain feature that closes the hatch with condensation. Plus, you can keep the hatch open if it is lightly raining, without the sensors, and you can always get an Ultra Breeze Vent Cover down the road.

This will definitely get the air flowing, but we recommend the MaxxAir Standard Model if you have an extra $30 to throw at it.

Read more about what tools and products you need to install your fan here.

Untitled design (7).png
2009 Subaru Outback, we built it out to travel and live in until we were finished with our Sprinter Build out. Here, we show how we easily added a removable sleeping platform, as well as, some other accessories to make life on the road more comforta…

2009 Subaru Outback, we built it out to travel and live in until we were finished with our Sprinter Build out. Here, we show how we easily added a removable sleeping platform, as well as, some other accessories to make life on the road more comfortable. Free blueprint of the build, so you can make your own! As always, budget friendly.

Sprinter Van ConversionHere, you can browse through all the topics and phases of our Sprinter build. And you can find just about everything you need to know about converting your Sprinter. We have links to products and step by step how to's and vide…

Sprinter Van Conversion

Here, you can browse through all the topics and phases of our Sprinter build. And you can find just about everything you need to know about converting your Sprinter. We have links to products and step by step how to's and videos. Be sure to check out our YouTube channel for more videos!

 
Step 5 wiring link.png
 
Step 5 wiring.png

Electrify your van

After dominating those “scary cutting holes in my new van” fears, it is time to move on to electrifying your van. Another intimidating process and ultimately something that most people believe they just don’t have the skills or capability to do, but it is easier than you think. You can do this and we are here to help with wiring diagrams, videos, and blogs about all the things you need to get your rig powered.

Now that you have a pretty solid layout, you should know where your battery bank is going to be. The first time we build our van, we knew a general area. We had to move some of the components, a couple times and a couple of inches, as we were building and realizing it was in the way. You’ll need to know where your battery bank and fuse panel will live so that all your wires can start there and be lead to their places where they will live in the van.

Wiring Diagram

If you are a kook and have no idea what you are doing when it comes to electricity, we have made it easy on you. We have made you this wiring diagram to give you an example of how to hook up just about everything you need in your camper van.

 
Enter your email below to download the wiring guide!**Don’t worry, we won’t spam you. We just want to know how many people this is actually helping so we know to make more infographics like these.

Enter your email below to download the wiring guide!*

*Don’t worry, we won’t spam you. We just want to know how many people this is actually helping so we know to make more infographics like these.

Electrical Blog posts:

Below you will find a collection of in-depth blog posts to help you get started wiring your 12v system so that you don’t have to pay some one to do it for you.

A First Step in any Van Build - Wiring a 12 Volt Power System in your Van Conversion

Here we talk you through how to wire your van. You will find links to all the tools that you need for the project here, as well.


12 Volt Van Conversion Battery Basics and Wiring Diagram 

This post will show you how to wire your battery bank in parallel. That way, you can double your AMPs, while keeping 12v system. Here, we demystify how to wire your camper van with 12v.


If you are building out your van, we have a build series on our YouTube Channel. we vlog every step. You can follow along as we take you thru each step, mis-step, and give you some tips we’ve learned along the way that we wish we knew our first time building.

Here we show you how we built our van for under $6,000, including the purchase of the van. We break it down in sections to make it easier to follow along.

Here we show you how we built our van for under $6,000, including the purchase of the van. We break it down in sections to make it easier to follow along.

ELECTRICITY IN A VAN SIMPLIFIED 

Here we show you how we installed a budget friendly electrical system for off-grid use. If you like the K-I-S-S method, this keeps it simple for sure!

Simple electricity

for the budget minded traveller in our VW- Small Van Build out.

Van Conversion Wiring EBook
Sale Price:$10.00 Original Price:$15.00


Step By Step guide to wiring 12v system in your camper van

This is a simple 9 step guide to get your power system fully connected and read to power your electronics to be completely off-grid. Follow these steps and there is no way this project will intimidate you ever again. You’ll feel like a pro after you are testing all your switches and turning your fan on and off, without being plugged into the grid. Bye bye grid-kid life, hello vanlife.


Once you have all your electronics wired, it is time to move on to Step 6, Insulation!

 
step 6 insulation.png
 
Step 6 insulation .png

Keeping your van temperate

Now that you have your electronics wired, it is time to start insulating your home. Here, we will talk about all the options there are to do this, as well as, mention our favorites. We have built and lived in quite a few vans and we have experimented with different types of insulation to find the best solution to keeping your van temperate.

There are endless options out there when insulating, but not all of them are good choices for insulating a van. Some house contractor might not understand vans require a specific type of insulation approach. Good van insulation needs to have the following:

  • High R-value per inch what is R-Value? R-Values quantify the “Resistance to heat transfer by conduction.” The higher the R-Value, the greater the insulating power. In vans, this number usually tops out around 7.

  • Resistance to moisture, mold, & mildew This is probably what makes insulation the most controversial topic. Because we are dealing with a metal box on wheels, you need to be very mindful of whether the material is resistant to moisture or has moisture control properties and natural mold resistance. Metal, wood, and water don’t mix. So if you have something that is holding on to moisture, you maybe creating a whole new ecosystem in there, and not the good kind.

  • Non-toxic You don’t want harmful off-gassing or microscopic itchy fiberglass particles from your insulation filling your tiny living space. Make sure to take this into account so your home isn’t trying to kill you slowly, while you are out there trying to live your best life.

  • Able to withstand good vibrations along the journey  There will be a lot of rattling and vibration inside your van as you adventure around in it. So, your van insulation needs to be able to take all the bumps, without falling out and converging together at the bottom of the inside of your wall.

Sound Deadeners

While we are talking about good vibrations, we ordered the FatMat Rattle Trap as a sound deadener. Because like I said, we’ve done this and skipped this step and what a difference this stuff makes! If there was a list of “things I would change about my van build,” sound Deadener is one of them. We wish we could have had this in our past vans and the ones we thought, “does this stuff really matter?” It reduces road noise by absorbing vibrations giving you a nice smooth ride. Some of these Cargo vans can have quite the road rattles. If you have an older van or dually, we would highly recommend not skipping this! It is an easy mindless task to get you going. We have a blog post on Sound deadeners here.


Spray Foam Insulation

If you are looking for the highest R-Value, this should be your go-to. It has about an R-7. Besides holding the title for highest R-value, this is a very messy install. Some send their van away to have professionals spray the van to avoid the mess. The Foam can get into hard to insulate areas, but beware of over spraying. We have seen some vans out there that look like they have pimples from the spray foam pushing through the sheet metal and deforming it. There is some controversy around spray foam in conjunction with condensation can cause the van to rust. It would be interesting to see 15 years later how each insulation install is holding up, rust wise, since people are so worried about it. If you want the most temperate van on the block, spray foam is the way to go. Here is a earth friendly product if you are looking to spray your van. Their company has directions specific to van conversions here as well.

Wool Insulation

There are Rock Wool batts (R-4.7)and there are Sheep Wool batts (R-3.7).

The Rock Wool Batts are hydrophobic, meaning it doesn’t retain moisture, so that is a great thing in vanlife. We’ve had some friends @expandingexplorers that installed Rock Wool. Their van was very temperate, but the insulation took up so much space away from their living and head room space. They have since remodeled, removing the insulation. This stuff can be itchy when exposed fibers are released.

Sheep’s wool is a renewable insulation material that’s non-toxic and very environmentally-friendly, for those of you wanting to make this a green build, with low VOCs. But, again, there is some controversy that because this insulation material has natural moisture absorbing properties that do not change it’s ability to insulate your space effectively, but it may come with some rusty properties in the long run. Again, some things we won’t find out until these van reach an age where we can dig in there and see if this rusty theory translates to practice.

Recycled Denim

Recycled denim is popular because a lot of people believe it is eco-friendly to recycle, reduce and re-use. While that is true, this may not be the best application for that motto. Recycled denim is hydrophilic, which means, it absorbs and retains moisture. We’ve seen and followed progress on some vanlifers attempting to enclose it in garbage bags to keep the moisture from getting in, only to find out later that the bags are soaked and the insulation is moldy. This means a full rebuild if you are trying to avoid breathing in mold all the time, which can make you very ill. So we don’t really recommend this option, although it is popular.

Foam Board

Polyiso Rigid Board, also known as Foam Board Insulation, has a pretty good R-Value, at 5.6, it is one of the top ones out there in van applications. They have a non-toxic install, easy, cut and paste install that any DIYr can pull off. You can get these at any major hardware store, which is a nice convenience if you are tight on a time and money budget. You can insulate a van for around $100-$400, depending on the size of the van and size panels you get. Some downsides are, they are hard to get into weird ribs in the van, which create air gaps and can lead to moisture traps. But nothing a couple cans of Spray Foam won’t fix. This would be our favorite alternative to Thinsulate.

Thinsulate

Thinsulate is our favorite insulation choice. We’ve done Foam Board and some spray foam, but we always come back to this product. It is literally cut and paste. You can be done with the project within the day and move on to the next project. We would use and recommend this product 10 out of 10 times and here’s why:

  1. No Mess

  2. Easy to Install

  3. Sound Damping  

  4. Two thumbs up after two years

  5. Moisture Repellent

Best Insulation for Van Conversion

As we have used this time and time again, we have many blog posts on the topic. Here is our most recent.

Budget Friendly BuildSmall Van ConversionHere we show you how we built our van for under $6,000, including the purchase of the van. We break it down in sections to make it easier to follow along.

Budget Friendly Build

Small Van Conversion

Here we show you how we built our van for under $6,000, including the purchase of the van. We break it down in sections to make it easier to follow along.

Van conversion Insulation the easy way!Here we show you all the tools you need to install Thinsulate in your Van Conversion. This is our favorite Insulation. So, you will find us talking about it multiple times on our website. Check out what you nee…

Van conversion Insulation the easy way!

Here we show you all the tools you need to install Thinsulate in your Van Conversion. This is our favorite Insulation. So, you will find us talking about it multiple times on our website. Check out what you need to complete the project here.

Need some Van Conversion Inspiration? Here we have numerous VanKookz that show us around their rigs! These are a great way to get ideas for your build!

Need some Van Conversion Inspiration? Here we have numerous VanKookz that show us around their rigs! These are a great way to get ideas for your build!

Thinsulate Insulation Video

We have a build series on our YouTube channel where we walk you thru why we chose Thinsulate and the little things that you need to insulate your Van when you choose this insulation. Fast, Easy, Mess Free Insulation for your van conversion.


step 7 lets start building.png
Step 7 Framing .png

Frame for walls & Furniture

Now that you have all the insulation, wiring, and other ground work done, you can start framing.

This will get your van prepared to attach all the furniture, walls, and ceiling. You want to frame out your van so that you have anchor points for these things, because you want as little screws going into metal as possible. So, what we are going to do here is attach the furring strips to the walls. That way, you can screw as many times as you need into the furring strip framing. We have an easy 3 step framing process here to make sure that you don’t send any screws through the outside of your van. (#1 question we get on the early build stages, “how do you attach the walls without sending a screw through the outside of your van,” in a DIY Van build?)

In this blog post, we breakdown in three steps how to frame out your van to get ready for the van build magic. It’s time to start making this empty shell feel like a home. Let

In this blog post, we breakdown in three steps how to frame out your van to get ready for the van build magic. It’s time to start making this empty shell feel like a home. Let

Ceiling

In your framing, you should have framed for a ceiling with furring strips along the roof ribs. That is where your ceiling will attach. We have seen people do it with strips of ply, as well, just so that you have a little more head room.

Our favorite is the Tongue and Grove and we like to mix up the colors. We have mixed up the brands to get different types of wood. It worked out for the most part, but we wouldn’t do it that way again because some of the sizes might be “the same”, but their actual sizes aren’t the same. It made it harder and harder for them to line up as we went on.

Wall+Planks+in+package.png

We really like the mix and match paneling look for the ceiling. On our T1N Build, we just bought the cedar planks from Home Depot and we stained them different colors. That way we know they all groove together nicely.

tongue%2Band%2Bgroove%2Bceiling%2Bvan%2Bconversion%2Bdiy%2Bsprinter%2Bcamper%2Bvan-10.jpg

Walls

There are lots of different types of walls, but we like to use the 4’x8’ ply sheets. The walls go up fast and you’re done with the job in 1-2 hours tops. We’ve also used some tongue and groove, throughout the van, walls and ceilings.

Youtube Tutorials:

If you learn best by watching someone else explain and do it. Then, our YouTube videos are definitely for you! Check these out!


In this video, we show you the first steps of van builds. Find out how to frame your van, install your fan, ceiling, and puck lighting. Watch the whole van series here!


In this episode, we show you how to frame out your van with minimal tools. Any DIY Kook can follow this!


This episode is from our budget build series. We show you how to insulate, frame, and add walls. If you are on a money and time budget, this series shows you how to get most of the things you need locally and on a budget.


Tounge+and+groovy+landing+pic.jpg

A 4’x8’ sheet won’t span the whole wall. We leave the bottom and the top open below, because we know that there are going to be upper cabinets and lower cabinets. They would all be covered. We used a different material for the upper cabinet backings that are flexible to maximize the storage space and for easy access to the wiring if we needed to check some wiring. We talk more about it here.

How+to+frame+out+a+van,+attaching+walls+to+a+van,+diy+van+build--13.jpg
 

Framing out the Furniture

Once you have the walls and the ceilings on, you can start framing out the furniture.

Since the van is curved and doesn’t have straight and square areas to build from, framing the furniture can be difficult, at first. But don’t worry kookz! We’ve got you covered with some simple and easy to follow blog posts & YouTube videos on how to build out each part of your furniture.

Building around your biggest items first

The best part about vanlife is you always have everything you need all the time. You’re like a turtle, your house and all your things inside are with you where ever you go. So, you are going to need storage for all those everyday items.

We started with our biggest items that we were bringing into the van, our bikes, and meshed it with our other biggest item, our bed. We wanted the bikes inside to avoid the weather and theft paranoia. We maximized the living space by building a slide out bed that also housed our bikes and camping gear in the garage area.


On top of knowing that we wanted the bikes inside the van, we knew we wanted to maximize the countertop space because we love to cook. We cook every meal and never eat out because you really have no excuse when you have a traveling kitchen.

Cabinets

How to build cabinets in the van.png

After the big ticket items were out of the way, we moved on to the kitchen and cabinet building for all the fun things we would need to store in our traveling home.

The width of the cabinets were dependent on size of the sink and water containers on one side, and the fridge and toilet on the other. So we placed the fridge, toilet, batteries where they would respectively go and we we taped some painters tape, blocking off the cabinets that would soon house them on the floor. That way we could have some reference point for measurements.

Once we had some reference points marked off with tape, we started framing for some cabinetry.

We've built cabinet frames both inside the van and in the shop. Having a shop is awesome! There are some workspaces out there for around $50 a month to use a shared workspace shop, in some cities (some even have classes). But, if you don’t have access to a shop, not to worry, we show you kookz how to make your build look professional, even if you are working with minimal tools.

We have worked with wood and metal in the van and there are perks to both. The metal keeps the build strong and sturdy without the weight of wood, which means it takes far less material to be structurally sound, which means less weight. Also with metal, if you cut something too short, you can always weld it back on and recut it! If you cut a piece of wood too short, you have to get a new piece of wood.

Here in this blog post, we show you how to frame out every piece of furniture with metal, in our T1N Campervan Conversion. We also have an entire Youtube Build series here.

In our first full build, we show you how us two Kookz figure out how to build cabinets out of wood. If we can do this build, with no prior skills, you can do it! This build was Dani’s first time picking up a power tool, now she can weld! So you kookz got this! Think of all the life skills you’ll gain!


Once you have your cabinets framed and the sides to match the curves, you can move on to the cabinet fronts for minimal builds, or you can take it one step further and add some professional face frames. We skipped face frames in our first build. But on the facelift, we added these and what a world of difference it makes to the finished look!

In this blog post we teach you how to Build Cabinets in a Van and match the curve of the van, every time. Professional cabinet builders don’t even realize how pesky van curves can be. We show you how to make templates out of your Amazon boxes so that you aren’t wasting wood, like a pro.

Above is a link to our YouTube video walking you through how to measure, account for material needed, organize your cut list, and make professional face frames. Accompany that info with our written blog here.

Above is a link to our YouTube video walking you through how to measure, account for material needed, organize your cut list, and make professional face frames. Accompany that info with our written blog here.


step 8 Plumbing link.png
 

vansion status: Running water!

If you are a kook and have no idea what you are doing when it comes to plumbing, we have made it easy for you. Follow along as we help make this a no-sweat process to get running water in your rig.

Having running water in the van is a game-changer. Yes, you can totally skip this luxury and be just fine, but for some reason, when I grab a glass of water from the faucet, it really makes it feel like home. Side note: It also impresses non-vanlifers when you have running water “just like a house.” ;)

When we did plumbing, we went to True Value, Ace Hardware, and Plumbing specific stores for all our builds. Home Depot and Lowe’s are just too big to have good service in this department. You could stand in that isle all day trying to piece together your plumbing situation, with or without a very nice, but just as clueless employee.

When you walk into the smaller Ace and True Value’s, you are usually greeted and asked if you need any help upon arrival. You can tell them your project, watch them grab pieces and put it together for you in seconds, and be back to the building in less time than it would take you to track down a plumbing knowledgeable employee at Home Depot or Lowe’s.

step 8 Plumbing van conversion .png

Water Storage

One of the most liberating things about vanlife is having everything you need at all times. Having enough water to survive out in the middle of nowhere is definitely one of those perks. There are two main ways for water storage in a campervan. Removable water tanks or Fixed water tanks.

Removable Water Tanks

The most basic and our favorite is a Removable water tank. We have chosen this route in many campervans, as it is the easiest and cheapest.

Advantages:

  • There are many different types, sizes, and combinations of removable water tanks.

  • Removable water tanks are generally stored inside your campervan, where it isn’t exposed to outside freezing winter or hot summer temperatures.

  • Small in size and modular in combination, they’re a quick and easy low-cost solution for storing water aboard your campervan.

  • No need for setting up some fancy fill gauge.

  • Low-cost and fast water storage solution.

  • You don’t need a special fill up station.

  • In places like Baja, having some of these is the cultural way to fill up on drinking water. They all fill up their reuable jugs, as well for home use. Fixed tanks in this situation can be a headache.

Disadvatages:

  • If you wanted a shower system, removable water tanks may not be the way to go as they will not hold enough water for showers, dishes, and drinking water.

  • Water is heavy. If you are unable to lift heavy things, on the regular, this might not be the route you want to go.

  • Removable water tanks take up interior living space.

Fixed Water Tanks

Fixed water tanks are also known as, freshwater tanks, come in a huge variety of shapes, sizes, and capacities.

The fixed tank is attached to your vehicle and thus fixed. It does not move once it is installed. It can be installed inside or outside the campervan.

If you are trying to break free from daily chores, like refilling water, a fixed water tank is going to offer you the largest capacity for storing water in your campervan.

Advantages:

  • Largest water storage capacity choice.

  • Interior living space is precious, if you have an under-mounted tank, you will save some of that living space for other items you want to bring on your journey.

  • So many choices of sizes, capacities, shapes to allow you the option to find the perfect size and fit for your layout and space constrictions.

  • Extremely durable.

Disadvantages:

  • You may need someone to install an under-mount.

  • Fixed tanks often require an installed filling point on the outside or inside of the van. You may have to make some more body cuts to the van to do this.

  • You will also need an overflow drain as well as a drain to drain water out of the tank when not in use.

  • Fixed tanks will require a water level gauge. So you know when to refill or when to stop re-filling and avoid overfilling and making a mess.

  • Fixed tanks are a challenge to clean. May require chemicals to clean the tanks.

  • The bigger your tank the more water (weight) your campervan will carry. Fuel consumption and maximum gross weight come into play here.

  • The refill point on your campervan needs to be accessible or refilling can be quite a headache.

  • You have to carry additional equipment to refill the water tank (ie: hose, adapters, in-line hose filters, etc.).

  • If you have the fixed tank mounted outside, you may need to add a 12v heated mat to the side of your tank to keep it from freezing in winter temperatures.

Easiest options for water: Gravity Fed

We have seen everything from gravity-fed easy water systems to recycled UV treated water. If you are just trying to get on the road, a gravity-fed water system might be the way to go. All you need is to get your freshwater holding tank higher than your point of use. This means that gravity will feed your water to your cup rather than an electric pump. The hardest part about this is mounting and securing the water while driving. When we had a basic build in Australia and New Zealand, we just had our water container live on the floor, while we drove. Then when we needed it, we would put it on a park bench or upon our shelving, while in use. This was elementary, but it worked, it wasn’t terrible, and it is easily replicable! Here are some examples from a google image search.

Foot and hand Pumps

If you aren’t into feeling like you are camping every day, by moving your water dispenser up and down to use it, but you want some sort of water faucet and sink set up. Then, the next easiest install would be a foot pump or hand pump. These are great because they require no 12v power to pump water, only manpower. If you are trying to be stealth, manual pumps, as well as, the gravity-fed water system are great because they are silent relative to the 12v pumps that are pretty loud if a stranger walked by the van at night while you grabbed a glass of water.

12v Sink pumps

After living in a van for two years traveling abroad and deciding we loved this lifestyle, we agreed that having a sink and faucet would make the van life more comfortable for the long term. We went with the ShurFlo pump, the accumulator, and a very simple set-up of removable BPA Free Reliance Jug water canisters.

DIY SINK IN A Budget Build

In our VW $6,000 budget build series, on YouTube, we wanted a simple, easy, and budget friendly plumbing set up that allowed us to have as much running freshwater, as possible without compromising too much space. We show you how to have a minimal, cheap, but luxurious vansion status of running water! Check out the write up here.

YouTube Tutorial

We’ve made a YouTube tutorial here showing you an easy DIY solution to bringing in the luxury of plumbing into the van. Follow along to easily run all your plumbing in your build. We have done this style in multiple van setups and it is easily our favorite setup.

Water Filters

There are many different ways to filter your water in the van. After many years of filling up with drinkable water only, we have finally added a filter to the system. We are pretty happy with the ease of the install and that we now have a filter in our system! Check out how easy the install was.


Step 9 solar & electrical link.png
 
Step 9 12v Electrical van conversion .png

Finishing your Electrical system

Once you have all your appliances and components in, you will want to power them up. Here, you will find some wiring diagrams, how-to videos to make this process a lot less intimidating. If us kookz could do it, so can you! Let’s do this!

Wiring Guide Download:

If you are a kook and have no idea what you are doing when it comes to electricity, we have made it easy for you. We have made you this wiring diagram to give you an example of how to hook up just about everything you need in your campervan.

 
Enter your email below to download the wiring guide!**Don’t worry, we won’t spam you. We just want to know how many people this is actually helping so we know to make more infographics like these.

Enter your email below to download the wiring guide!*

*Don’t worry, we won’t spam you. We just want to know how many people this is actually helping so we know to make more infographics like these.

Portable Power Stations

If you are not into the electrical part of the build and you just want to move on with the build, there are plenty of companies out there that are pre-packaging everything you need to power an off-grid campervan in one unit. This is one of the easiest, but probably the most expensive routes to power up. Just plug and play.

Of the Portable Power Stations, Goal Zero is probably the most well known and also the most expensive. Their stations range anywhere from $199 (to power a laptop) to $2,000+ (able to power a fridge, lights, & charge your laptop.) Other than the fact that they are the most expensive per watt-hour, they aren’t our favorite because they play like an Apple product. Meaning, they only play well with their own proprietary parts (solar panel, proprietary input connections).

Although when we were helping a friend @es_dons add an off-brand flexible solar panel to power his Goal Zero Station, we did find a solution. We made a quick YouTube video of our beachside install in San Diego.

Since Goal Zero is out of our budget and we love to try out the lesser-known brands, we have a Jackery Explorer 240 ($249) and we love it for charging computers, iPads, projectors, small lights, mini food processors, and other things when the sun is down.

DIY your own Electrical System

If you are trying to gain some valuable life skills on this DIY adventure, this is probably the most rewarding. Here, we will teach you how to set up your own electrical system in your van. There are many choices of battery systems you can choose from, Marine batteries, AGM, Lithium, Tesla, parallel or series, parallel or series. We will go over all of that here and hopefully, you can choose one that works best for you and your needs. Remember, every van build is like a unique fingerprint. What one person has might not work for your lifestyle or power requirements.

Budget Friendly BuildSmall Van ConversionHere we show you how we built our van for under $6,000, including the purchase of the van. We break it down in sections to make it easier to follow along.

Budget Friendly Build

Small Van Conversion

Here we show you how we built our van for under $6,000, including the purchase of the van. We break it down in sections to make it easier to follow along.


Subaru Conversion “Camparu”

2009 Subaru Outback, we built it out to travel and live in until we were finished with our Sprinter Build out. Here, we show how we easily added a removable sleeping platform, as well as, some other accessories to make life on the road more comfortable. Free blueprint of the build, so you can make your own! As always, budget friendly.

Sprinter Van Conversion

Here, you can browse through all the topics and phases of our Sprinter build. And you can find just about everything you need to know about converting your Sprinter. We have links to products and step by step how to's and videos. Be sure to check out our YouTube channel for more videos!


Step 11 Components & extras in Van build link.png
 

Human Comforts for your van

We are living in such an awesome time right now. Technology these days makes vanlife so accessible. For instance, this website is connecting like-minded kookz to the knowledge needed to build a van, solar is readily available, affordable, and flexible, 12v fridges exist for us, 12v battery systems make our days off the grid no sweat, apps help us to stay connected, find new routes, and find camping destinations, etc. Think about it, there has been no better time to vanlife! Here we compile all our favorite human comforts for all you vankookz. These are some of the things you do not want to live without. We talk about our favorites and things we wouldn’t use again or recommend.

Step 10 Components Timeline cutout.png

12v Fridges

While there are a lot of people out there using Dorm Fridges, we like the efficient 12v Fridges. The less efficient fridge you have the more you will have to spend on batteries to power it. I know a lot of people see the price on 12v fridges and get pretty turned off. But, have you seen the price of batteries?!

Anyways, we are cheap, so we will show you the best knock offs and then we will show you the other brands you’ve probably already read about. But if you know us kookz, we never pay full price. We are gonna share our favorite fridges that don’t break the budget. Remember, that your layout has probably already decided whether you will have a front-loading fridge or a top-loading fridge. If you are here to compare, you are in the right place.


Propane Fridge

Propane fridges, aka 3-way fridges, are very popular in typical RVs. Like the name explains, you can run these fridges off of three sources of power: propane, 120v, and 12v. I have never had one of these besides the RV that I lived in, but I know they come in cooler styles as well. So if you are looking for a 3-way Toploader, now you know this hybrid exists! But, having a three-way fridge comes in handy when you are low on sunlight (i.e: a couple of days of rain) when you are parked at a campsite and would like to plugin, or if you have tons of propane then you have no worries.

120v Fridge

If you have noticed, you may have to pay a pretty penny to purchase a 12v Fridge.

If that isn’t in your budget, but you still want a fridge. The dorm-style fridges are used in a lot of builds out in the wild. But, what you may be saving on your fridge, you’ll most likely be trading off in your battery bank and solar array. Running a 120v fridge requires you to have an inverter running full time. So that the power you are collecting in your battery bank needs to convert to 120v to run your fridge.

Things to keep in mind when going this route:

  • There is the loss of energy in power in the conversion.

  • Have a large enough battery bank to afford to lose energy 24/7 thru conversion loss.

  • You can always think of it as investing in your battery bank and having a big fridge

Page Under Construction.jpg
Budget Friendly BuildSmall Van ConversionHere we show you how we built our van for under $6,000, including the purchase of the van. We break it down in sections to make it easier to follow along.

Budget Friendly Build

Small Van Conversion

Here we show you how we built our van for under $6,000, including the purchase of the van. We break it down in sections to make it easier to follow along.


Subaru Conversion “Camparu”

2009 Subaru Outback, we built it out to travel and live in until we were finished with our Sprinter Build out. Here, we show how we easily added a removable sleeping platform, as well as, some other accessories to make life on the road more comfortable. Free blueprint of the build, so you can make your own! As always, budget friendly.

Sprinter Van Conversion

Here, you can browse through all the topics and phases of our Sprinter build. And you can find just about everything you need to know about converting your Sprinter. We have links to products and step by step how to's and videos. Be sure to check out our YouTube channel for more videos!


How to Convert a Small Job.png
Free Wiring Guide for Campervan, Boat, RV, Motorhome, Tinyhome OFF GRID systems.png

installing Cheap walls in a van

Here we get tounge and groovy with our walls in the VW. We show you how we install these walls and crush our wall budget with this method.

installing Flooring in a Van

Here we walk you thru how we installed a sub floor and insulation before attaching our flooring. That was the one thing we regreted on our first build, is no insulation under the floor.

Building SImple Cabinets in a Van

Here we show you a simple way to build cabinets in your van. While most people use cabinet grade plywood, we like to keep it light weight and cheap, but still shabby chic.

Copy of Copy of popular content.png

How to build a small Van

Here we show you how we built our van for under $6,000, including the purchase of the van. We beak it down in sections to make it easier to follow along.

Simple Sink Set up in a small van

In this How-to, we show you how we turn an old 70s crock pot into a cute 70s sink. We show you how to set up running water for cheap and simple in your small van.

Electricity in a van Simplified

Here we show you how we installed a budget friendly electrical system for off-grid use. If you like the K-I-S-S method, this keeps it simple for sure!

Finished Product of the VW