


Planning your layout
If you are good at Tetris, you will probably be really good at laying out how everything is going to fit in such a small space. After you have cleaned and gutted out your van, you will want to take some measurements inside the van to see what kind of space you will be working with. You can gather inspiration and information from Pinterest, Instagram, YouTube, Reddit, the world around you, or where ever you draw inspiration from and think about how your living space could be laid out around your appliances, components, and the things that you have decided are going on this adventure with you.

Order your components to build around
First things first. Having all of your components ordered and present when you are trying to work out your layout is highly recommended. If you need some cliff notes on what products are best for van life, we have tried out our fair share and we have our favorites. There is some info here to get you started.
Once you have all of your appliances and components that you are including with your van, you may want to Tetris it all in there, according to your imagined layout to see if it is realistic and functional. If not, try a live game of Tetris by shuffling things into better places. Sometimes when you are in the van, you have a better eye for nooks and crannies that work perfectly for something needing a home. Once you find a functional layout, then, you can tape off the area on the floor around your appliances and things. Measure and draw out the area to put the idea on to paper, as a reference.
Planning your layout
This is a process that will continue to change as you build out the van, unless you have it all figured out on CAD. But, most times you will find little nooks and crannies, as you are building, to turn into something usable. You will need all the space you can get.
It’s very important to have a layout in mind before you start wiring and building your cabinet frames. There’s lots of ways to configure your van and all van layouts will be different. Some vans are more geared towards adventure, while others are more for comfort. The key here is how to make the van layout work, for you, and what’s important, to you, when it comes to living in your van.
Here, we really encourage you to draw out your design, on paper, or if you are into CAD that works too. It may take multiple drawings to really get something you like.
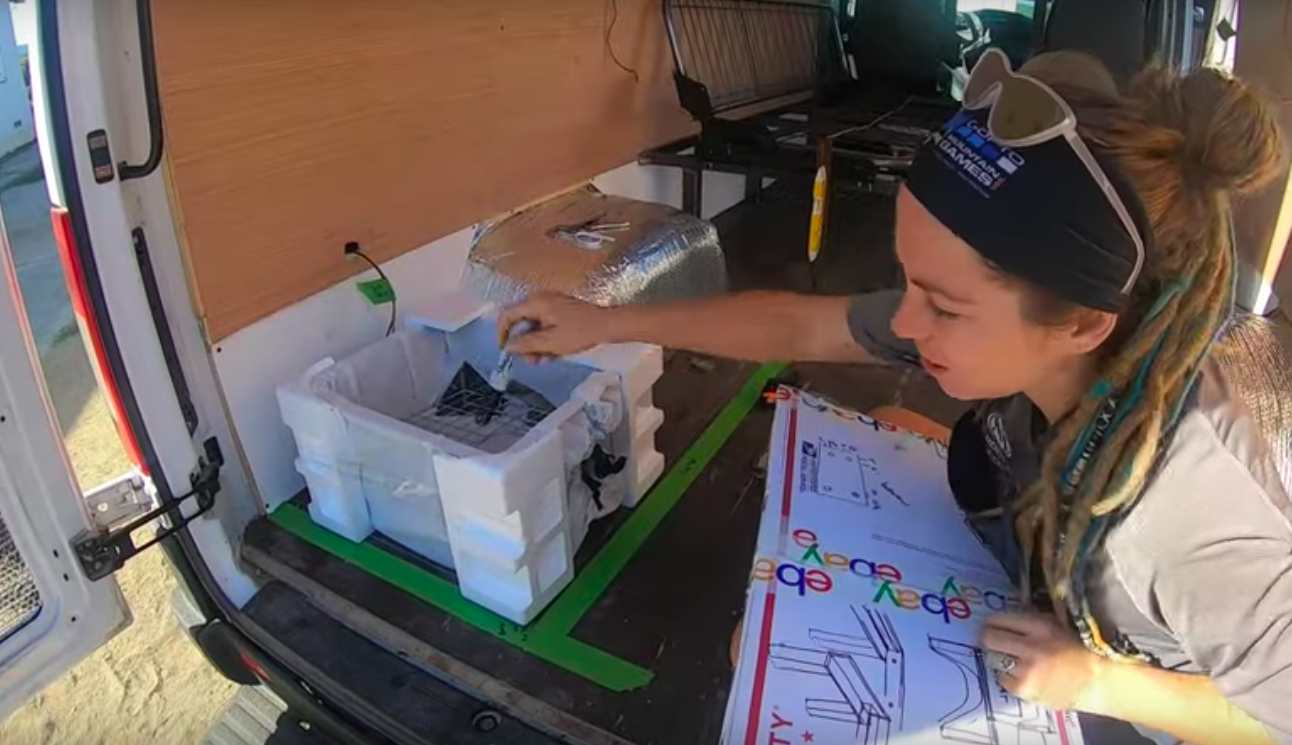
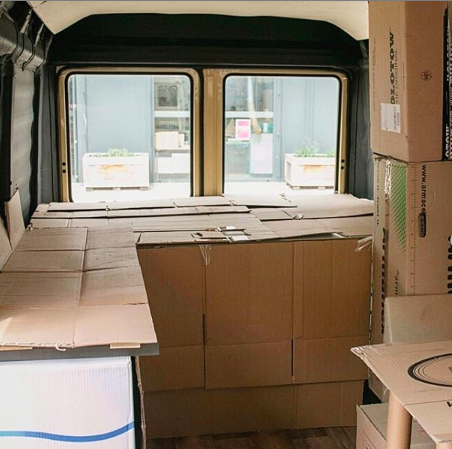
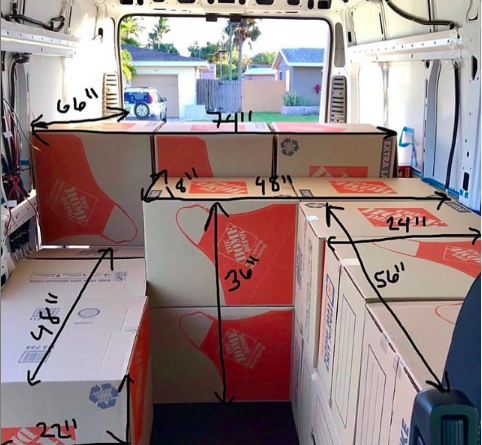
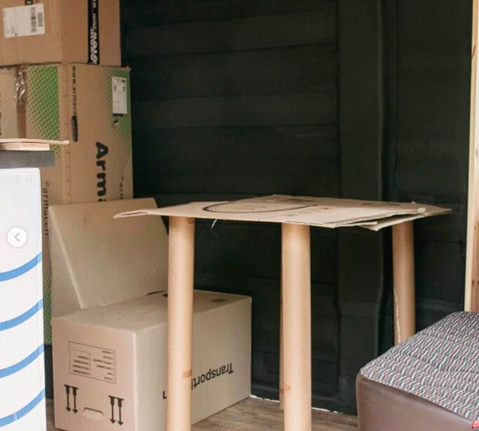
Some people like to tape out their layout to the van floor to get an idea of how much room they will have in the van and adjust the design as they go. Some re-use their Amazon boxes and mock up their design with cardboard to get all the depths and dimensions that their furniture needs to be. It’s the other kind of CAD, Cardboard Assisted design, for all those non-techy, hands-on builders out there.
The design will morph as you build and some of your original ideas might not work out or will need to be reworked. We can’t tell you how many hours we’ve spent in the van reworking our design because a drawer won’t be able to pull or something is in the way of another mechanism from working. This is one of the more back and forward processes in the van.
A couple of things you will want to take into account when planning your design is making sure that there is weight distribution. You will want your water and batteries on the opposite side of each other, or have the batteries be in the center over the back axel is a great way to make sure you don’t overload one side or the other. You will need to know where your fuse panel and electrical system will live for Step 5, wiring. You will need to know where your windows, fans, solar wiring will come down from the roof into the van. You will also need to think about if you need to have shore power hook ups coming in the side of the van, or maybe a place to fill up your water holding tanks, if you choose to go with storage tanks.
Once you have the layout designed and know where everything is going to go, you can move on to the next step, cutting holes in the van!


Ultimate Guide How To Build a Sprinter Van Step by Step Complete Van Conversion Timeline
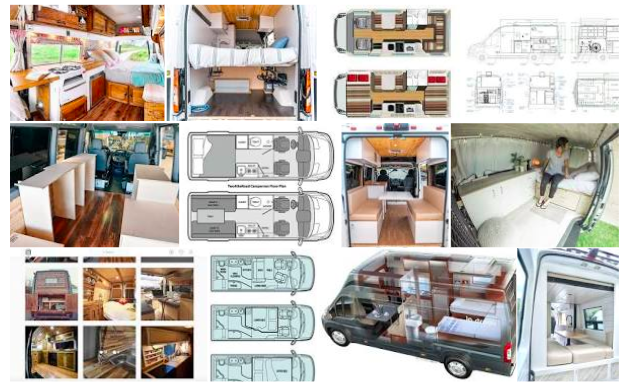
Layout Inspiration:

Inspiration of different layouts you may not have thought of like this one here. Photo credit: Guy Williams on Instagram

Inspiration of different layouts you may not have thought of like this one here. Photo credit: Van & Waves

Option for bikes in the back in a 144” Sprinter, while maximizing the interior space. Photo Credit: Vankookz