How to Wire a Solar Panel in Parallel on a DIY Van Conversion

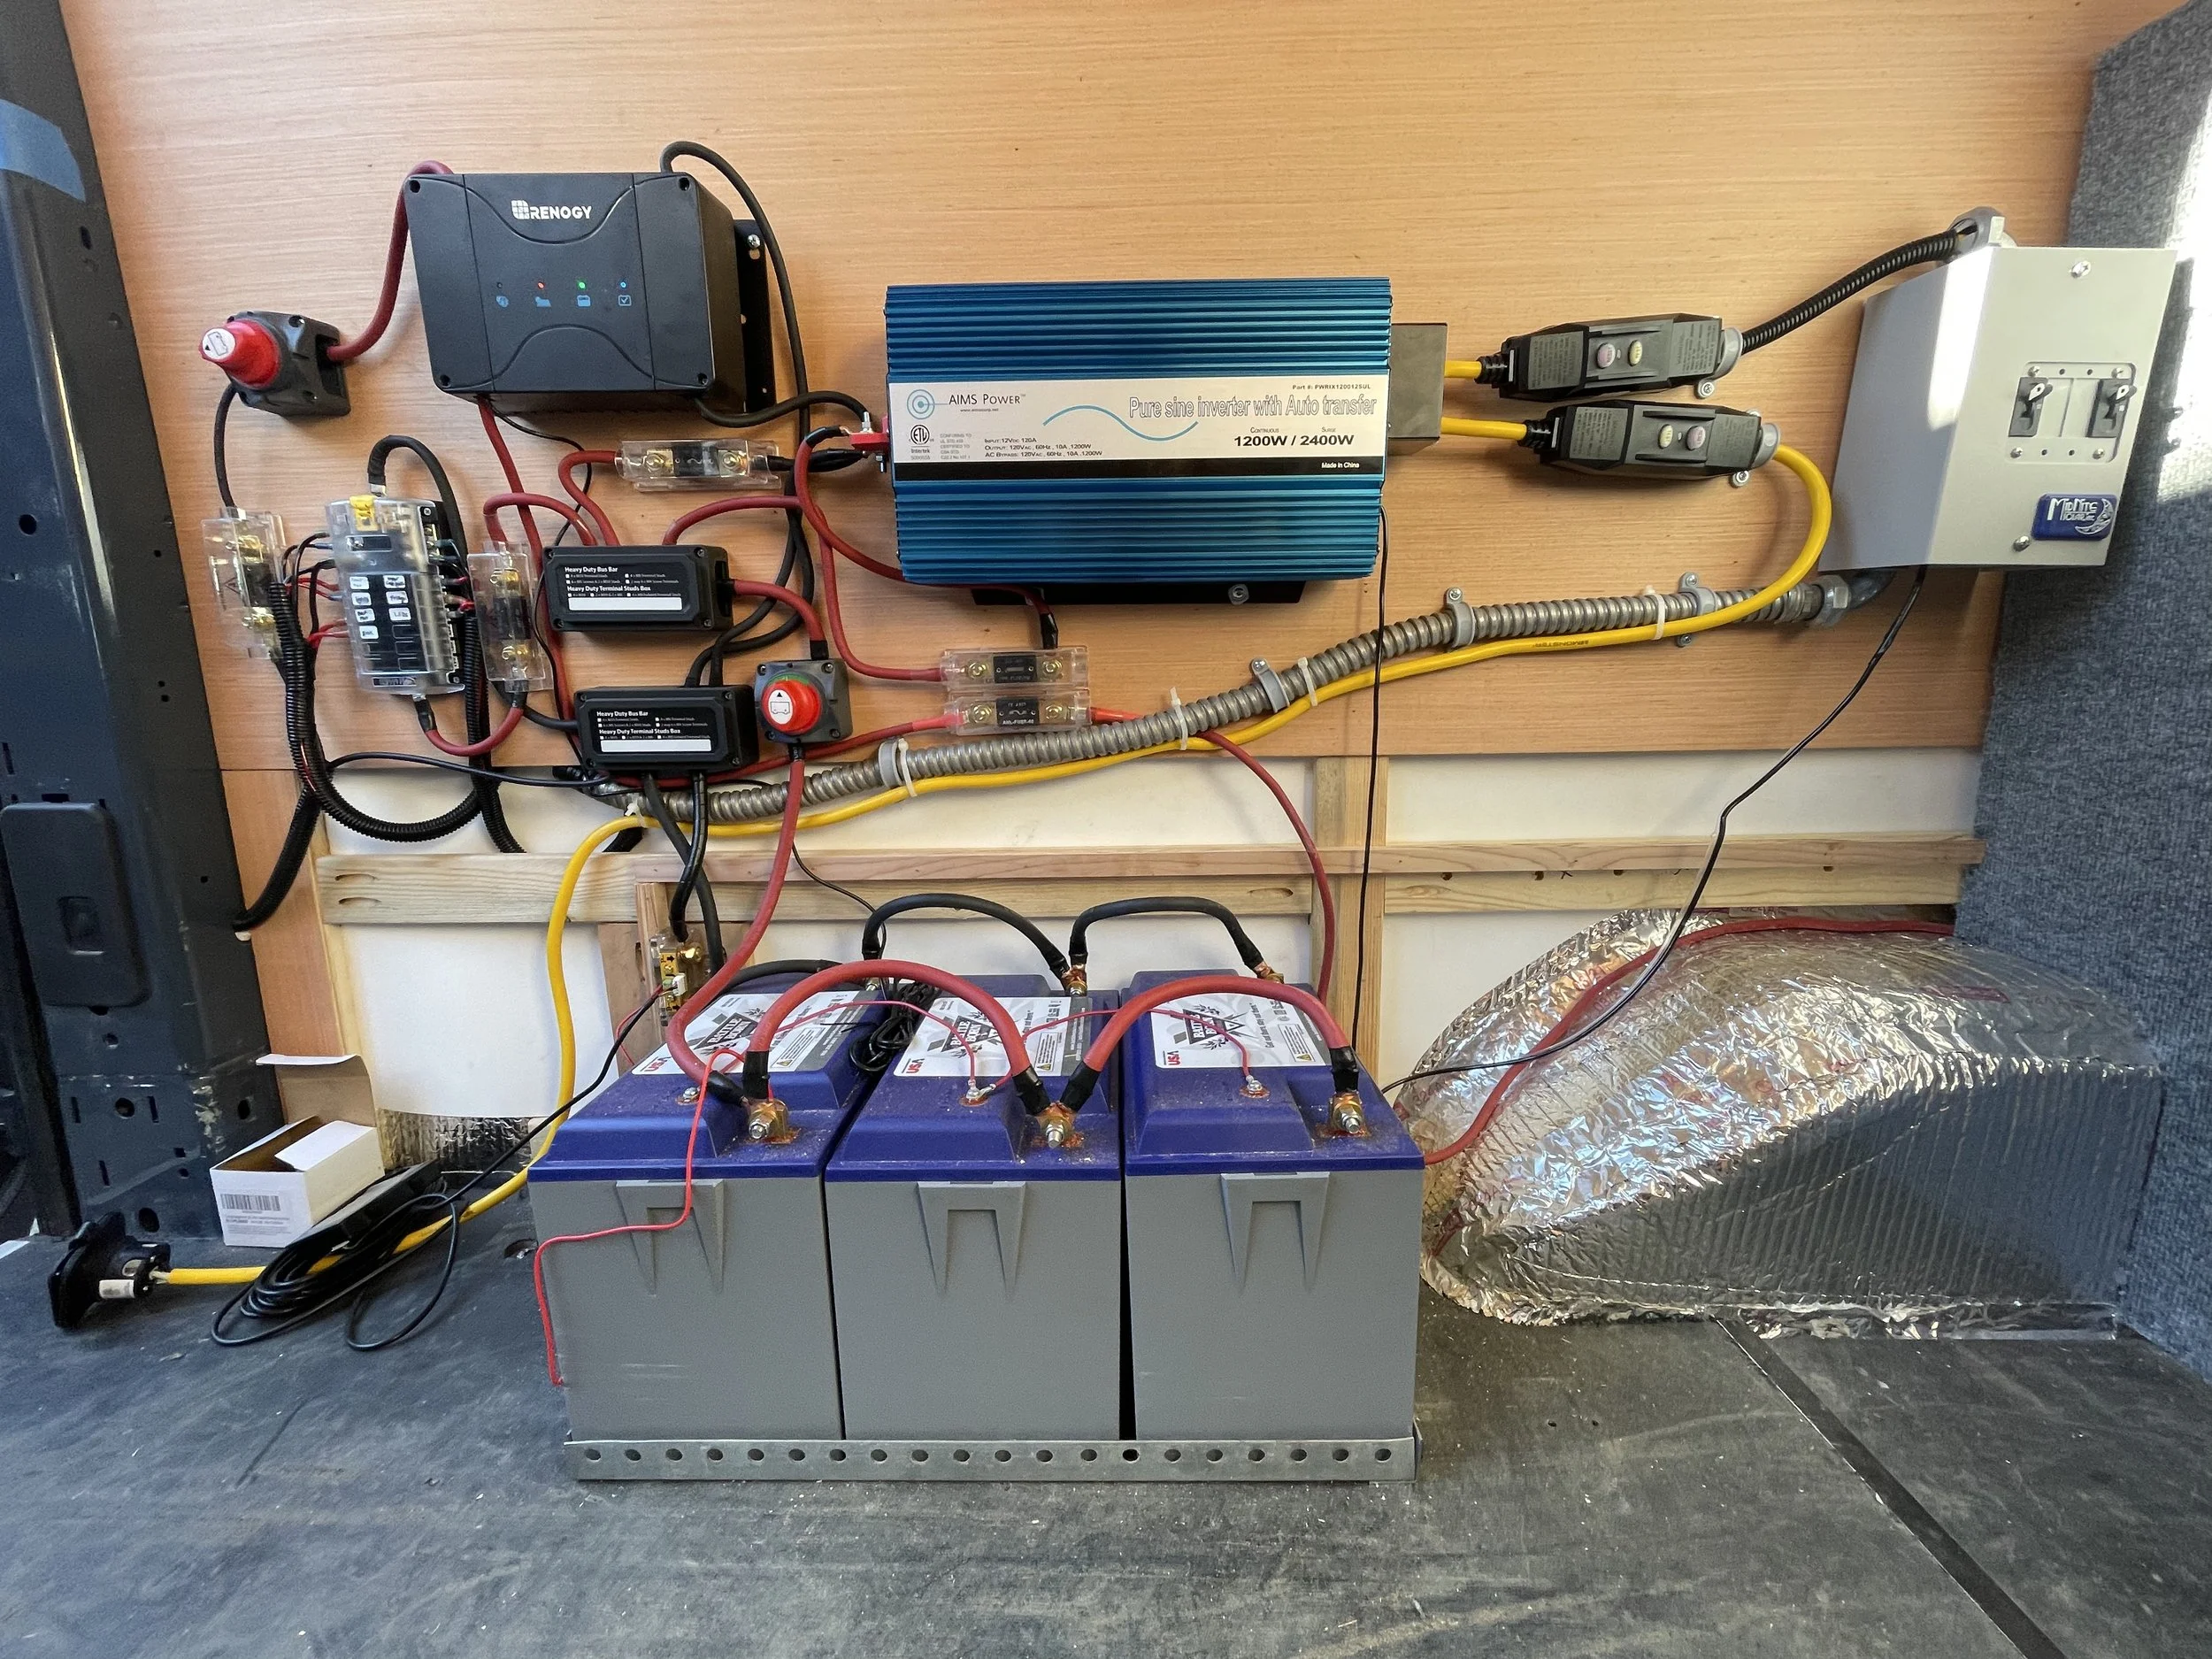
***It’s very important to note to not hook up any cables to your solar panels until you have your charge controller in place. Once you have your charge controller in place the last thing you will want ot connect to the charge controller is the solar panels.***

Solar Y Connectors - https://amzn.to/3PXFIEs

30A Solar Inline Fuse - https://amzn.to/3PZOfq8

MC4 1ft extension - https://amzn.to/3pV3DK4\

Solar Entry Gland Install - Running Wires for a Solar Panel in a Van Conversion

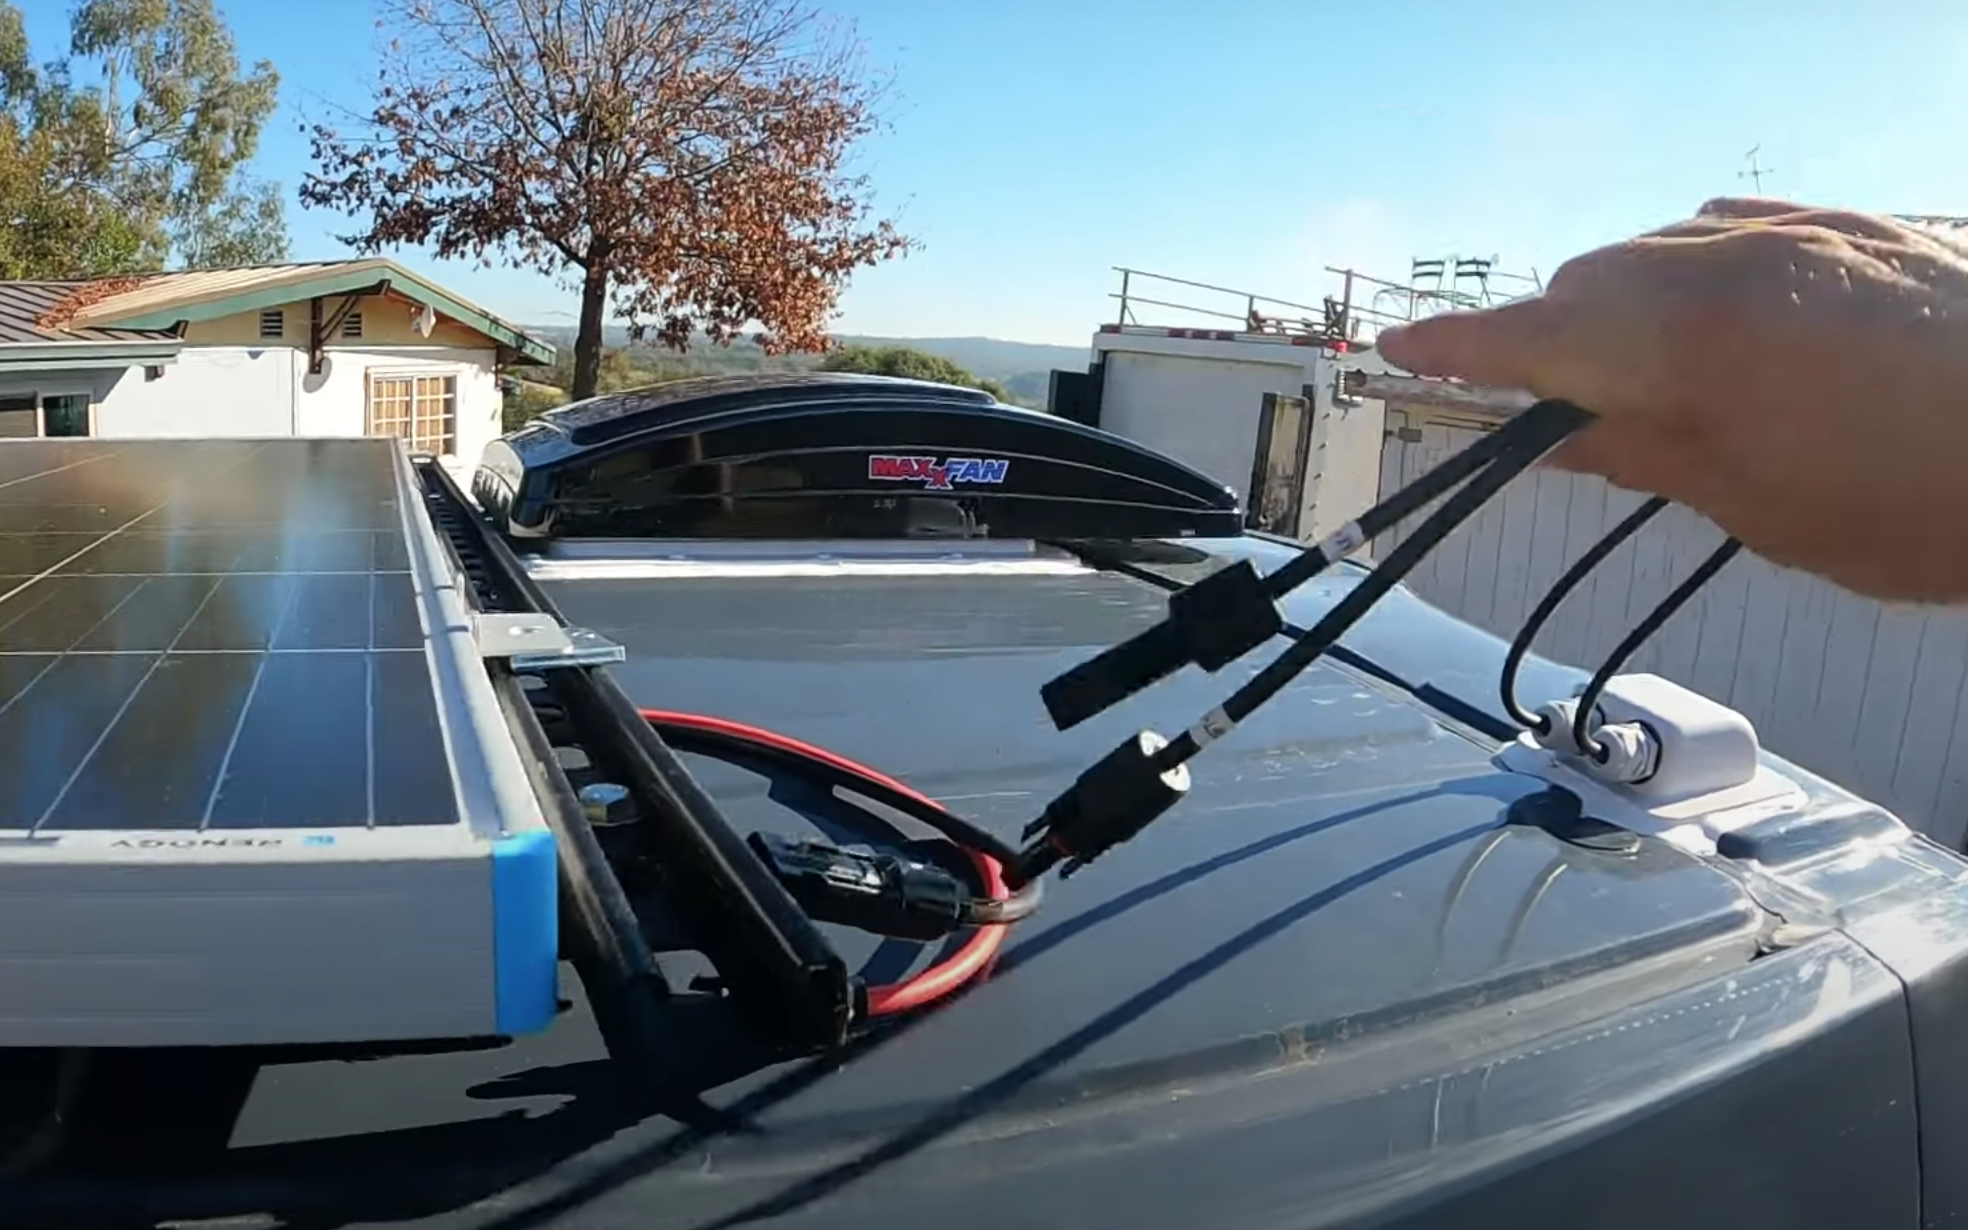
Today we are doing the first step for your solar system for your van conversion. Before you even install your solar panels on your roof you will want to run your wires to the solar panels. This is done best with a solar entry gland. This will drastically reduce the likelihood of water and moisture getting into the van. This is a very easy straightforward task. I really like using the BougeRV cables that come with the MC4 connection already attached. This makes for a quick and easy install and should only take a few minutes.

You will also want to use butyl tape as well as lap sealant to prevent any water from entering the van and causing problems. The butyl tape goes on first and provides a nice seal in between the van and the entry gland. Once the entry gland is in place and the butyl tape is all cleaned up you will want to apply a generous amount of lap sealant around the base of the entry gland. The lap sealant will really help prevent any water to seep into the van. With the butyl tape and lap sealant you should never have any problems with water getting into the van and causing problems to your insulation or water staining your nice wood ceiling.

Here's What I used

Entry Gland - https://amzn.to/3KsYFOb

MC4 Cables - https://amzn.to/3KwOZlv

Butyl Tape - https://amzn.to/3wEz1A8

Lap Sealant - https://amzn.to/3CEBkqG

Easy DIY Unistrut Roof Rack - Mounting Solar Panels on a Ford Transit

Get the plans for the rack! This includes all the hardware you will need to replicate this roof rack as well as a diagram on how to assemble it. https://www.vankookz.com/shop/how-to-build-a-roof-rack-for-your-solar-panels-on-your-campervan-guide

Today we are making a DIY Ford Transit Solar Panel Roof Rack for those that do not have stock roof rails. We built this solar panel roof rack out of Unistrut and did it for under $500!

If you have a Ford Transit and you do not have stock roof rails, but you need to mount your solar panels on your camper van, in this video, we will show you how we made a solar panel roof rack out of Unisturt for or Ford Transit campervan conversion.

This project took about 25 hours and it turned out so amazing. We went to the hardware store a million times to make this rack. If you want to expedite this rack we highly recommend you download the plans from our website.

The parts list is concise but comprehensive of the sizes, amounts, and every part you need to complete this rack. We give you diagrams of assembly, things you might need to buy on Amazon and we give you some supplementary pictures.

Here are a few items we used to make this Ford Transit DIY Solar Panel Roof Rack.

How to Install Walls in a Van Conversion

Today we are attaching walls to the van.

If you followed our framing video (https://www.youtube.com/watch?v=jwRkMm-47CE) that will make this step much easier. We use a combination of Poly Wall and Revolution Ply to get a nice finished product.

We used Revolution Ply 5mm Poplar Plywood, from Lowe’s. Once finished, it has a great look to it and is affordable and easy to work with. You will want to cut all your plywood to size depending on your design then attach it. We used Liquid Nail and a pin nailer to attach our walls to the frame.

Here, you may realize you need to add some framing to attach your walls more securely. Also, don’t forget to cut out holes for wiring and for your outlets.

Additionally, to save some space, we used a rot and water-resistant Plas-Tex poly wall plastic panel. We used this because we wanted to gain an inch of storage above where our upper cabinets are going to go. Also, they are removable. So, if you wanted to wire some additional electronics to the system, the wires are easily accessible. This came in handy throughout the build multiple times. We also used the Plas-Tex on the lower half 16” of the van where the cabinets will be covering the walls and you will have a water/rot-proof wall in case you have any vancidents.

We have a 26-gallon water tank along the wall and we figured this will help protect if anything were ever to happen to the tank. This was extremely easy to install and we used 3M 90 Adhesive spray to attach the Plas-Tex to the insulation.

It came out looking really nice and it has a nice texture. So, it will look finished inside the upper cabinets.

What we used

Tools we used

Insulation

Easy DIY Van Conversion Tongue and Groove Ceiling

Today we are installing Tongue and Groove pine cladding in our Ford Transit Extended. This is a pretty easy step and will really give your van a nice look.

We really love the T&G look in the van conversions it gives it a nice feel and really makes you feel at home.

What we used in this video

Insulation

How to Frame Out a Van Conversion - How to Attach Walls in a Van Conversion

If you've made it this far, then maybe, you’ve watched our previous insulation post (https://youtu.be/gmGD8R0YYes).

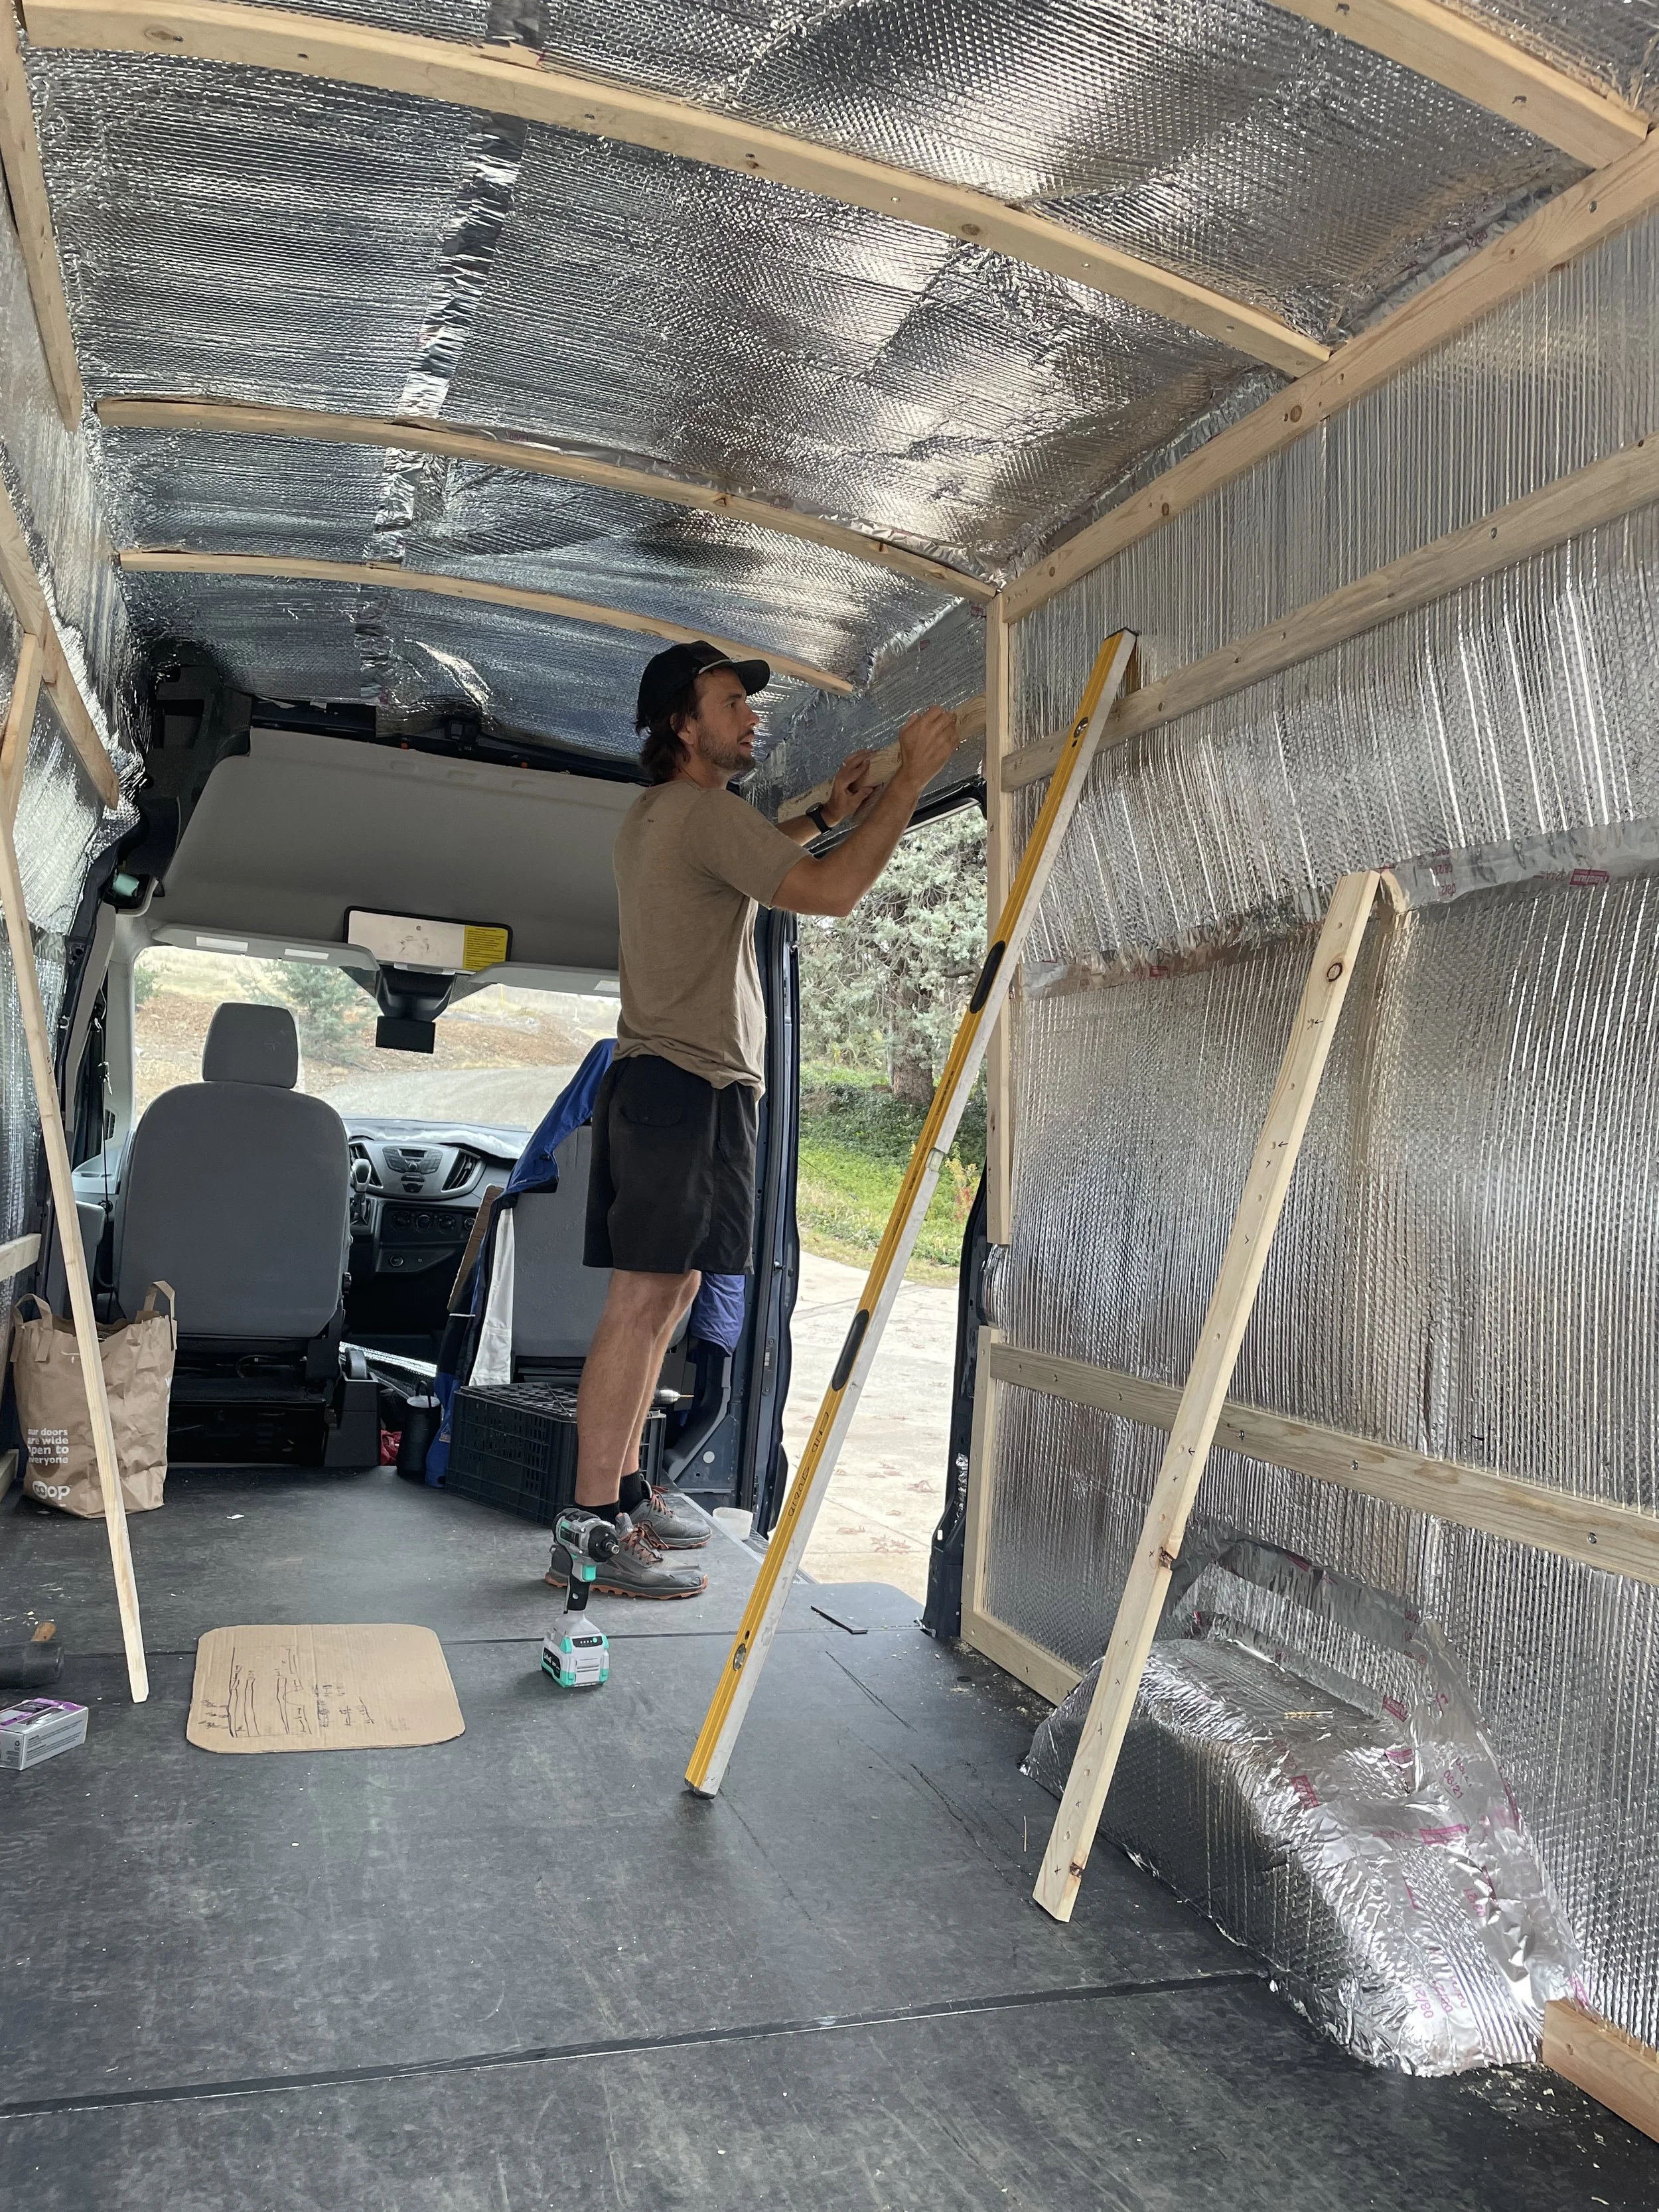
Welcome to the next exciting step of your van conversion. Installing framing for your, walls, and ceiling in your van is easier than you would think and we are here to help. Most supplies come from your local Home Depot or Lowe’s.

What you’ll essentially want to do here is create a nice frame to attach your interior walls to, as well as, frame some wall support for upper cabinets and countertops and to also secure them all to the van. So they do not become projectiles.

We use 1 in. x 3 in. furring strips from the Home Depot to frame the walls, along with some 1 1/2 in. #10 Self-Tapping Hex Head Sheet metal screws. Now, you will want to measure all your wall heights and lengths along the interior ribs of the van and along the floor and the ribs on the ceiling. Once you are done, draw out your wall framing diagram so it makes more sense and to reference.

Remember to add framing where you will have cabinets so you will be able to attach the cabinets to the wall. Also, note that you may need to add some furring strips where two pieces of the interior wall come together. So that way, they can also be attached to the van walls. (If there is no metal rib to attach your furring strips to ensure you have an anchor point for your walls, you will need to attach a furring strip with pocket screws, so you don’t send a screw thru the side of the van)

You will cut all your boards and install them to the van ribs with the 1-1/2” self-tapping hex head screws (Note: Screw size will vary between vans). You will also want to countersink all screws so that your walls/ceiling lay flush to the frame. The Sprinters have large cavities behind the wall ribs so you have plenty of room. ALWAYS double-check your screw length so you don't send a screw through the outside of the van.

From here, you are just attaching the strips to the van matching your diagram and this should go pretty quick.

Tools we used

Insulation

Complete Guide to Van Insulation | Step by Step How to Insulate a Van Conversion

This video is all about quick and easy van insulation we show you the fastest way to insulate your van in 10 easy steps.

In this quick video, we will show you how to insulate your van with 3M Thinsulate and reflectix. This is one of the easier tasks in insulating your van conversion and you will feel pretty good about yourself after completing this job which only requires you to use scissors, a mask, and safety glasses.

Here are a few products we used in this build.

Thinsulate Insulation - https://amzn.to/3ZpRQCP

Reflectix - https://amzn.to/3oV2Tlo

3M Adhesive Spray - https://amzn.to/3acQ0zo

3M N95 Respirator - https://amzn.to/3ad54gm

In this build, we used 70 linear ft. of Thinsulate SM600L. We believe Thinsulate is a great product for use in insulating your van, having tried other insulation products we would use and recommend this product 10 out of 10 times, and here’s why.

No Mess - Very easy installation, when compared to spray foam insulation and even cutting all the R-Max boards to size, can create a mess.

Easy to Install - Installing the 3M SM600L is literally a cut and paste job. All you need to do is measure the cavities, spray the 3M 90 spray adhesive and stick it to the van wall.

Sound Damping - Another benefit to the Thinsulate is that it has sound deadening qualities with non-woven sound-absorbing fibers creating a quieter vehicle environment.

Works Pretty Good - The SM600L has an R-value of 5.2. It can be increased with a Refletix moisture barrier, which is what we will do here. We’ve noticed that it keeps the heat out just as effectively as the cold. Once you are in a cold environment for an extended period, you will want to install a diesel cabin heater to keep the van warm. The insulation works, but it doesn't work miracles. If you know you will be in the cold, consider a heater.

Moisture Repellent - Hydrophobic fibers resist moisture, mold, and mildew. (We’ve seen it work). Thinsulate insulation is also resistant to mildew growth, reducing the risk of offensive odors and mold. Using an additional layer of Reflectix on top of the Thinsulate can gain a little extra R-Value for pretty cheap. In order of this to work, you need to create an air gap when you install your framing. Your walls should have an air gap in-between the Reflectix and the interior walls, which we will show you how to do next.

You will want to create a vapor barrier with the Reflectix in this step. What you do is use 3M Spray 90 adhesive to glue Reflectix to the entire interior of the van and use metal duct tape to tape up all seams to create a vapor barrier to prevent condensation from the metal van to venture into your walls.

Insulating the Van Floor - Depending on how tall you are or how much headroom you want to have an influence on what type of insulation you can use on your floor. The best bet is to lift the floor off the van with some floor slats and insulate it with the poly board in between the slats. In this van, we don’t have even an inch of headroom to give so we are just going to use reflectix. This isn’t the best option and won’t provide much more than a floor pad, but we know it's better than nothing. So, we used one layer of Reflectix to insulate the floor. We took the floor out and cut the Reflectix using the subfloor as a template.

Here are some values for how much insulation you will need depending on your vehicle

Thinsulate Insulation - https://amzn.to/3gMGpAo

Reflectix - https://amzn.to/3oV2Tlo

Sprinter 144 WB = 50 linear feet

Ford Transit 148 WB = 50 linear feet

Promaster 159 WB = 50 linear feet

170 WB Sprinter = 60 linear feet

170 WB Extended Sprinter = 70 linear feet

Easy, Mess Free Insulation with Thinsulate in 10 Easy Steps

This video is all about quick and easy van insulation we show you the fastest way to insulate your van in 10 easy steps.

In this quick video, we will show you how to insulate your van with 3M Thinsulate and reflectix. This is one of the easier tasks in insulating your van conversion and you will feel pretty good about yourself after completing this job which only requires you to use scissors, a mask, and safety glasses.

Here are a few products we used in this build.

In this build, we used 70 linear ft. of Thinsulate SM600L. We believe Thinsulate is a great product for use in insulating your van, having tried other insulation products we would use and recommend this product 10 out of 10 times, and here’s why.

No Mess - Very easy installation, when compared to spray foam insulation and even cutting all the R-Max boards to size, can create a mess. Easy to Install - Installing the 3M SM600L is literally a cut and paste job. All you need to do is measure the cavities, spray the 3M 90 spray adhesive and stick it to the van wall.

Sound Damping - Another benefit to the Thinsulate is that it has sound-deadening qualities with non-woven sound-absorbing fibers creating a quieter vehicle environment.

Works Pretty Good - The SM600L has an R-value of 5.2. It can be increased with a Refletix moisture barrier, which is what we will do here. We’ve noticed that it keeps the heat out just as effectively as the cold. Once you are in a cold environment for an extended period, you will want to install a diesel cabin heater to keep the van warm. The insulation works, but it doesn't work miracles. If you know you will be in the cold, consider a heater.

Moisture Repellent - Hydrophobic fibers resist moisture, mold, and mildew. (We’ve seen it work). Thinsulate insulation is also resistant to mildew growth, reducing the risk of offensive odors and mold. Using an additional layer of Reflectix on top of the Thinsulate can gain a little extra R-Value for pretty cheap. In order of this to work, you need to create an air gap when you install your framing. Your walls should have an air gap in-between the Reflectix and the interior walls, which we will show you how to do next.

You will want to create a vapor barrier with the Reflectix in this step. What you do is use 3M Spray 90 adhesive to glue Reflectix to the entire interior of the van and use metal duct tape to tape up all seams to create a vapor barrier to prevent condensation from the metal van to venture into your walls.

Insulating the Van Floor - Depending on how tall you are or how much headroom you want to have an influence on what type of insulation you can use on your floor. The best bet is to lift the floor off the van with some floor slats and insulate it with the poly board in between the slats. In this van, we don’t have even an inch of headroom to give so we are just going to use reflectix. This isn’t the best option and won’t provide much more than a floor pad, but we know it's better than nothing. So, we used one layer of Reflectix to insulate the floor. We took the floor out and cut the Reflectix using the subfloor as a template.

Here are some values for how much insulation you will need depending on your vehicle

  • Sprinter 144 WB = 50 linear feet

  • Ford Transit 148 WB = 50 linear feet

  • Promaster 159 WB = 50 linear feet

  • 170 WB Sprinter = 60 linear feet

  • 170 WB Extended Sprinter = 70 linear feet

More info on insulation is available on our website here: https://www.vankookz.com/2006-t1n-sprinter-conversion/2020/2/16/how-to-insulate-your-van-conversion-with-thinsulate