
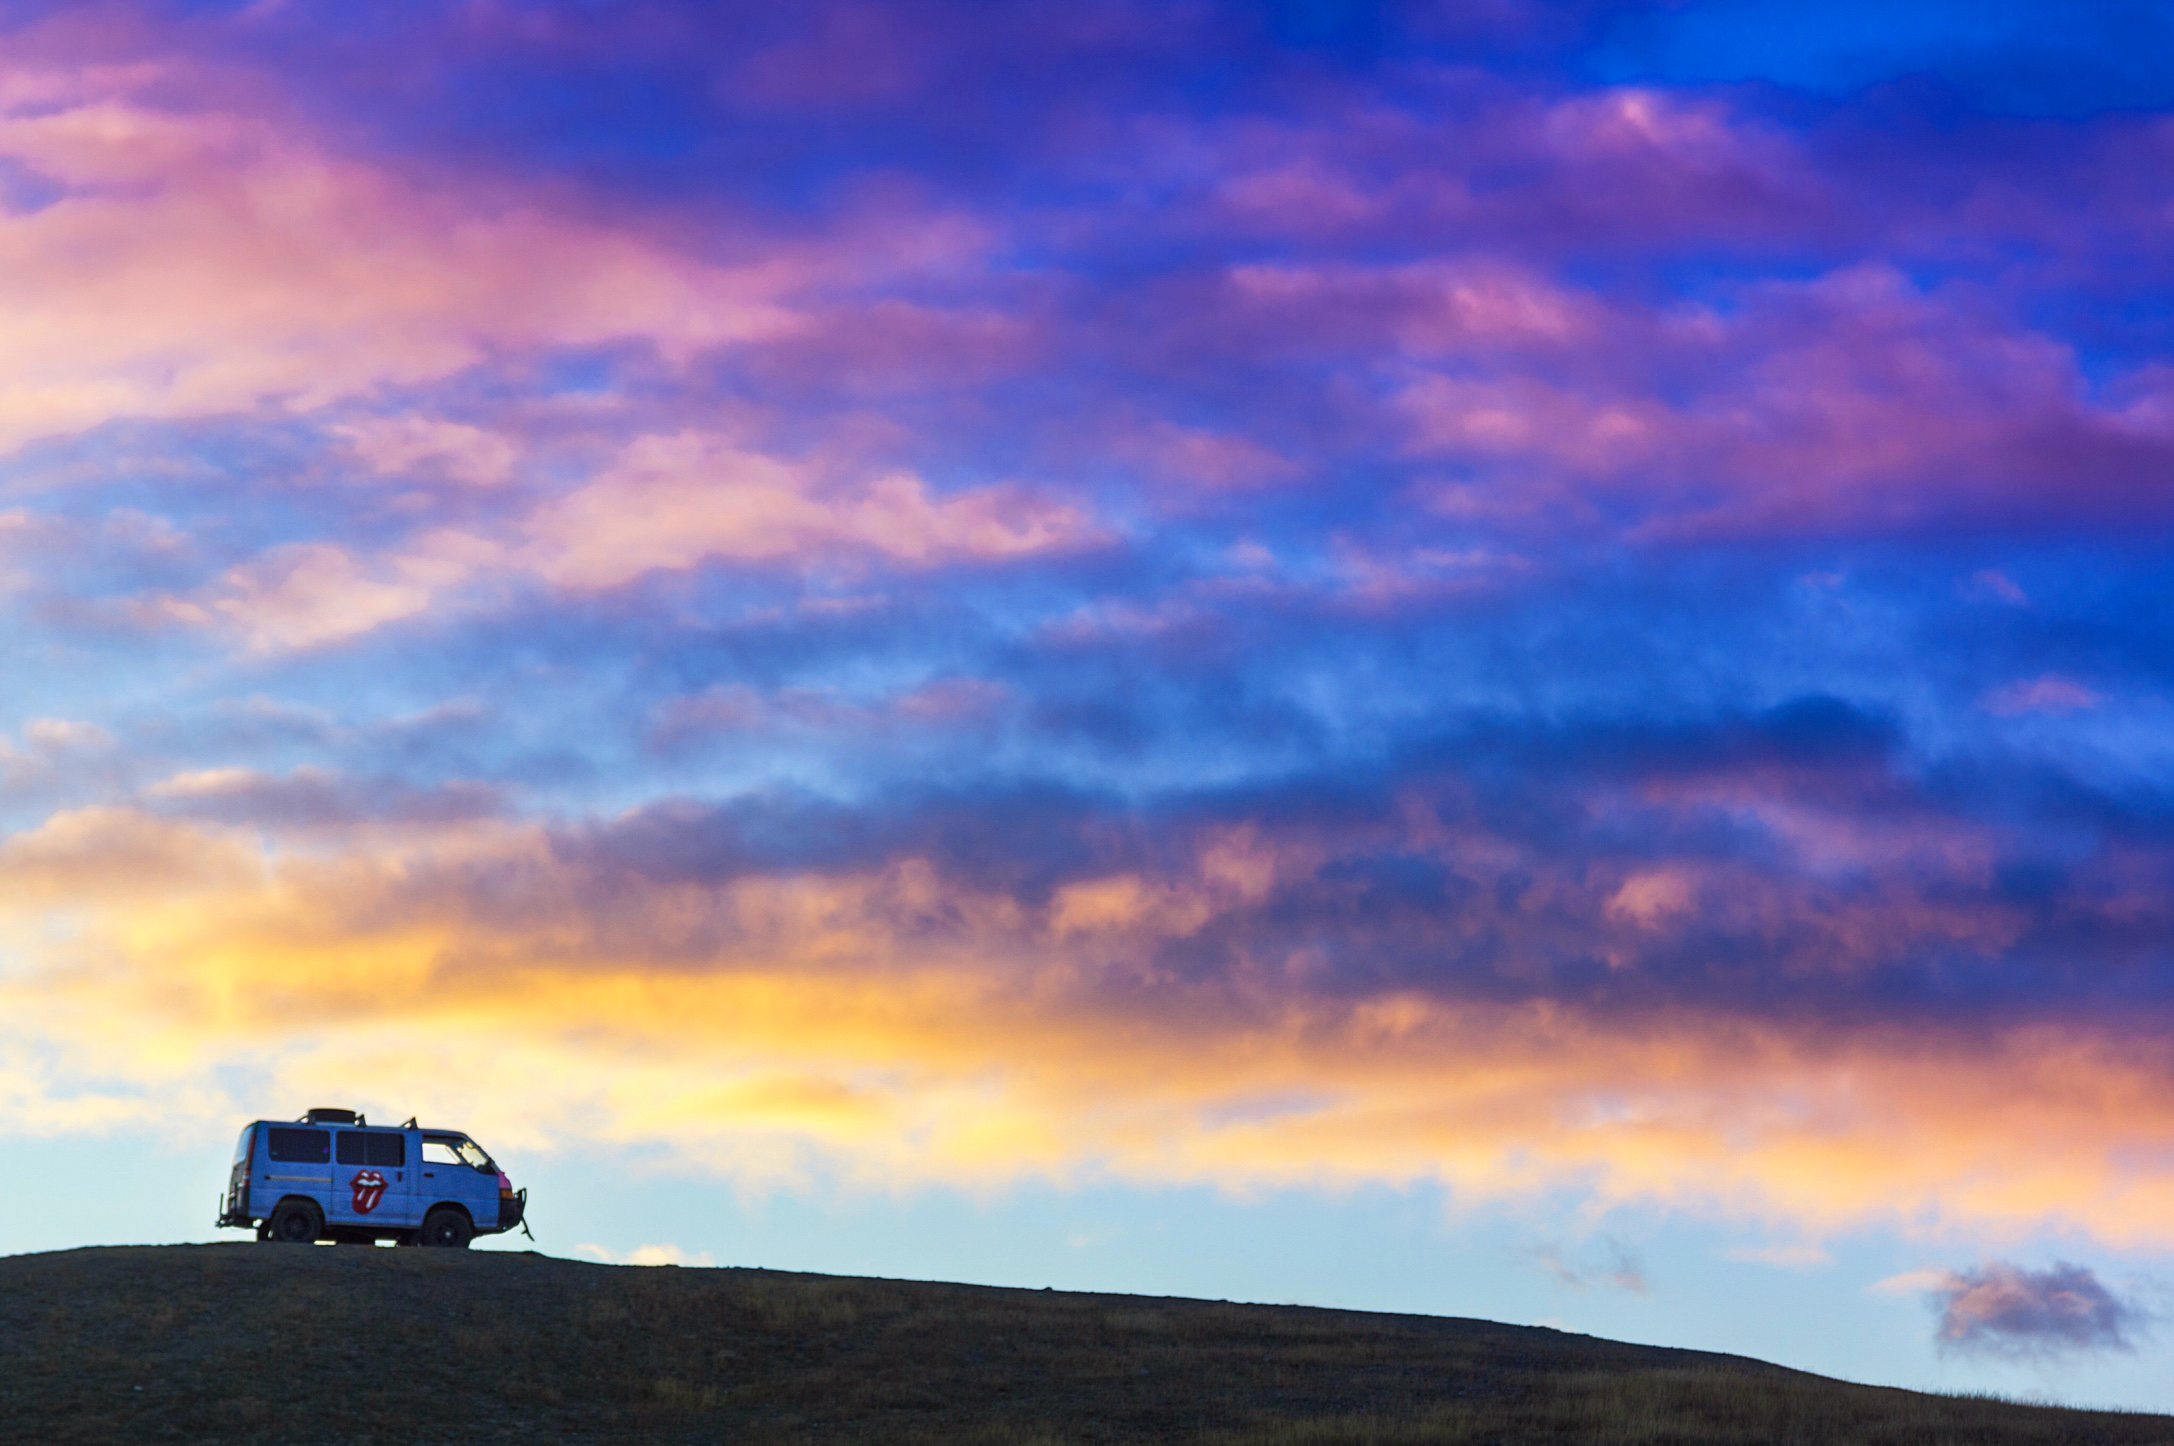
Four of the best apps to download before you start adventuring in New Zealand. Save money, fill up at the pump for cheap, find out how to turn your phone into one of those fancy GPS handhelds and save $200 doing it. Read More at vankookz.com
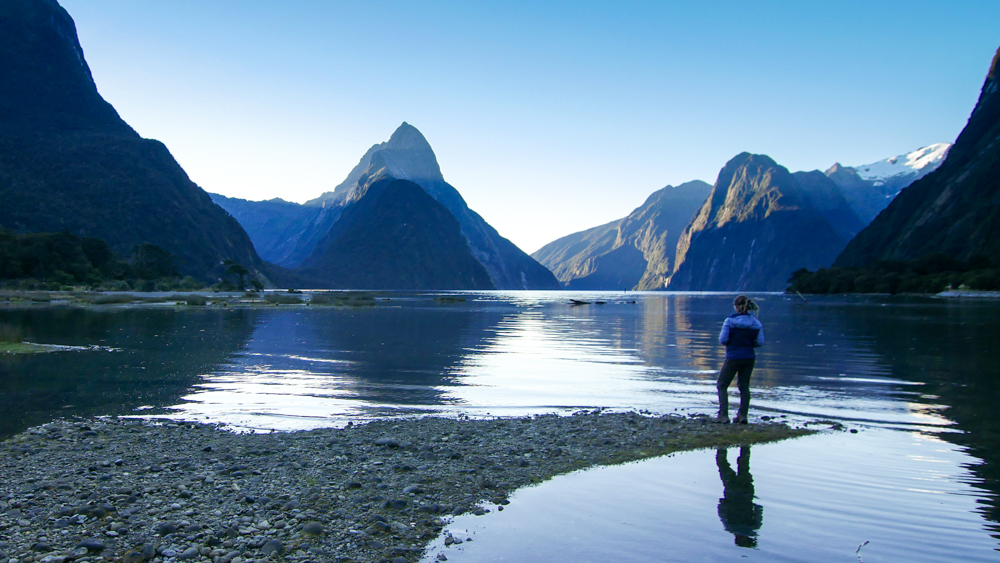
Hiking and Camping around Mount Cook and Mueller Hut
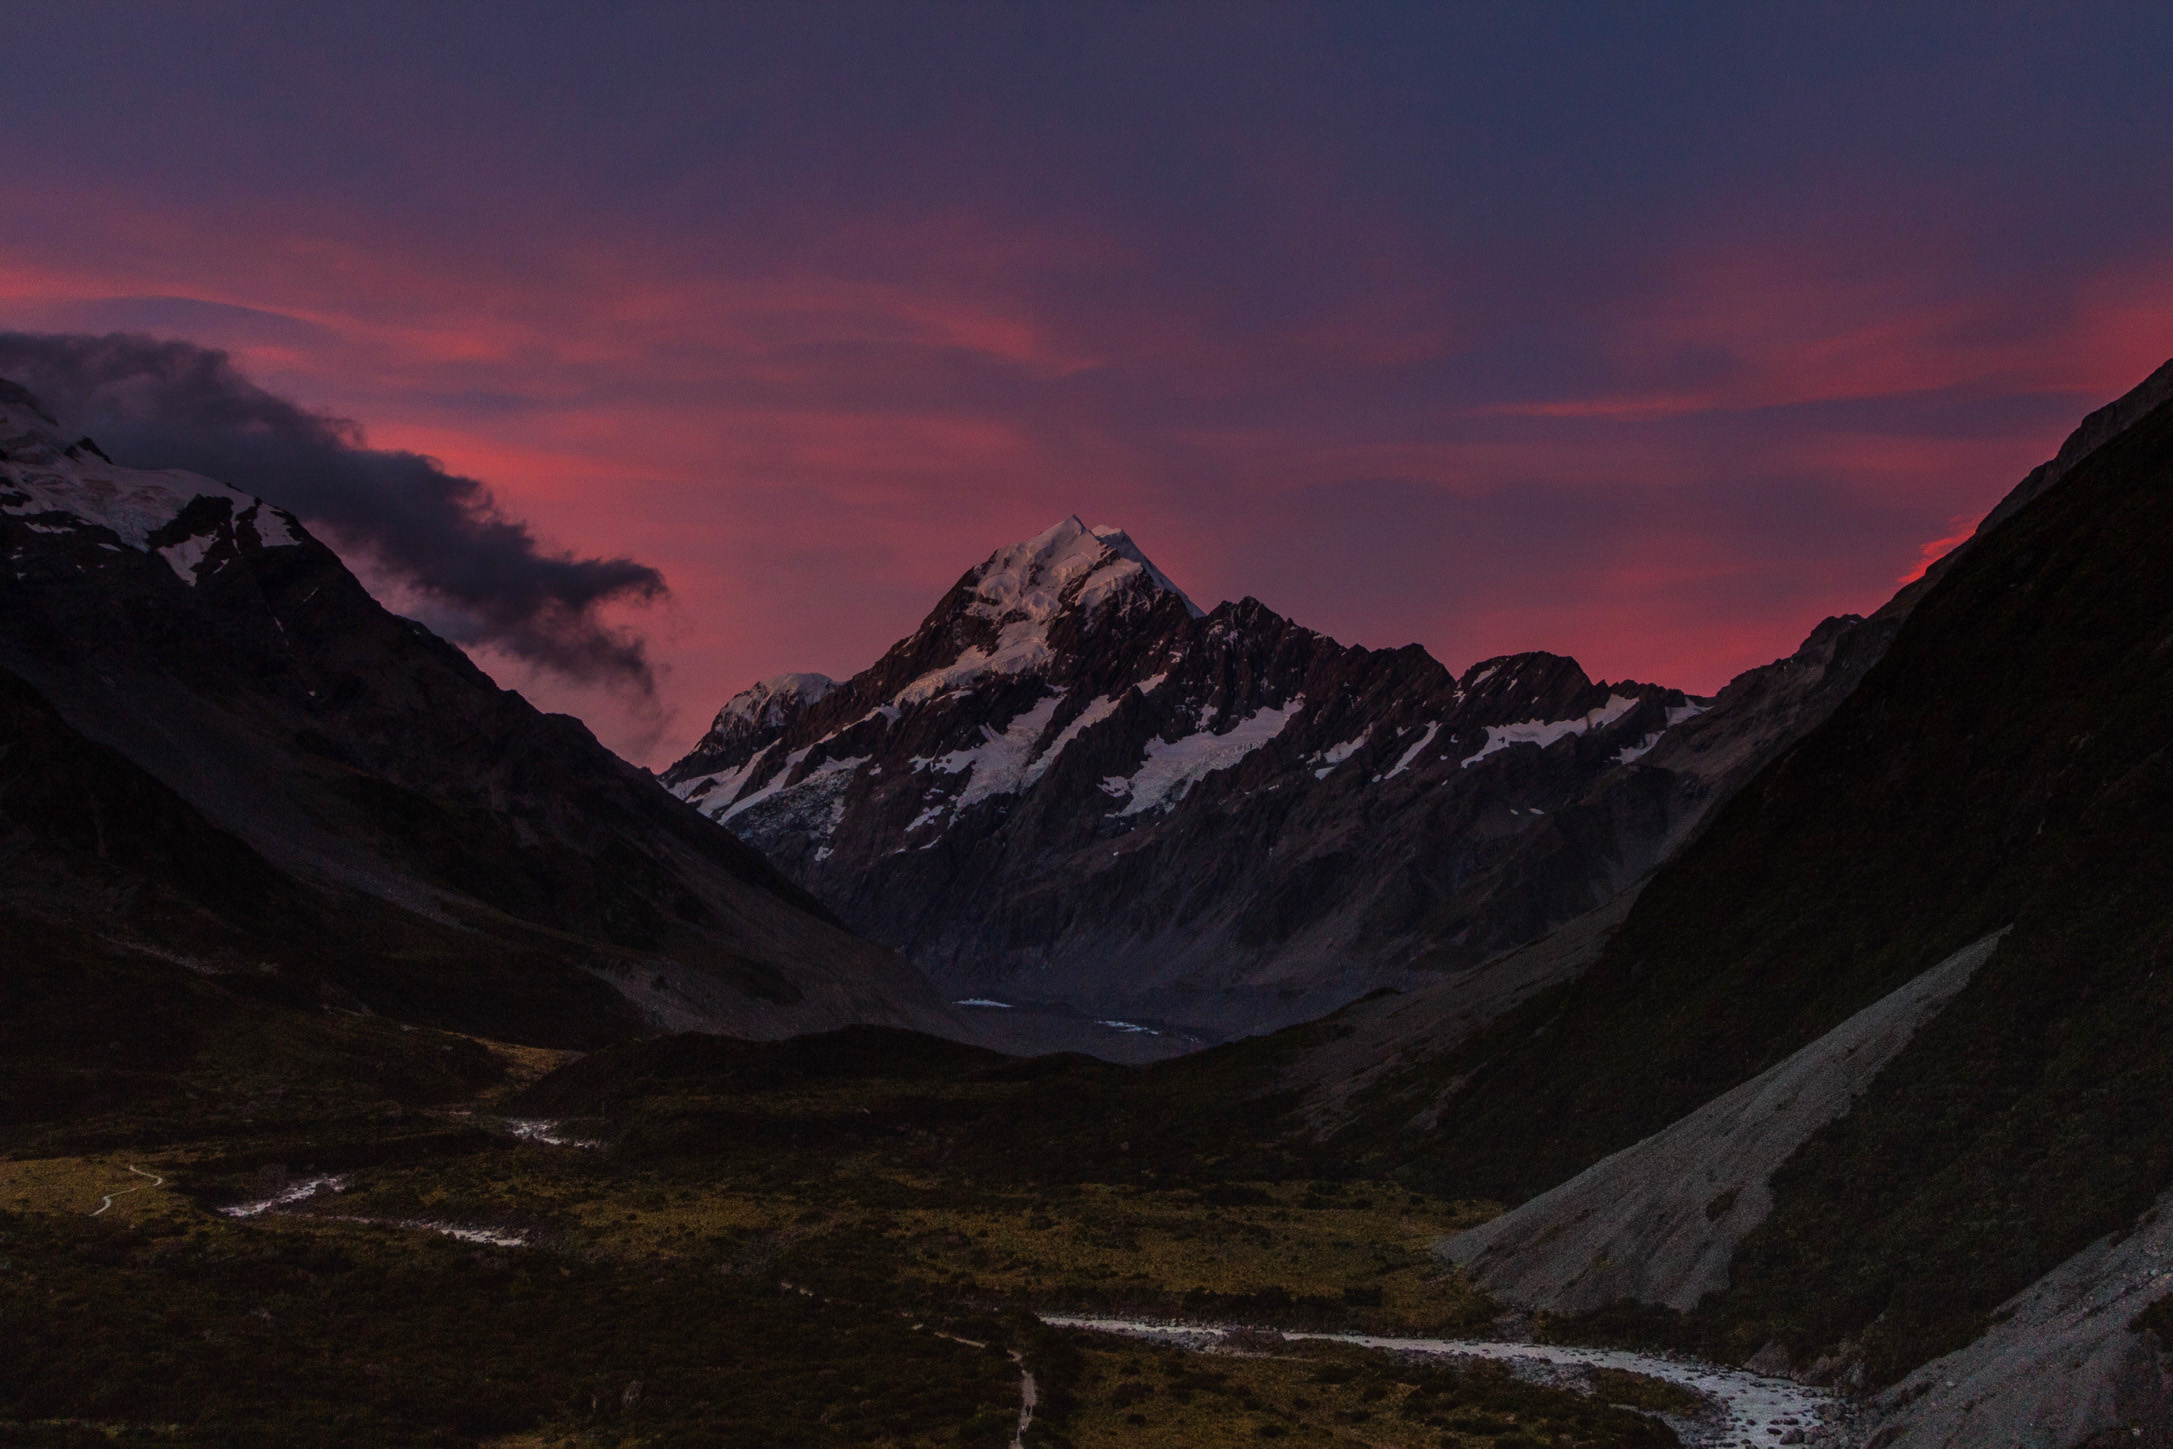
Aoraki/Mt Cook National Park
This was our last stop on the circle back to Christchurch and once we got there, I couldn’t believe that we saved the best for last. This was by far our favorite place on the South Island. Mt. Cook is the tallest mountain in New Zealand and whether you are on the West Coast or Canterbury side, there is no mistaking this towering peak.
The closest place to get groceries in this area is Twizel. So make sure that you stock up so that you can spend as many days as you can in this magical area.
Camping
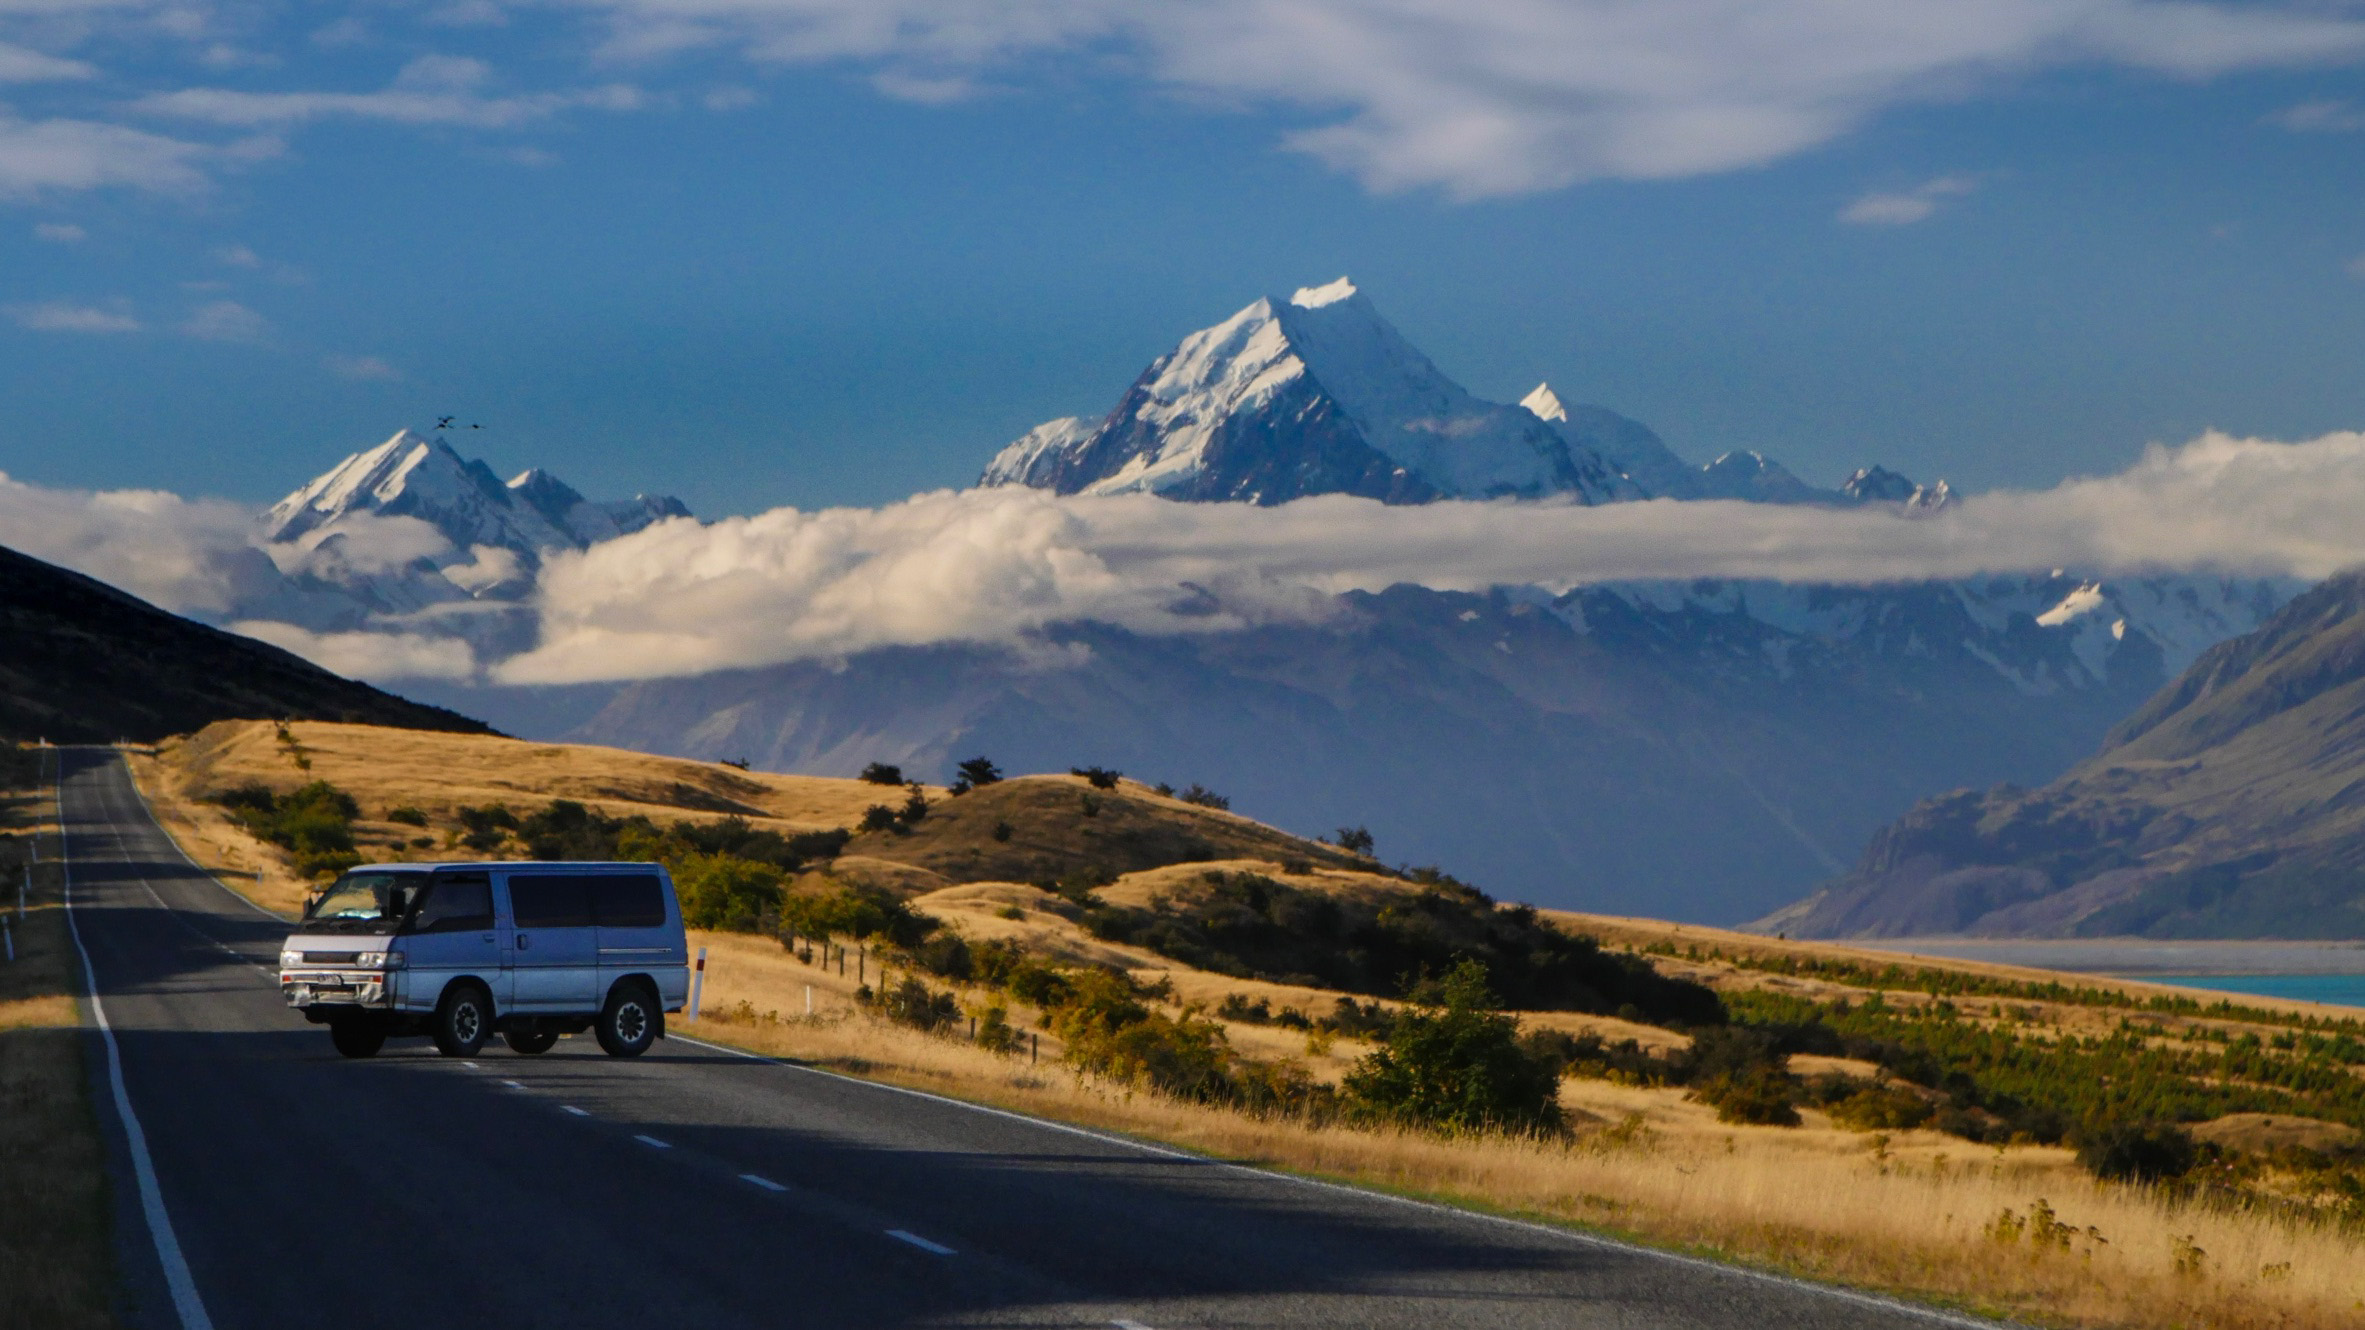
If you are on a budget, there is a free campsite with the most epic view and plenty of space at Lake Pukaki Campsite. It is about 50 minutes from the National Park, but believe me, it will take you longer because of how scenic the drive is. The scenic drive follows the shoreline of the turquoise Lake Pukaki. It’s one drive we didn’t mind repeating. So, we camped at this spot a total of three times. There are some awesome safe spots to pull over and take epic pictures, like Peter’s lookout, on your way to the park. I am sure that you will find quite a few more pull over spots on your way in, as it is very common to do so.
There is a DOC campsite at the base of the Hooker Valley, White Horse Hill Campground. It is a standard $13 per person per night and it has actual toilets, rubbish bins, drinking water, a big enclosed shelter to cook, and epic views and sounds of thundering glacier avalanches from Mt Sefton 24/7.
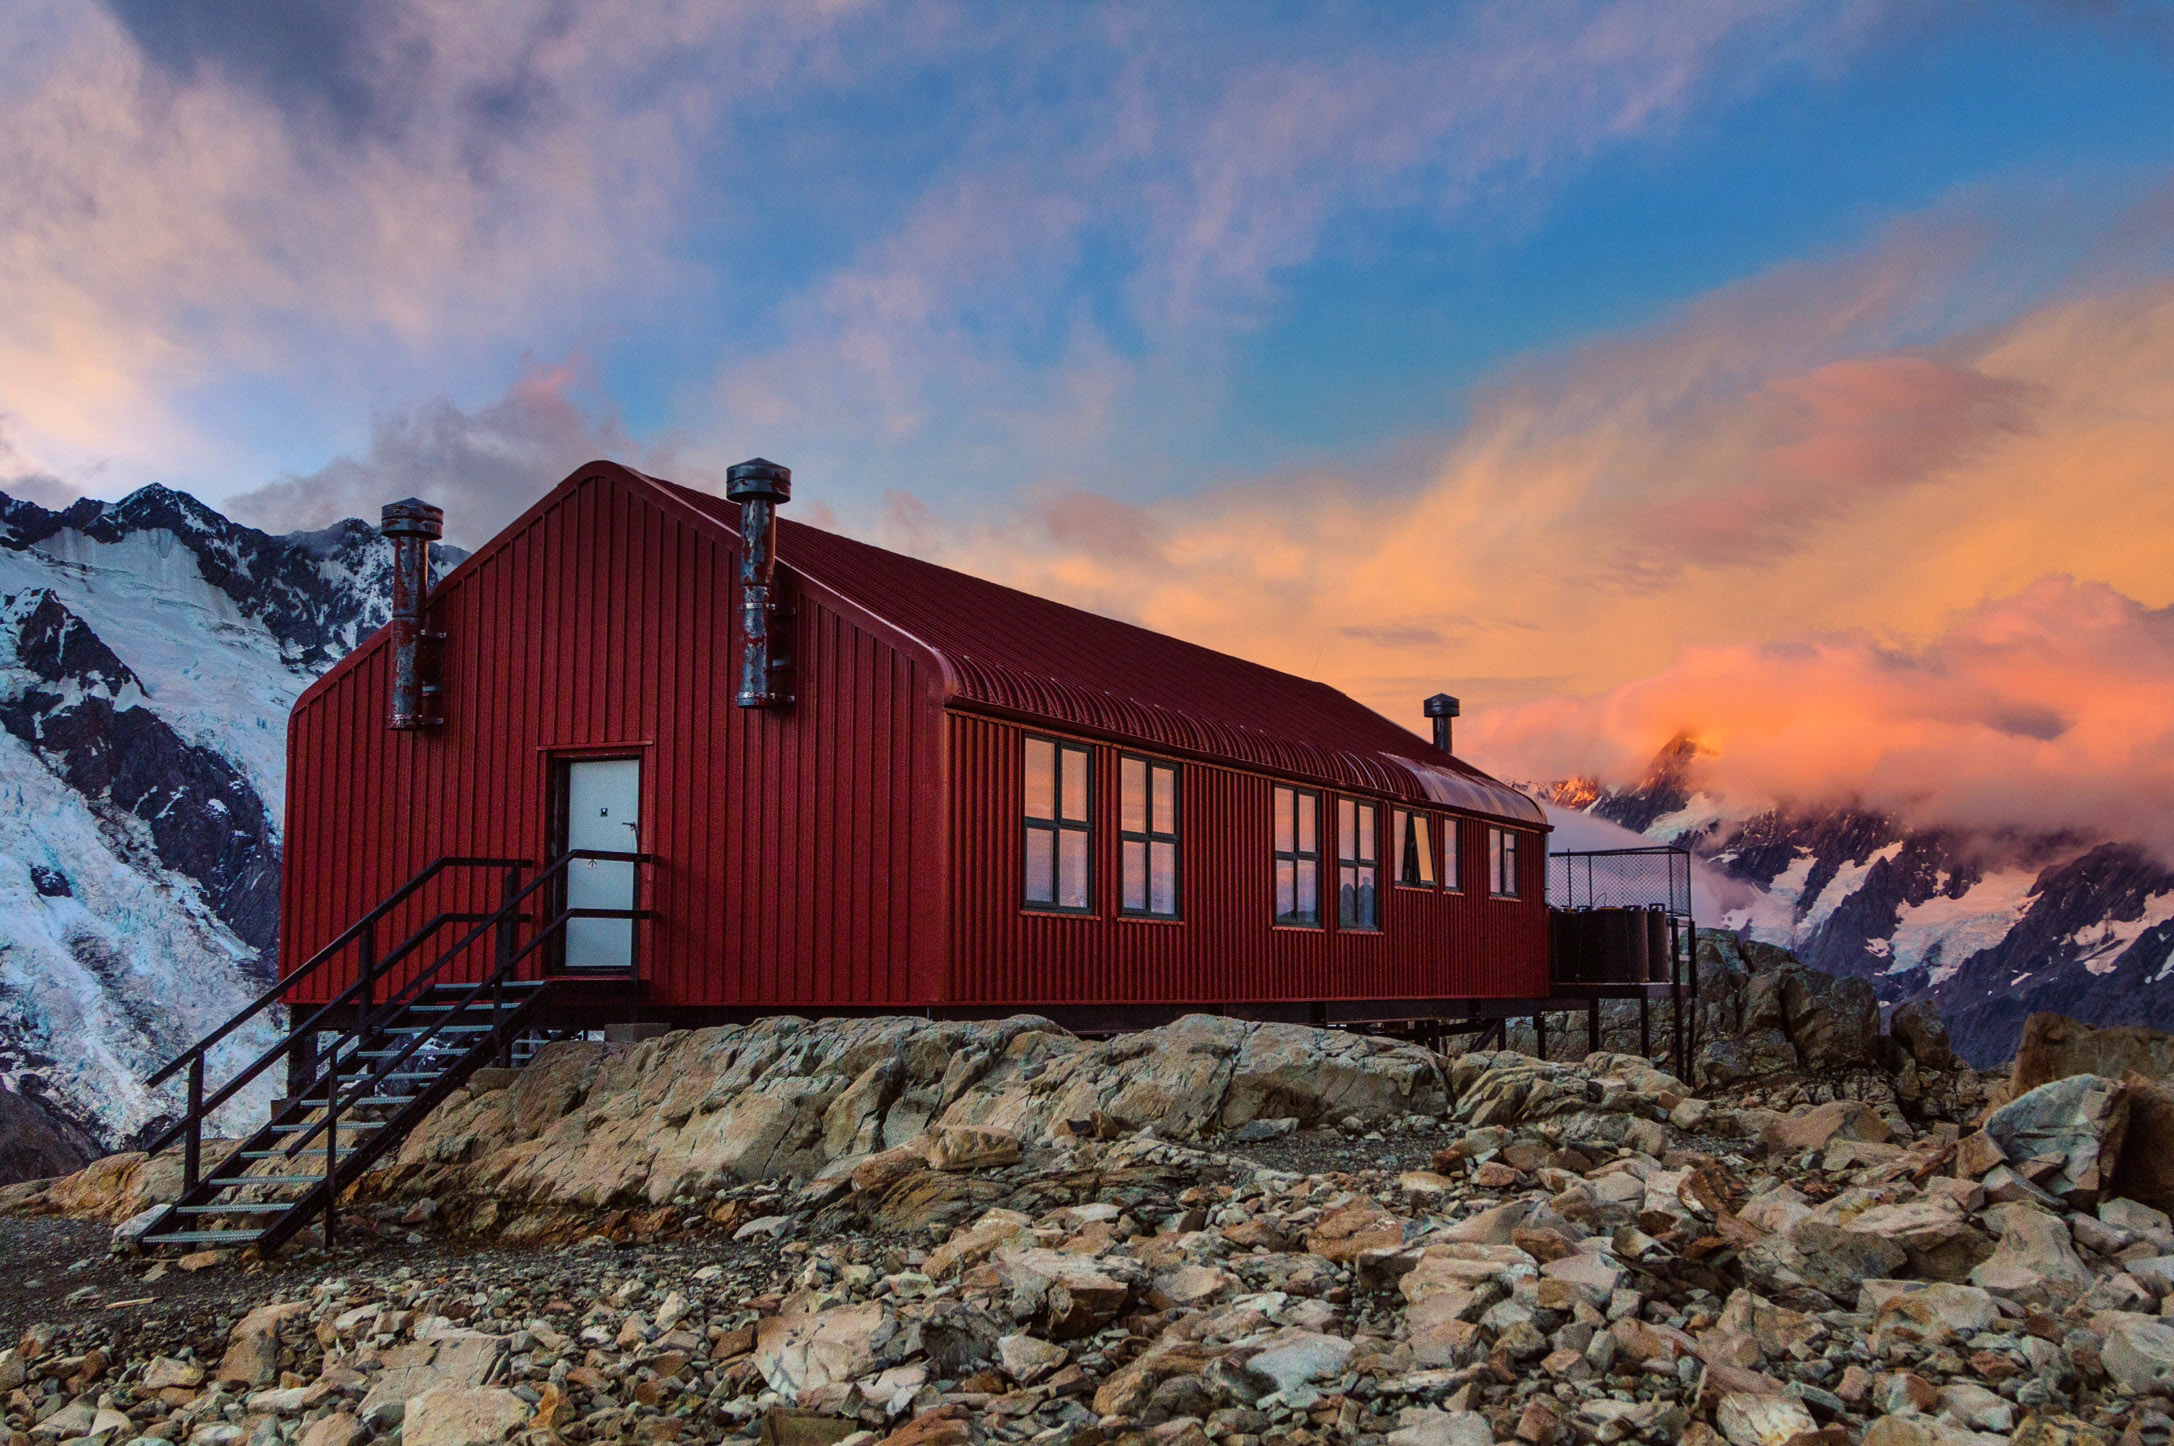
Mueller Hut is 1800 meters straight up and sits below Mt Oliver with views of the entire Hooker Valley, up close and personal views of Mt Sefton, and views of Mt Cook. We had been watching the weather forecast and timing our arrival to the area based on sunny weather combined with booking availability at this hut. It was our last must do hut in New Zealand. We booked the hut for a sunny day, but we totally blew it on checking out the wind aspect. For most of the climb, it is exposed to all the elements, but the most dangerous of them all, on this hike, is the wind. On our first attempt, the DOC refunded our payment and told us it was unsafe to go up, as the wind gusts in the valley below were 90 kmph and expected to exceed 100 kmph wind gusts on the trail. We were so bummed. It was a perfectly sunny day, but the wind could have blown us off the trail and down the side of the mountain. So, be sure to take into account the wind when planning your hike to Mueller hut!
Finally, there was a window of semi-cloudy weather, some cancellations at the hut, and a light breeze of 5 kmph. We booked it and made the 4 hour drive from Christchurch to get some redemption and get the Mueller Hut experience. It was worth the wait and worth the climb. Booking Fees for this hut are $36 per person per night and it is worth every penny (and that’s coming from these two cheap asses). There are gas stoves and water at the hut. So, no need to bring your cooking gear.
There are also plenty of rock bivvys set up for tent camping near the hut. The hut warden that was on duty, when we were there, was asking tent campers if they had proof of a camping reservation, but I know people do it for free. She scared a couple groups of tent campers off that had hiked up all their gear, without a reservation. (You can get a reservation at the iCenter in the Village). But if you don't have a reservation, I’d say drop your stuff off under the hut, there is a rock bivvy under there. Then, set up just before sundown to avoid that hassle of being scared back down the mountain.
Tramping
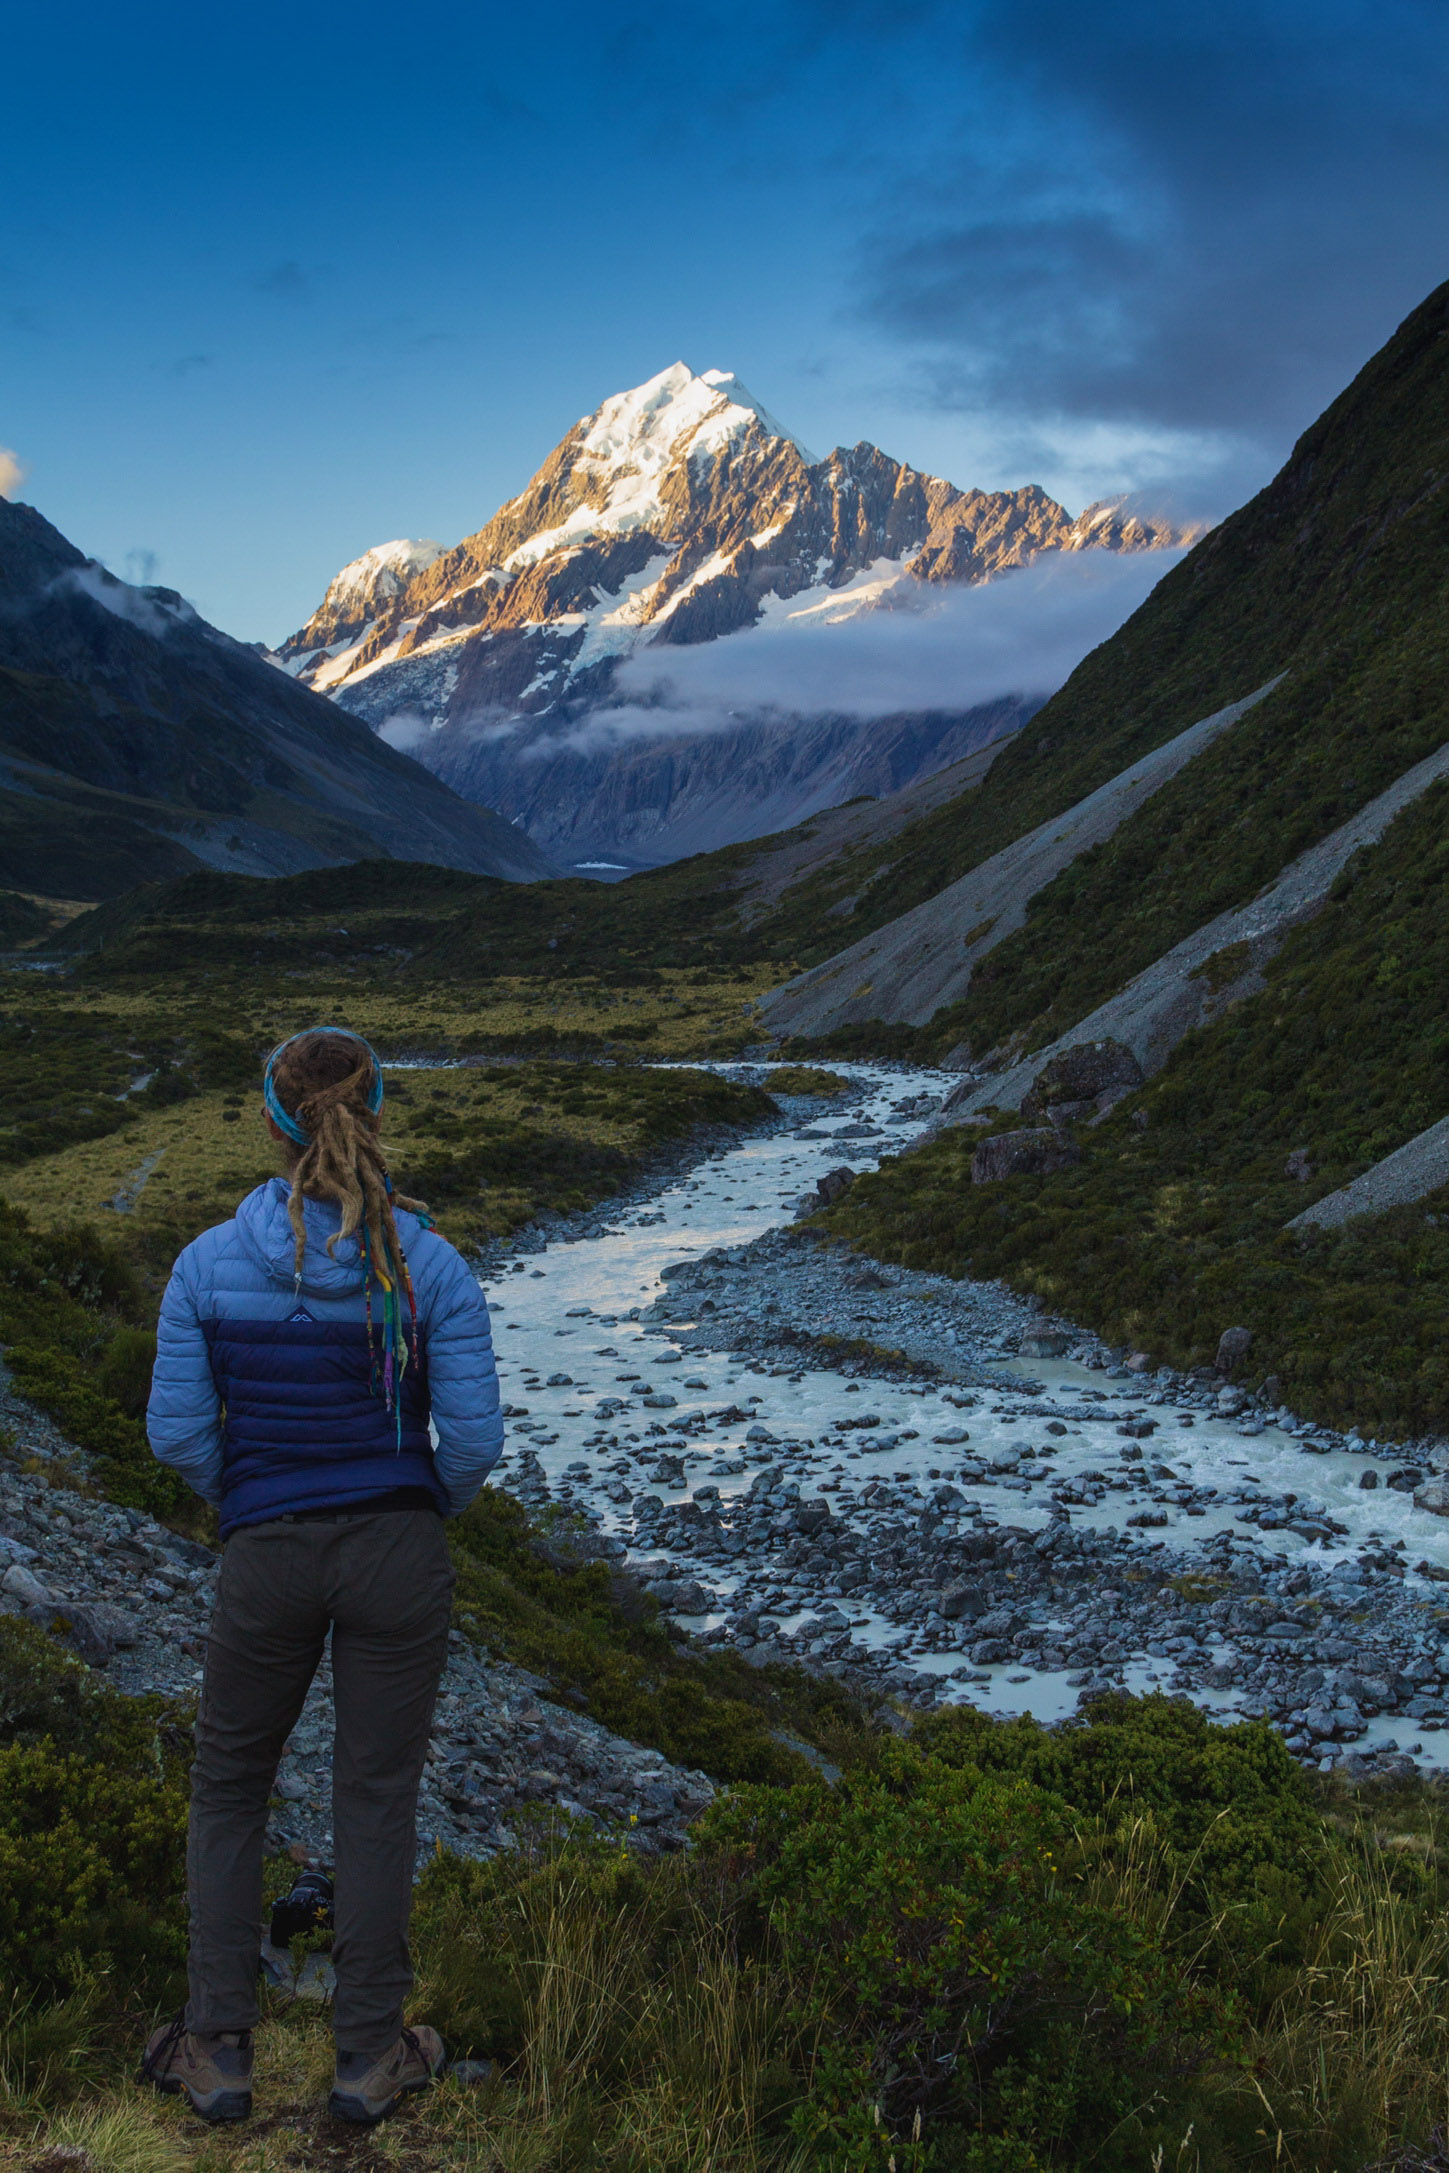
Hooker Valley had to be one of our all time favorite walks (I wouldn’t classify it as a hike or tramp). It was so effortless and beautiful that we did it 3 times in two days. I am not sure there was enough of an incline on the whole trail to even classify as a hill. So, it is perfect for the whole family. While the track is a 10km return, it really didn’t feel like it. There is so much beauty along the entire track that I could not believe it wasn’t officially among the best hikes/walks in New Zealand. This is a very popular track that is very well maintained with multiple swing bridges, look out points, picnic tables, and zig zagging board walks. The trail end is at Hooker Lake, where you will find floating icebergs and epic views of Mt. Cook and probably a few Kias, if you're lucky
Sealy Tarns - This is the most maintained part of the Mueller hut track. It is stairs the entire walk and once you reach the tarns, you are half way to Mueller Hut. On a sunny day, you can get a nice reflection of Mt Sefton in the tarn and great views below. But, I really wouldn’t do this tramp on a cloudy day, unless you are purely up for the workout.
Mueller Hut - It actually surprised me how many people day hike this hut. They hike all the way up to have a snack or lunch and then walk back down! We thought about doing it the day after we got winded out, but if we made that effort, we wanted to see some stars, a sunset and sunrise. So we decided to wait till we had a reservation, but plenty of people day hike this hut. Once you get up there, you will see why.


Green Lake Hut - Fiordland National Park's Hidden Gem
We weren't quite ready to leave Fiordland National Park after 5 great days. We were able to dig deep and find a little gem on the south end of the national park, in the Lake Monowai area.
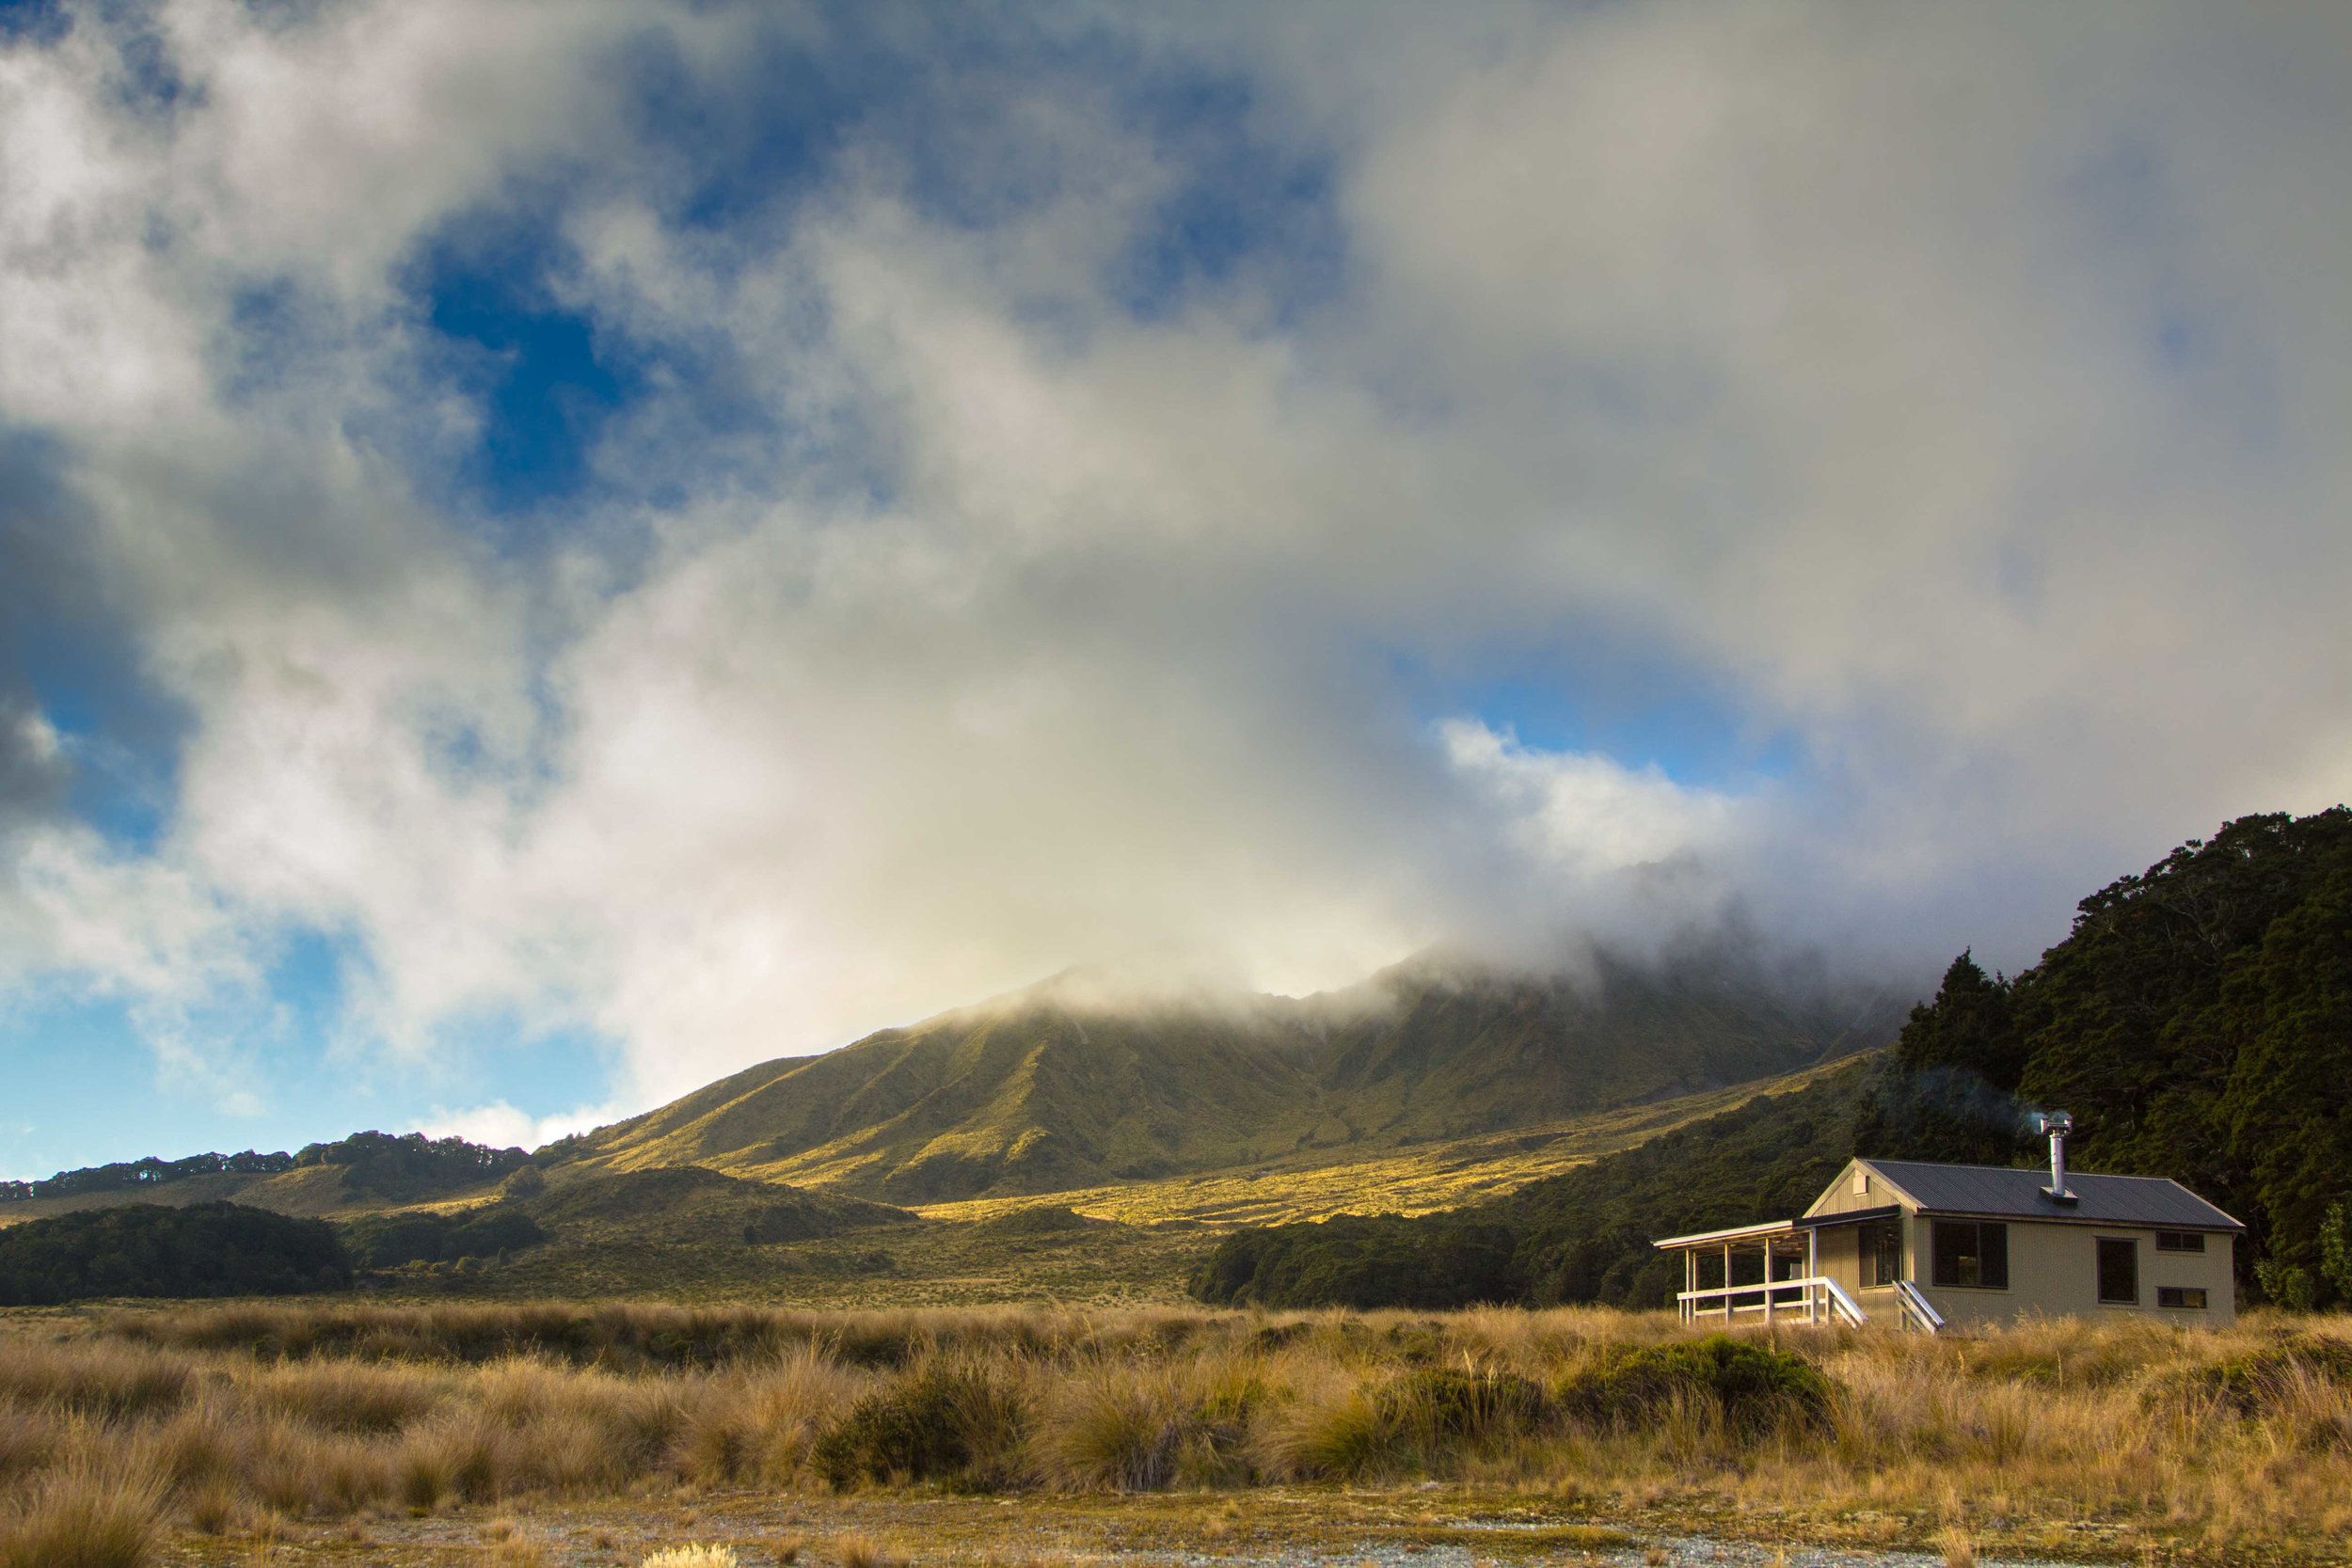
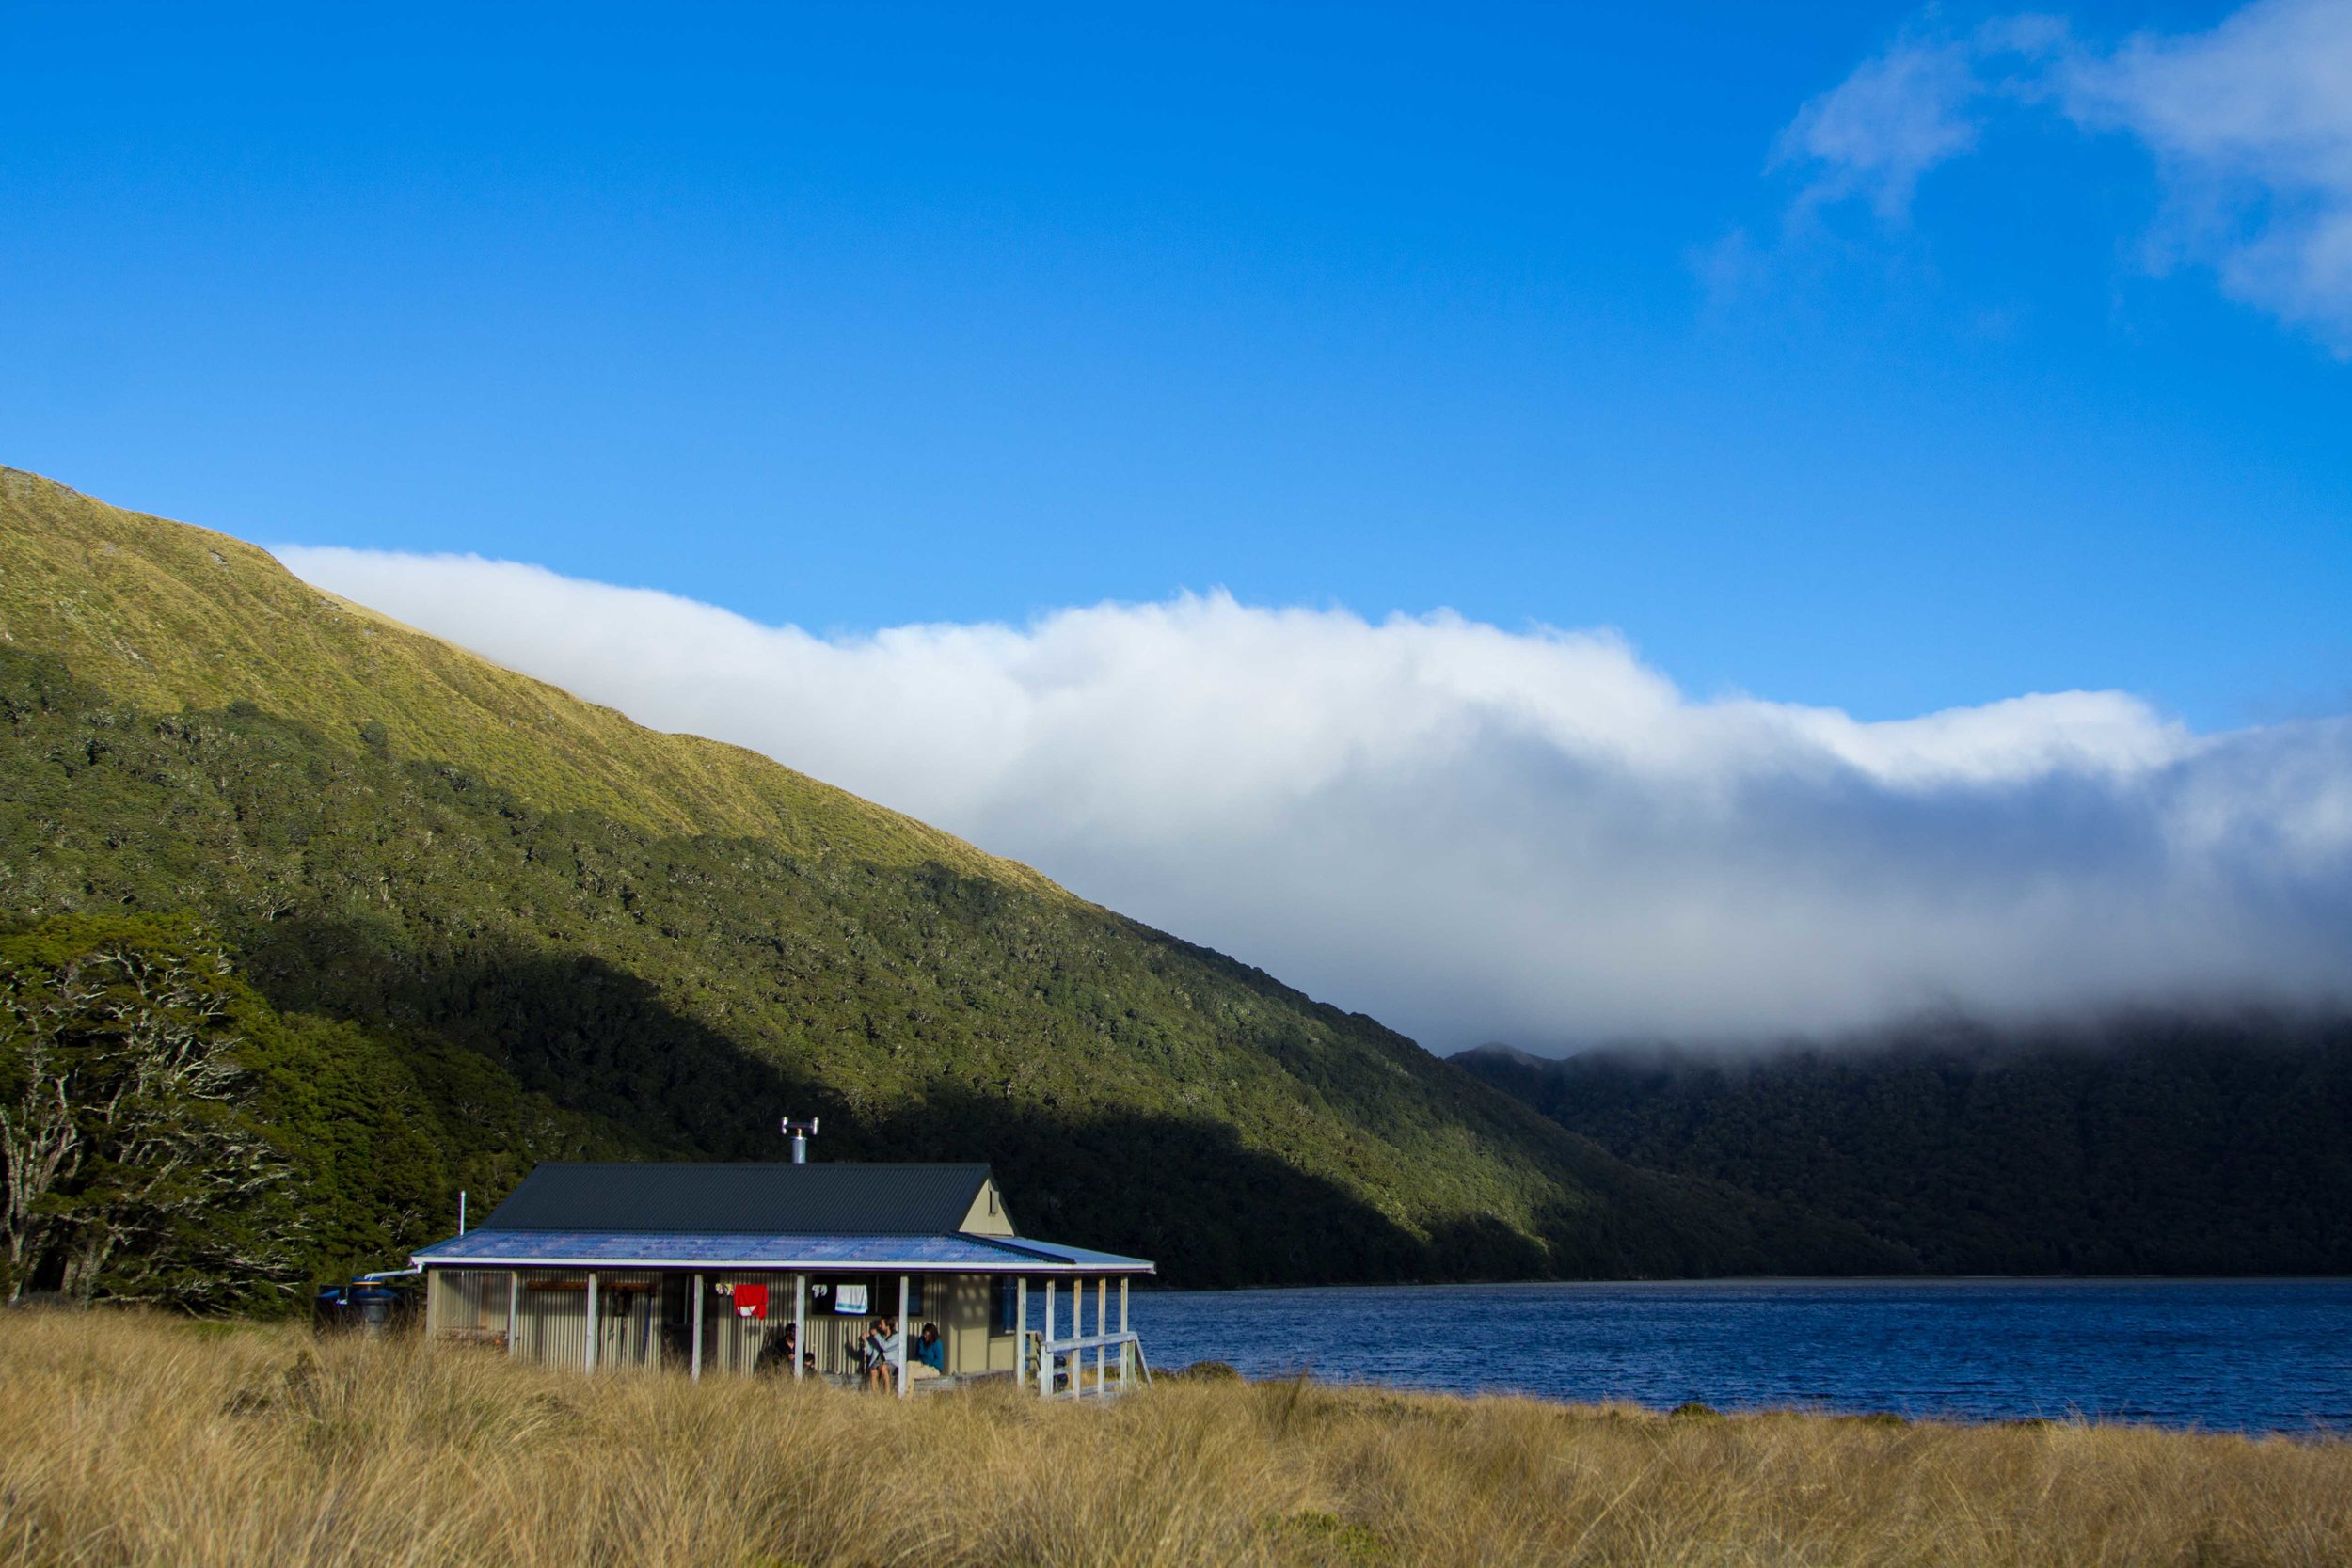
Green Lake Hut is a newer serviced hut. It was built just a few years ago and is one of the nicest we've visited. There are two ways to approach this hut. One is a 5+ hour hike from Lake Monowai Road. The other, a much easier walk and the one we decided to choose, is a 2.5 hour 6.8 km hike from the Borland Bivy, just off of Borland Road. This walk is quite easy, with really only one hill to climb towards the end. The only problem we found was that in a few areas the grass was chest high, at times, making the trail hard to find and sometimes a bit boggy underfoot.
We would highly recommend this hut, as it is hardly used and you could find yourself with an empty or uncrowded hut. There are many other options in the area for hiking and overnight hut stays in the Lake Monowai/Borland Road Area. There is also a free campground at Lake Monowai that we stayed at after the hike. We really enjoyed this off the beaten path area. It is hardly ever visited by tourist.


Featured


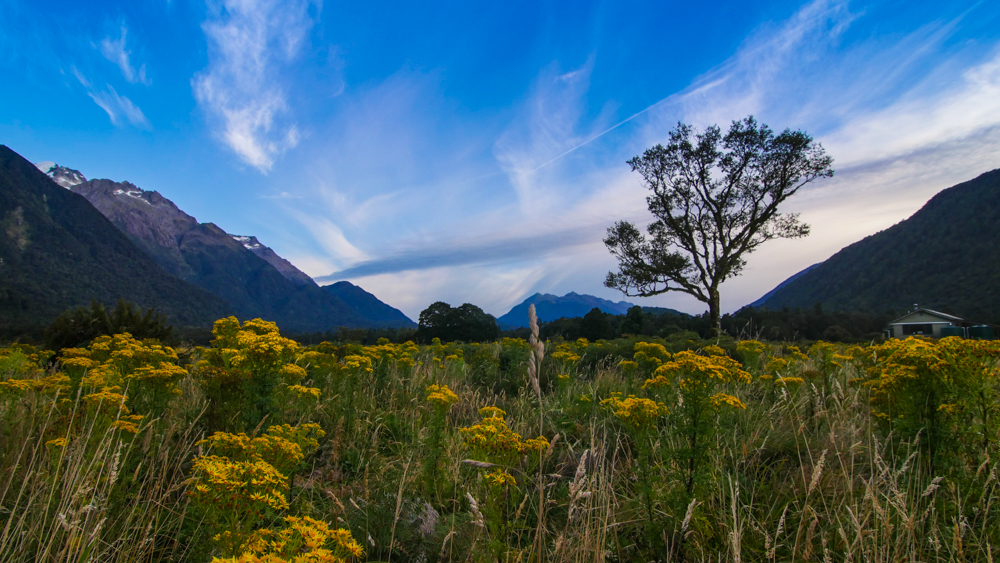
5 Days in Fiordland National Park - Best Hikes and Camping
Where do you even start in this amazing place? First off, there are three Great Walks on one road. There are plenty of trails to spend overnighters or just day hike. There are heaps of roadside pull over spots for a quick picture as the drive into this place is amazing on it’s own. This area is amazing and planning a quick trip to Fiordland can be difficult and overwhelming at times. We had an awesome time in the six days we spent in this outdoor playground. So we thought we would make your life easy and share our itinerary to hopefully help you get together a game plan for one of New Zealand’s best National Parks.

Day 1: Kepler Track Overnighter - If you’re as unprepared as we are, in the New Zealand’s busy season, you’ve most likely found out that A: Great Walks are all booked out and B: They are overpriced and really aren't geared towards the budget traveler. We found a way around this anomaly and decided to do the Kepler Track our own way. Because after all, there shouldn’t be so many rules on how one should hike a nature track.
We learned from friends that the Kepler Track is really only amazing above tree line from Mt. Luxmore Hut to Iris Burn Hut. So, what we did was booked a campsite at Broad Bay and walked from the Control Gates car park at about 8am to Broad Bay. We got to the campsite in less than an hour. We set up camp and packed our day bags (Which we packed inside our overnight packs) for a long day hike. From Broad Bay Campsite, it’s a fairly easy climb about 3.5 hours up to Mt. Luxmore Hut, where you can stop and have snacks or eat lunch, and even check out the Luxmore Caves, which are 10min away from the hut. From here, it’s about an hour hike to Mt. Luxmore summit. It’s only a 10 minute hike up to the summit, off the track, you should definitely do it, if the weather is nice. From Luxmore summit to Iris Burn is where you really start to experience the greatness of this Great Walk. With amazing views over Te Anu lake, this is a hike that was worth the all day effort of hiking. From here, if the weather permits, you can continue on to the emergency shelters, which we highly recommend to get the full Kepler experience. Just remember you have to walk back to Broad Bay, so don't walk too far.
We ended up doing about 36km in one day, but it saved us from paying $54NZ per night to stay in the two huts. And most importantly, it also saved us 3 days of being on the trail. Also, if you wish to hike the whole circuit, we recommend parking at the Rainbow Reach car park, hiking to the Iris Burn Campsite or even the Hanging Valley emergency shelter, if you go later in the day no one will catch you and it’s an awesome place to stay the night. From here, walk the best section of the track and then down to Broad Bay Campsite. Plan on hitching back to Rainbow Reach car park. You shouldn’t have a problem hitching a ride since so many people access these tracks all day. Also, you won't miss anything but 10kms through bush from Broad Bay to Rainbow Reach.
All in all, we paid $18pp at the Broad Bay Campsite. If we were to pay for the 3 Great Walk Huts we would have paid $54pp/pn, and been on the trail for 4 days. Although this is a long day walk, its on a Great Walk track that is suitable for the elderly and inexperienced hikers. If you are a frequent hiker, this long hike won’t be that difficult, especially since you’ll only be carrying a day bag for 90% of the kms.
Day 2: Lake Marian and Milford Sound- Wake up at Broad Bay, pack your shit up and hit the short 50min track back to the carpark. Hop on the Milford Highway in the car and into the Fiordland National Park. If you need supplies, Te Anu is your last chance. There is actually a lot more to offer in Te Anu than I expected. Grab your supplies and hit the last bit of cell service in town and head to your next stop, Lake Marian. There are plenty of roadside stops along the Milford Highway and each one is a short 5 min walk to a scenic vista or a waterfall, or something amazing.
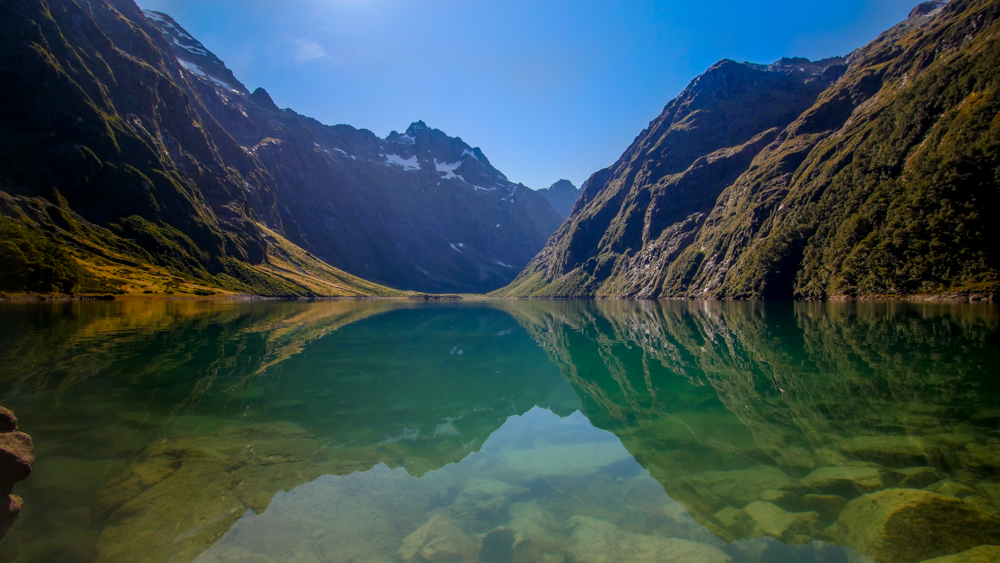
Lake Marian is located on Hollyford Road, its the first stop on the road it will be clearly marked with a classic Green and Yellow DOC sign. The hike to Lake Marian is pretty easy, sometimes steep and root climbing but, takes about an hour to get up there. Lake Marian has to be one of the most amazing alpine lakes I’ve ever seen, especially after only walking for one hour. If you have nice weather, you’ll definitely have to swim in the pristine blue glacier melt water. The hike out of Lake Marian is quick and is about 45min out.
From here, you’ll have to make a decision on where you want to stay for the night. You have already passed the last DOC campsites so if you're more of a rule follower, you’ll have to head back to the campsite. We decided to head to Milford Sound for sunset and astro shots for the night. We ended up sleeping in the Milford Sound car park and had no trouble, they even have nice toilet facilities open 24 hours (with outlets an outlet for charging in the toilets)! We stayed up till about midnight getting photos and making sure a pesky ranger didn't come around to ruin our fun.

Day 3: Milford Sound to Gertrude Saddle - You will definitely want to book ahead to jump on a boat ride on the sound. Since we are on a budget we picked the cheapest option, a $45, 9am cruise with Go Orange, it actually came with a free snack as well. We recommend jumping on a boat because you really can’t grasp the size of Milford until you get out and onto the sound. It was a 2 hour cruise packed with info and peppy tour guides. We really enjoyed it and would recommend it 100%. After the cruise, we had lunch in the car park and fought with sand flies for a few more hours before we packed up and headed to Gertrude Saddle.
On the way to Gertrude you can stop at The Chasm waterfall for a quick 15 min stop over. From here, carry on up the road to the Gertrude Valley car park. We pre-made some snacks before the hike.
The hike is 3.5km to the saddle and worth every step. It’s more of a activity than most tracks as you have to scramble up granite and use a rope to climb some sections. It’s actually a really fun track. The view at the top are some of the best in Fiordland, you can see Milford Sound from the top as you look across massive glacier cut u-shaped valleys. It was by far one of our favorite hikes of our trip. We spent a lot of time up at the top and headed down pretty late in the afternoon. We had initially planed on camping on the saddle, which we wish we had done and highly recommend hauling your gear up there for a cold but unforgettable experience overlooking Fiordland’s best treasure (if the weather permits). We cooked dinner in the car park and ended up sleeping there as well. We saw plenty of campers heading up to the saddle for an overnighter so we figured no one would know if we were in our car or not.

Day 4: Key Summit to the Hollyford Track - We woke up in the Gertrude Valley car park and actually ran into some friends from our travels. They highly recommended heading to Key Summit, and then an overnighter at Hidden Falls Hut on the Hollyford Hut. We took their advice and we were glad we had ran into them because we weren’t sure of what to do with the last beautiful sunny day.
The Key Summit Track starts from the Divide Car park just above Hollyford Road. The track starts along the Routeburn Track and is a Great Walk. So, the trail is a pretty moderate to easy climb to the summit. It takes about 3 hours, round trip, with stopping and hanging out. Once you reach Key Summit, the hike isn't over. Pass all the people who think they are done and follow the track that leads up the ridge to the real summit where you will get an amazing view of Lake Marian and the surrounding peaks. This track really surprised us. Once we reached the false Key Summit, we weren't that impressed until we saw a trail out the back that no one was taking. It’s an easy walk up a ridge to a far superior view of the area.
After we headed down the track, we packed up our bags once again and headed for the Hollyford Track just below us. The trail starts at the end of Hollyford road about 10 min down a dirt road. This easy flat track crosses 15 Bridges 5 Waterfalls and 2 Boardwalks through amazing temperate rainforest for about 2.5 hours. We really wanted to walk the Milford Track but A: Couldn’t afford it and B: Couldn't book it. However, we feel the Hollyford track is a great substitute to the Milford track. At the end of the 2.5 hour easy track, you’ll find yourself at the very nice serviced Hidden Falls Track. The hut is cost $15. So, a green serviced hut pass or a backcountry hut pass covers the cost. We wished we had more time to continue on this track to a few more of the huts in this area, as they are very well kept and in amazing shape and lead all the way to the Tasman Sea and back. We think that the DOC thought this trail would be more popular but, we ended up having the entire hut to ourselves and it was amazing.

Day 5: Hidden Falls Hut to Te Anu - After a nice night at the Hidden Falls Hut you can either continue on the Hollyford Track our head back to the car park. We were completely out of supplies so we opted to head back to the car park and back to Te Anu to get some much needed groceries to continue our journey. The Hollyford Track looks like an good hike just to do a few easy nights out in the Bush along the pristine Hollyford river and looks like it has some amazing fishing opportunities.


Featured


Angelus Hut - Nelson Lakes National Park
Our first experience on the South Island of New Zealand was exactly what we were looking for, dramatic peaks and amazing scenery. What we didn't know was we would meet some of the most amazing people we've come across on our New Zealand travels.
We arrived late to the Nelson Lakes visitors center around 2:30 we checked out some options for hiking to some basic huts to get familiar with the NZ hut system. Luckily there was a cancellation at Angelus Hut a very popular serviced hut which we wanted to originally hike to but it was booked out thanks to the crazy NZ busy season. The ladies at the visitor center booked us in and we were on our way.
We started at the Mount Roberts car park and decided to approach the hut via the 13km Robert Ridge track. Lucky for us it was an amazing day and even though it is not an easy hike if the weather is good we highly recommend the ridge. After about 4 1/2 hours of non stop hiking and scrambling over ridges and rock slides we finally reached the majestic Angelus Hut. It was quite the sight after a late start to know that we would have made it before sunset.
We got the the hut cooked dinner had a chat with a few campers that were up late then we passed out for the night. The next morning brought with it some interesting weather with low visability so motivation was at an all time low to start on the journey to the Speargrass hut which was our next planned destination. But luck was on our side, the warden had let us know around noon that there were cancelations so we booked another night.
We had a relaxing day and met some of the most amazing people that we actually ended up spending a week with in Christchurch after the hike. We spent the whole day talking with our new friends and the day flew by. The next morning we headed out back to the carpark.
The weather was amazing on our return hike via the Speargrass but after doing this hike if you're not staying at the Speargrass Hut, I would recommend taking Roberts Ridge back to the car park. All in all we recommend this track and hut 10/10 and we felt that it was one of the South Islands hidden gems.
There are also plenty of other awesome huts and hikes in this area. You could easily spend days out here.


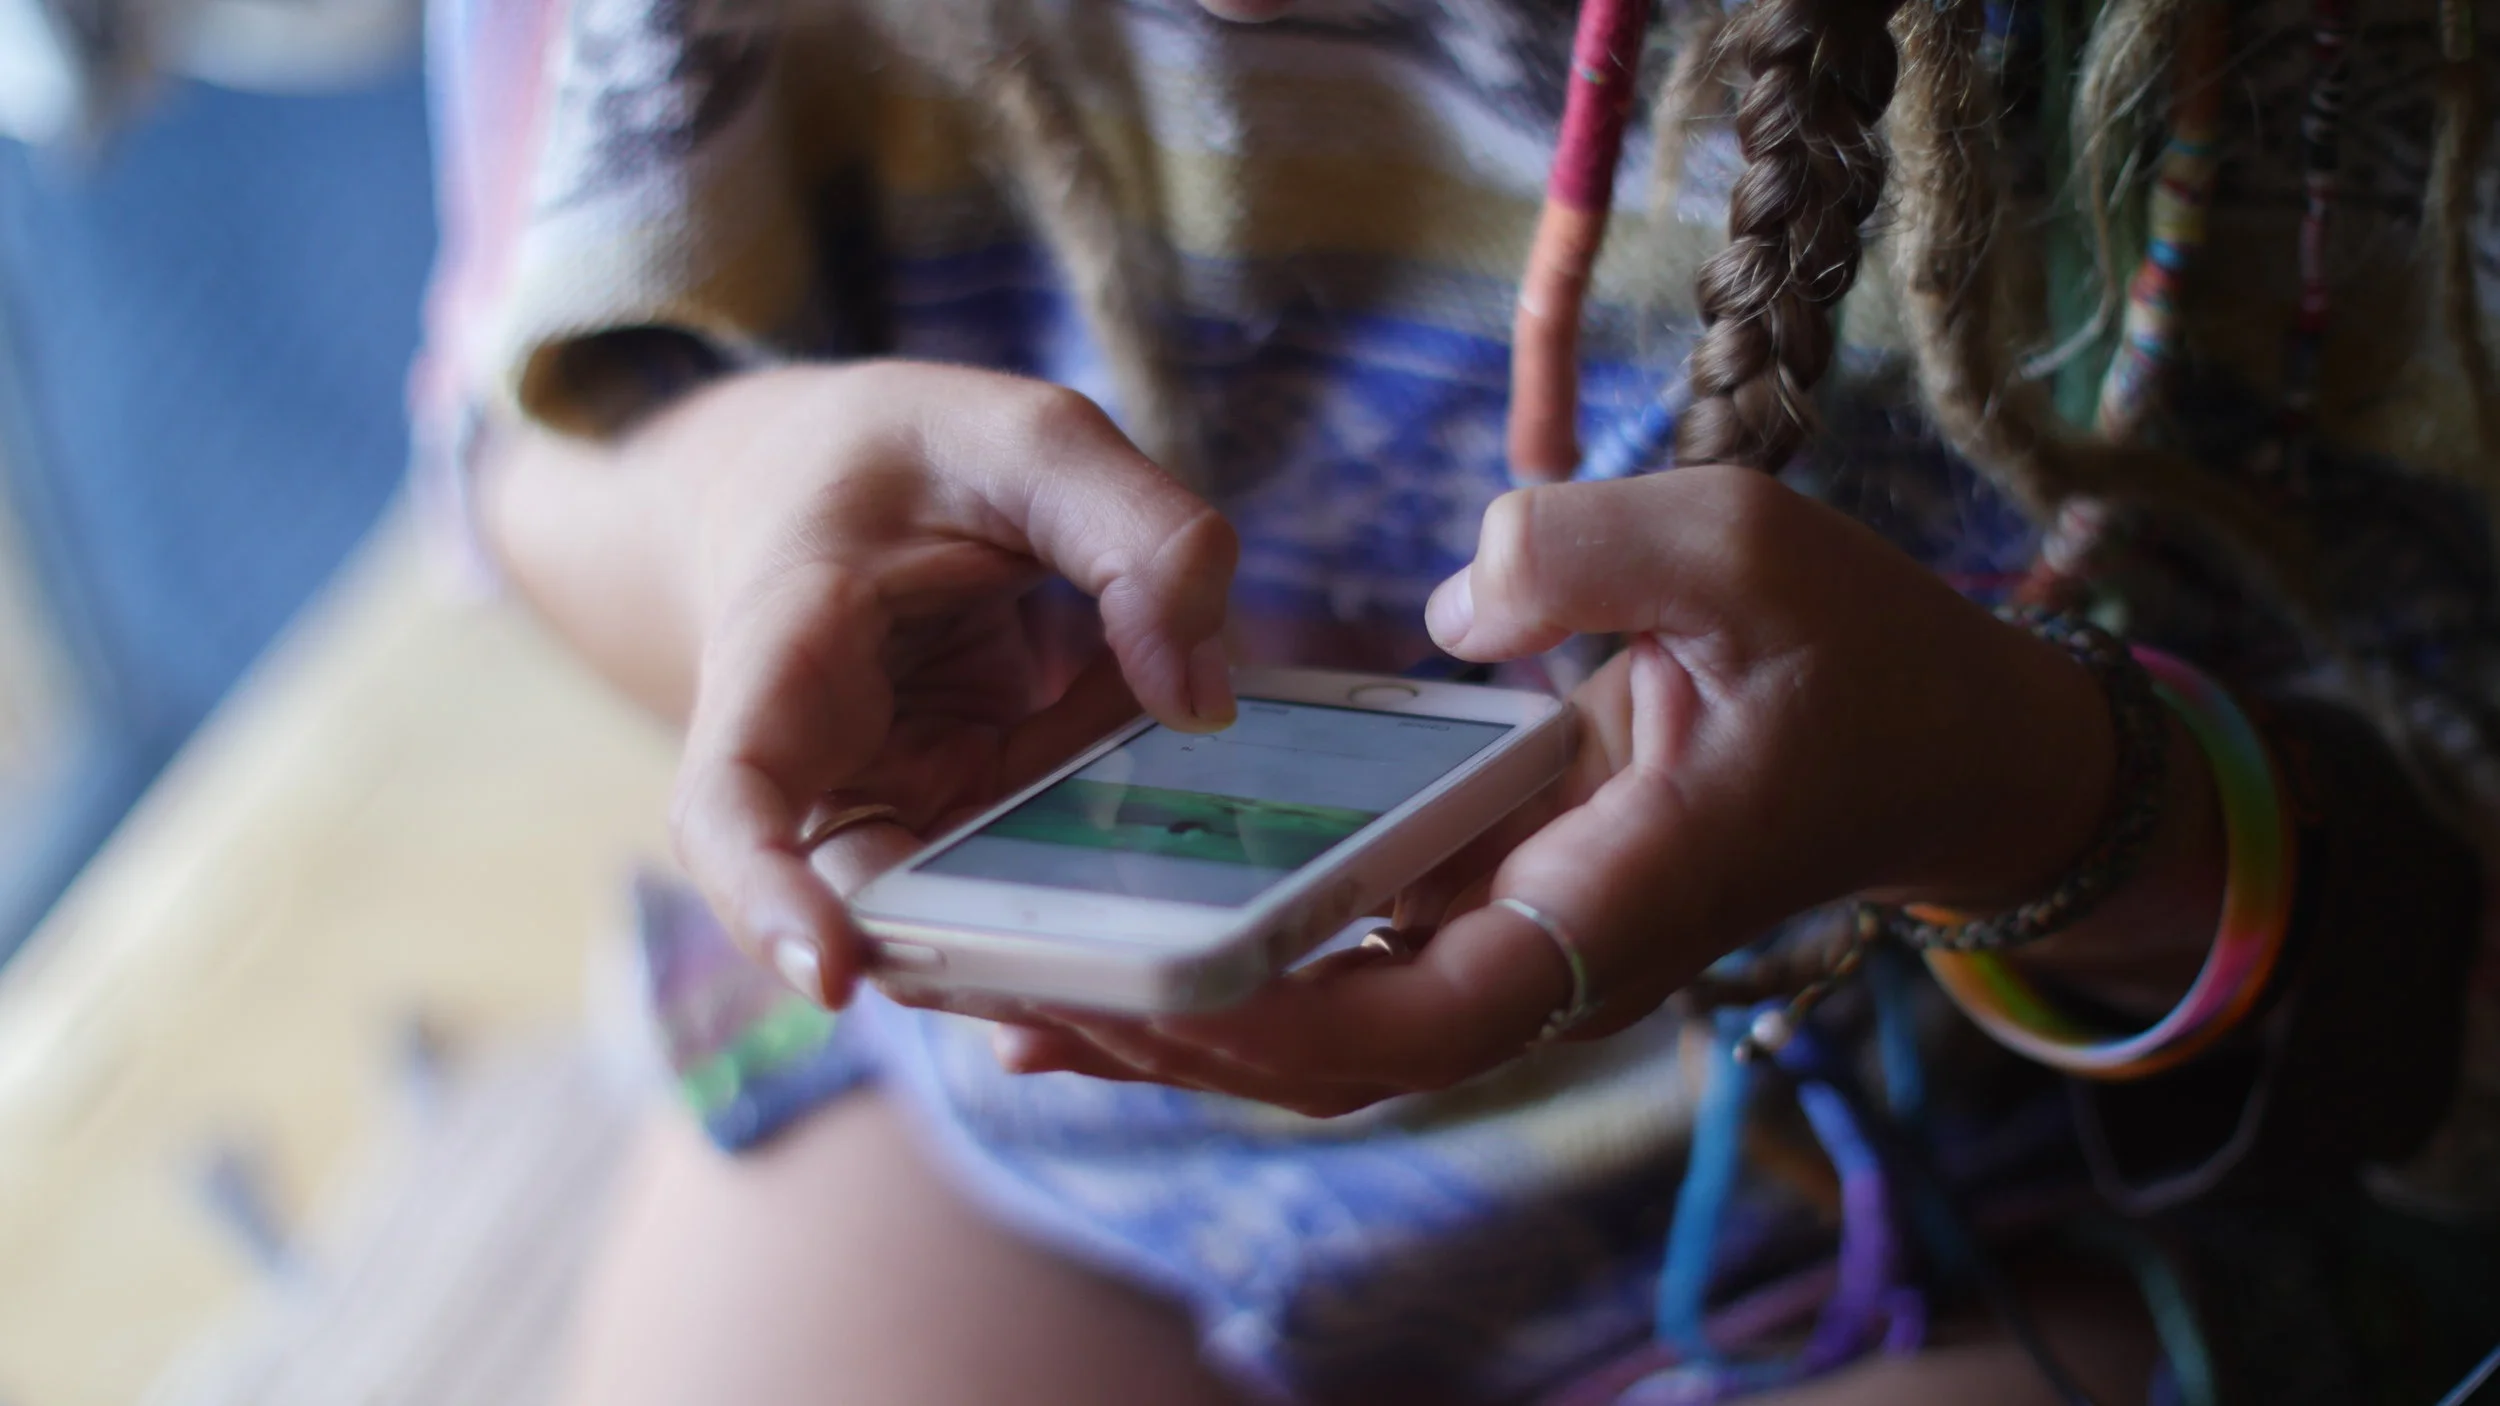
Best Cell phone service options in New Zealand for Travelers
Cell Phone Service options in New Zealand
There are a couple to choose from, but to preface this section, I would check with your provider in your home country. We had our American T-Mobile phones in Australia and it would roam to any tower and was actually more reliable than our Oz phone. Without our T-mobile phones, we would have been stranded in Tasmania the entire time as our Vodaphone Oz phone didn't work anywhere, but Hobart. For our T-mobile plans we pay $10 a month for unlimited data (at 2g speeds) and unlimited text pretty much anywhere abroad. That means we could FaceTime, Face Time voice, and Facebook Messenger call, Instagram, Facebook, etc. as much as we wanted.
Although it is convenient to buy SIM cards at the Airport, they only had two brands, Vodaphone and Spark, available and I am pretty sure they do not offer the full packages they do in their stores. But if you go to any information center, you can usually pick up a 2 degrees SIM card for free. They roam seamlessly between their towers and Vodaphone towers.
For our first round of phone plans when entering NZ, we took on the convenience of buying the Spark Traveller's plan at the airport. Who knows why, I think it was because we wanted to have a contact number for all the vans we were sussing out. But they got us and once again we found out that our American phone service was more reliable purely because it connected to any tower it could (usually Vodaphone).
Coming from America, we are quite spoiled with our Data plans and have noticed that data plans abroad can be a joke by comparison. With hardly as many cafes offering free wi-fi, I can eat thru the max 3gb data in a couple days. Here in NZ to top up on data, it is $50 for another 3gb. Steep as.
Phone Companies in NZ:
Vodaphone NZ
Vodaphone seems to have some of the best coverage. When asking our family of four what service they used in their travels, they said they to also counted on their Canadian plans still rolling from their most recent van visit to Alaska, Canada and the USA. They said 90% of the time they always had Vodaphone service on their Canadian phones.
2degrees
2 degrees seemed to have the cheapest bundle with the most data and unlimited calls to numerous countries abroad. The prices on bundles were more along the lines of the Australian prepaid, which was reasonable. They also have a data hunting app. Where you can pick up mb or gb's of data just around the area (If you are thinking this sounds like Pokémon Go, it kinda is) This data also rolls over to the next month if it goes unused. This is the service we chose in the long run.
Spark
Spark doesn't even care if you are 5 years old asking for a SIM card for your mom's iPad. If your have a visa or other credit card, they will give it to you without taking down any personal information. Very different experience from Australia. They need to see a license, passport, or if you do it over the phone, they run your name thru some government website to approve your visa status. The max amount of data they offered was 3gb, but they had wifi hot-spots available to cell phone customers whenever they were in range. The wi-fi hot spot was reminiscent of Australia's Telstra service (and they had the best most convenient hot spots in Oz). Anyways, I think that is why we hopped on Spark in the beginning. Apparently, connecting to the wi-fi didn't require an app. When your phone was in range it was just supposed to connect and override using the data. We connected to the Wifi via settings on the phone and it sent our phone a code to punch in...then, we were able to connect and it remained connected every time we were in range! I noticed the code worked for my laptop connection as well, which was quite handy. When we ran out of our 3gb data within the first week, we kinda dumped topping up our Spark and used our trusty T-mobile to navigate, but we still hit up those wi-if spots.
The Warehouse Phone Plans
Although we have not looked into this, apparently, this is one of the best deals around. They have "pick & go" options where you pay $4 per 4 hours talk, $4 for unlimited text, and $4 per GB. To top up on your data, just pay another $4 per GB or talk. It sounds simple and some friends we met on a hike have one Spark phone and one Wharehouse phone. They have the spark phone strictly for the hot spots and Wharehouse to have cheap data. Sounds like they are doing it right.