2009 Subaru Camper Blueprints How to Build a Bed in Your Subaru Outback

Subaru Outback Camper

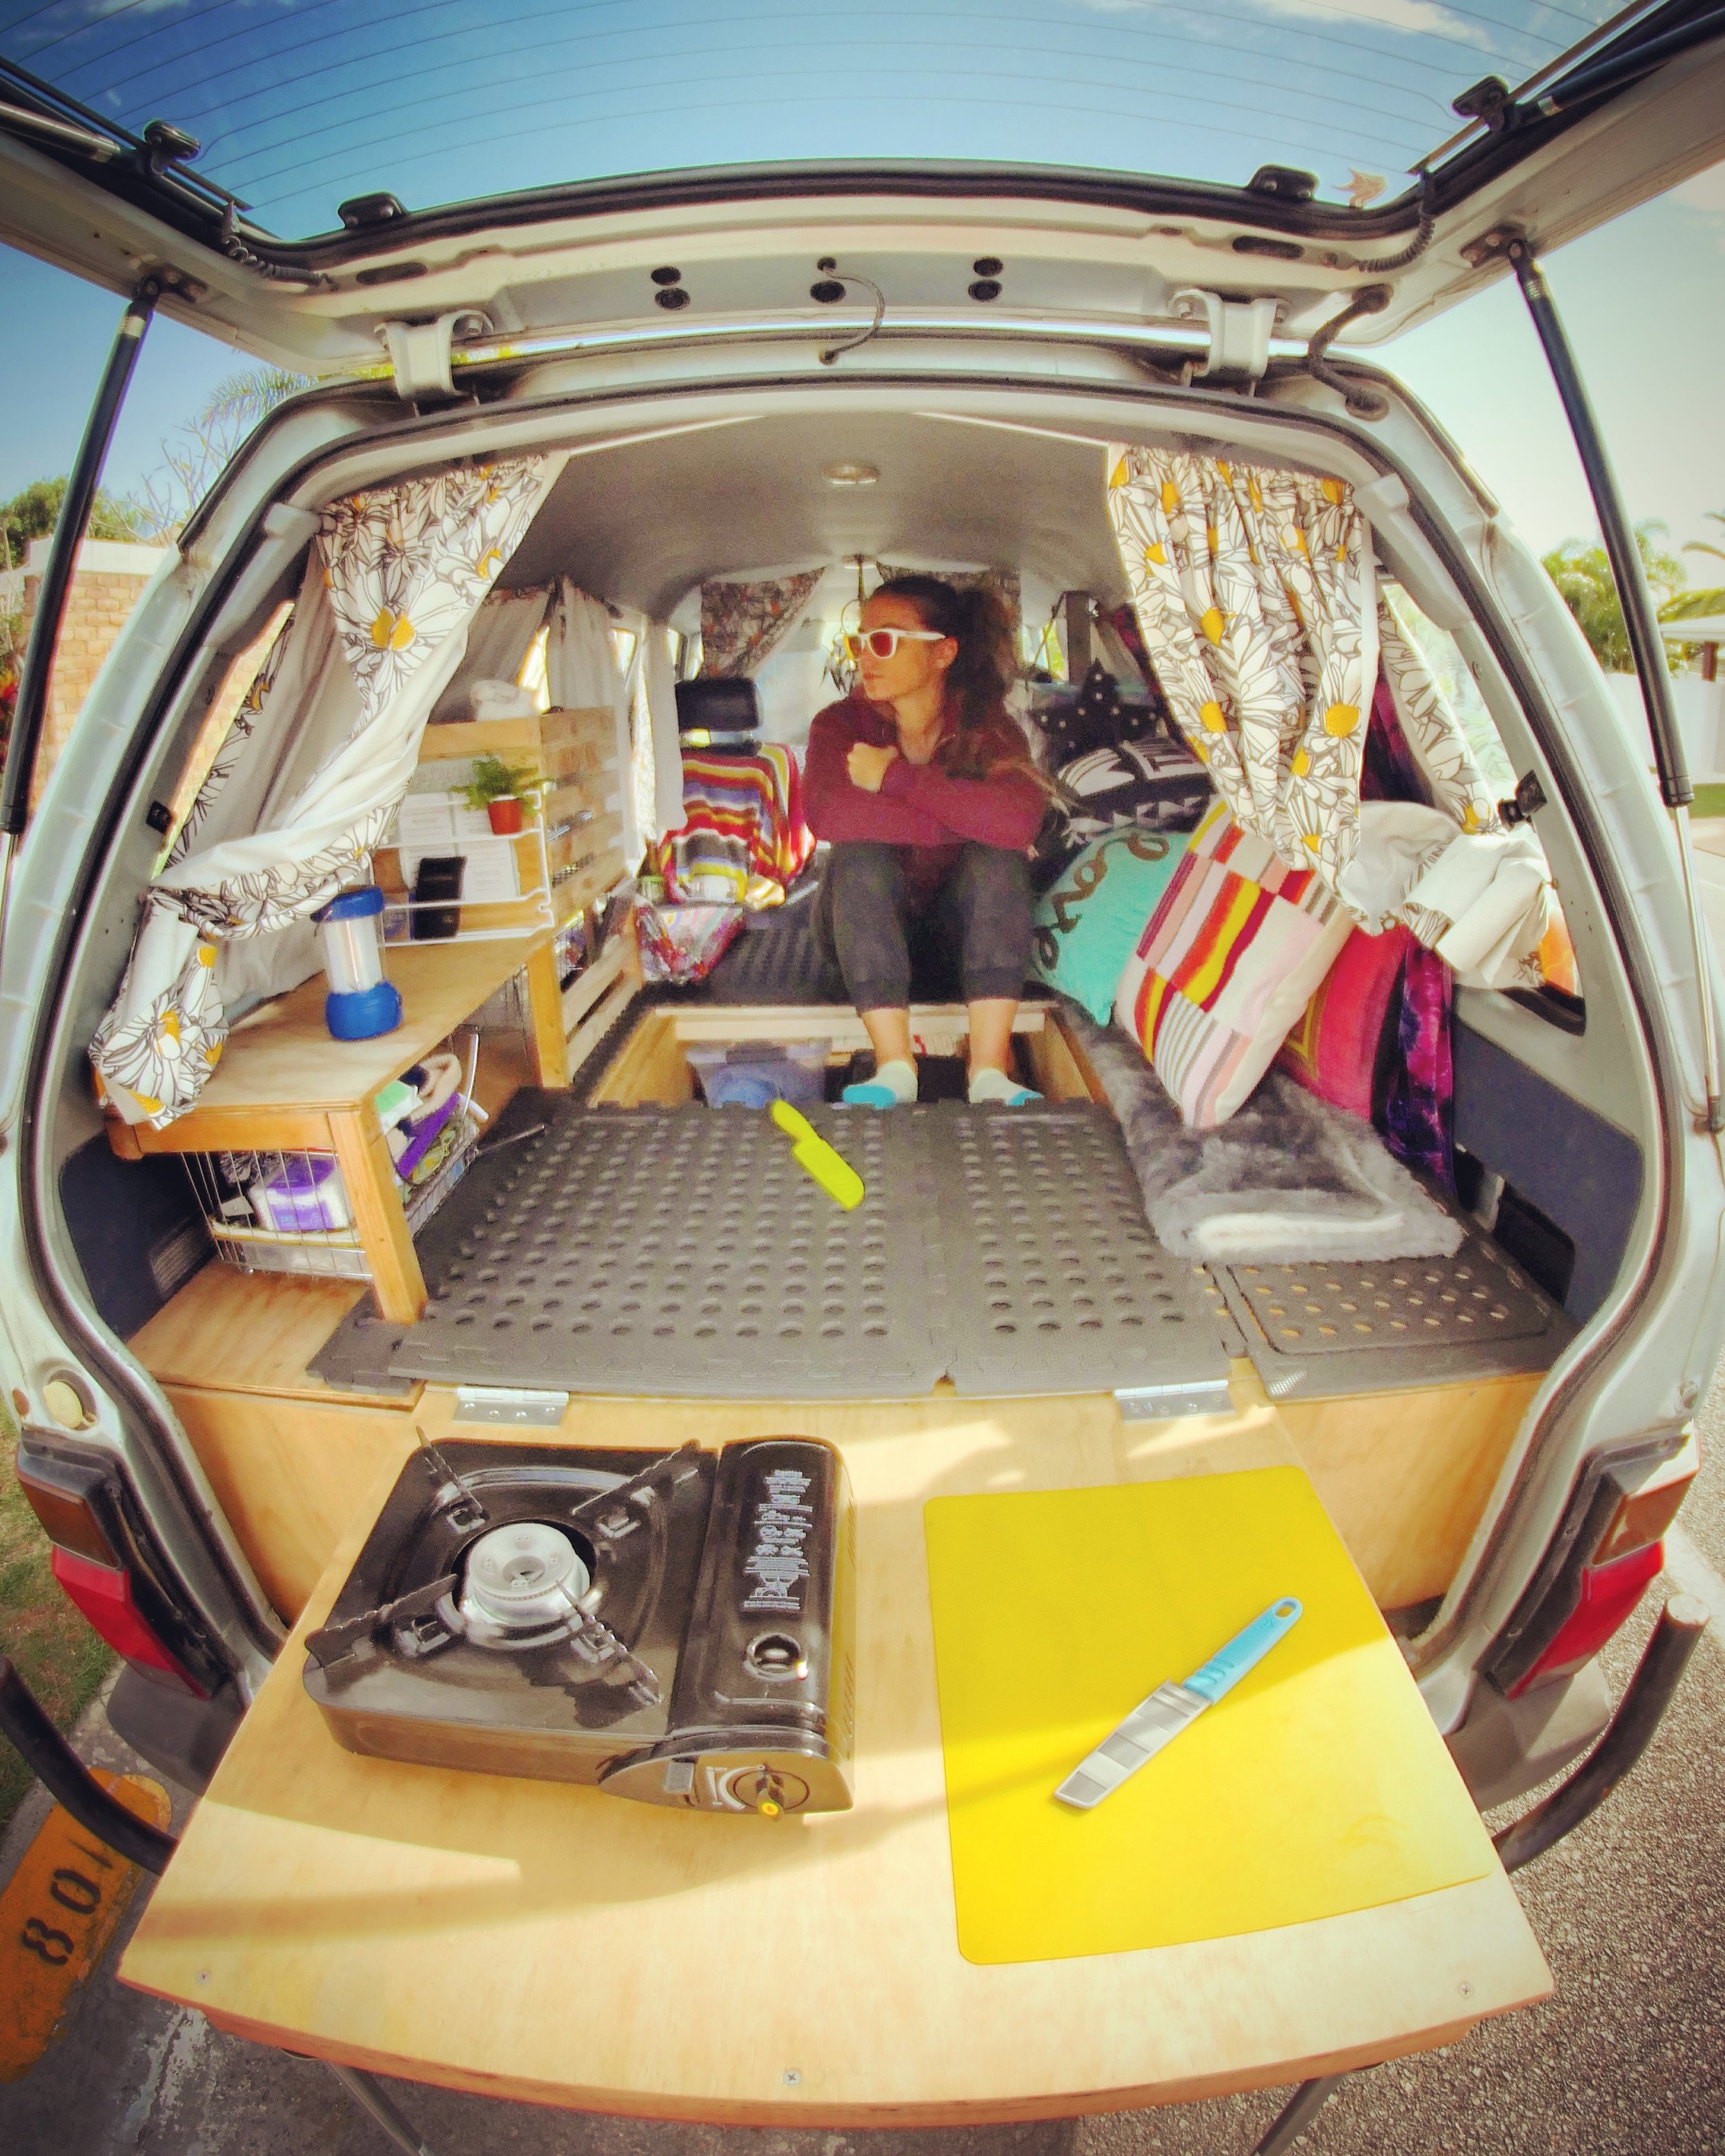
We returned to the States and were ready to get our current vehicle ready for some summer road trips.  We have a 2009 Subaru Outback that we added an easily removable sleeping platform, as well as, some other accessories to make life on the road more comfortable.

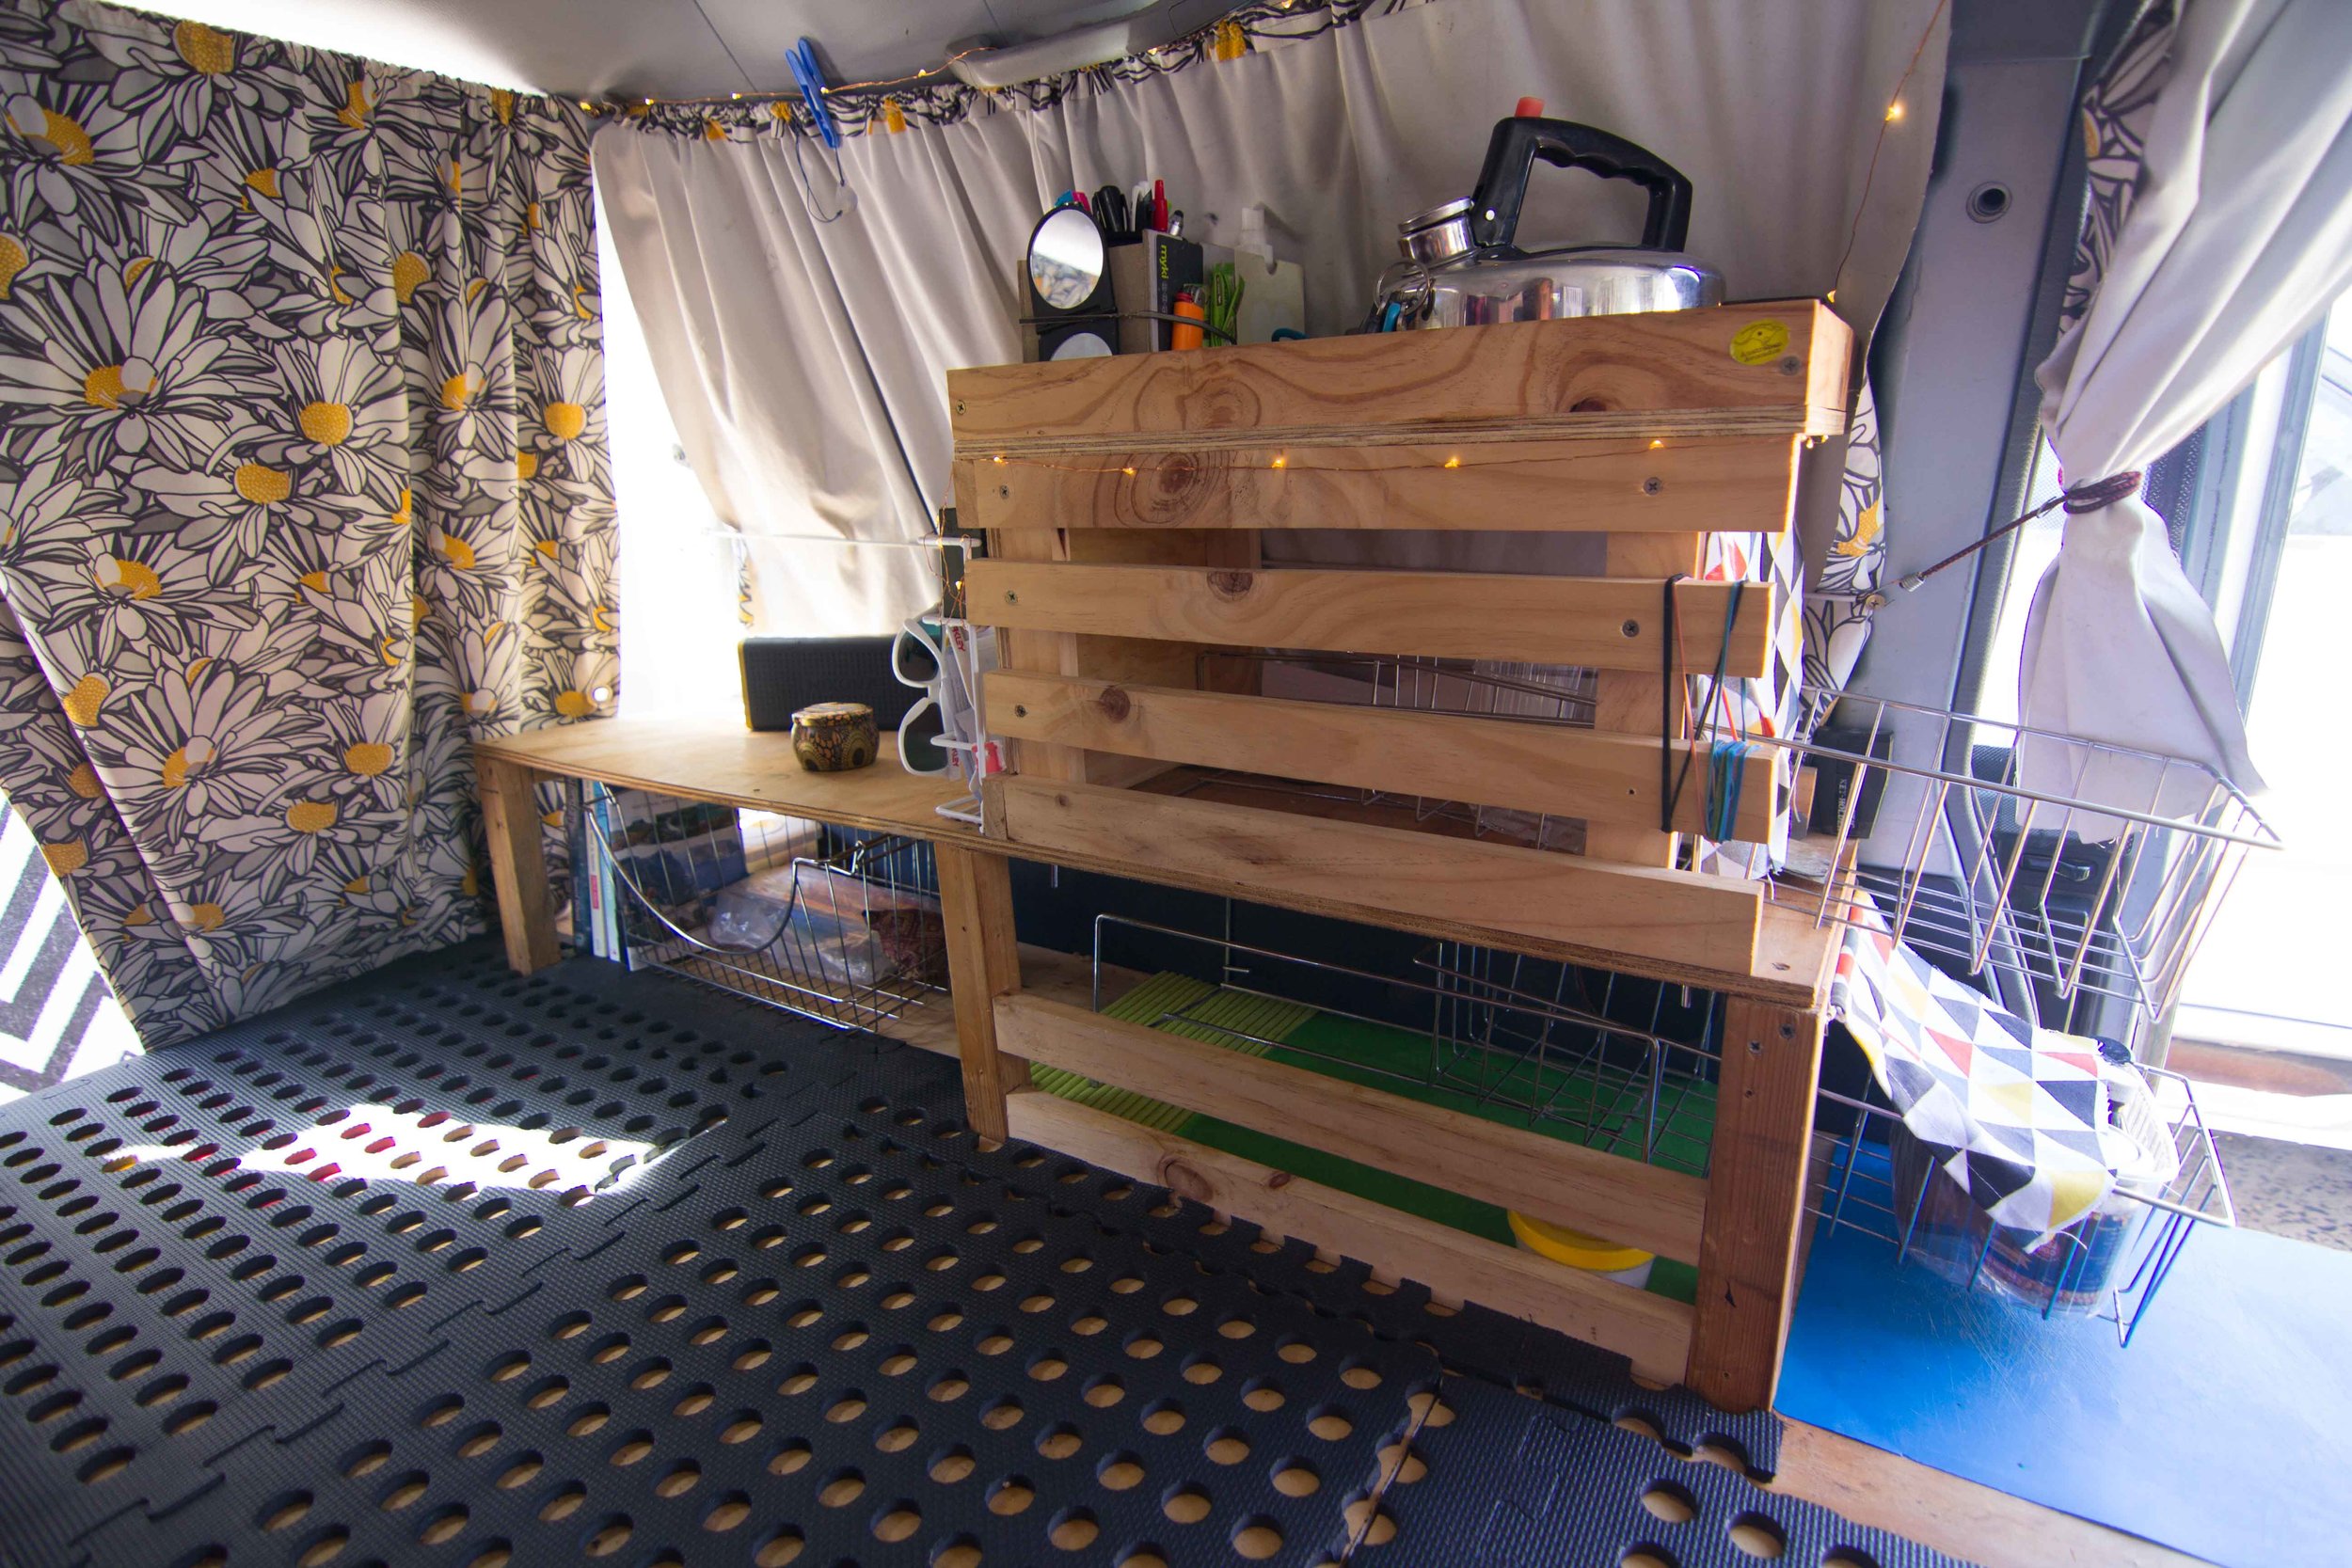
The first order of business was the sleeping platform. I got the design from multiple internet sites and basically added a few of my own touches.  I bought all the equipment from Home Depot. I used door hinges for the fold out head rest, 1/4 plywood for the platform and sides, 1x1 planks for support, and some very cheap carpet.  I have a video of the set up below.  I had no idea building the platform would actually create so much storage.  It adds two compartments in the back.  In one of the compartments, I added a Tupperware that fits perfectly. The other is a great stash spot for expensive items.  I even had my car broken into with some of the really expensive items inside and they were missed due to being hidden under the back storage.  The bed also gives you a little storage compartment underneath, where the seats fold down. So, there is actually some organization to car camping, finally! 

CHECK OUT THE BLUEPRINTS HERE!!!! Enter Your Email for a free download!

CHECK OUT THE BLUEPRINTS HERE!!!! Enter Your Email for a free download!

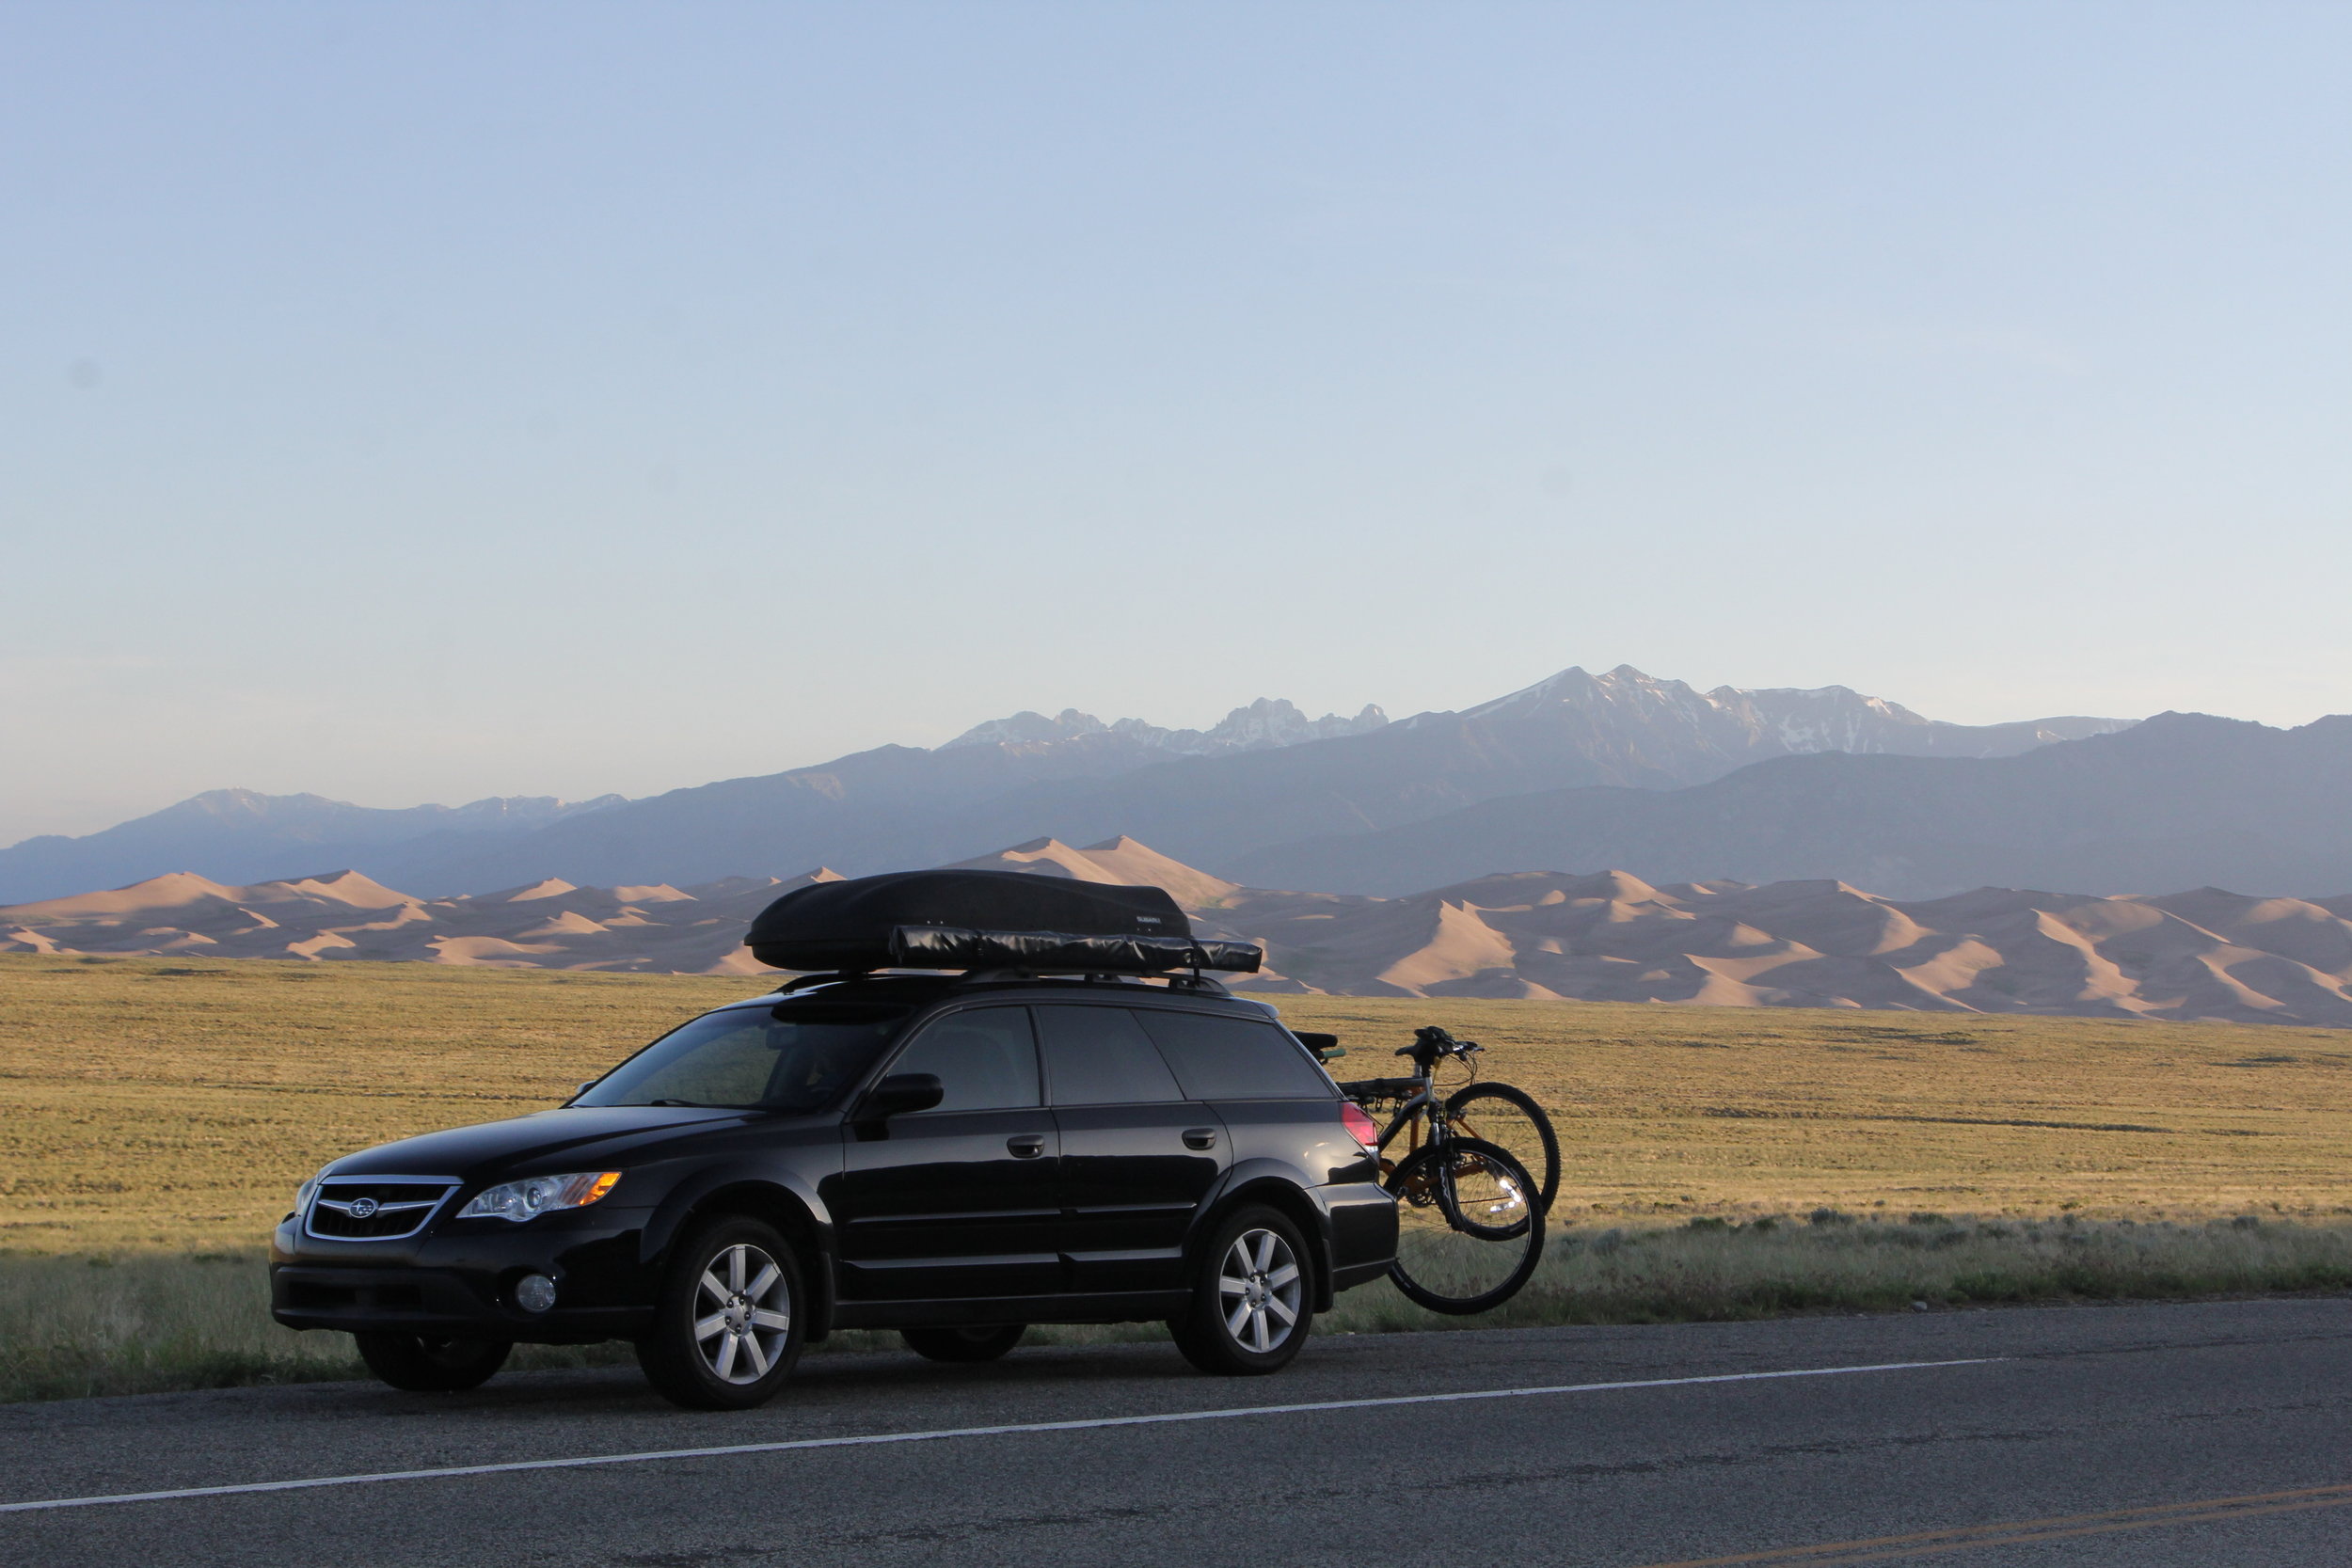
In order to be comfortable in the Camparu, you’ll need overhead storage.  Luckily, I already own a massive Thule cargo box that holds my stove, chairs, tables, tarps, tools, gas, wood, and just about anything you don't want in the car.  I highly recommend a roof box, you can put so much in them and they are easy to access on lower vehicles.  I've put firewood, construction material, trash, all kinds of shit I don't ever want on the inside of my car in that box.  

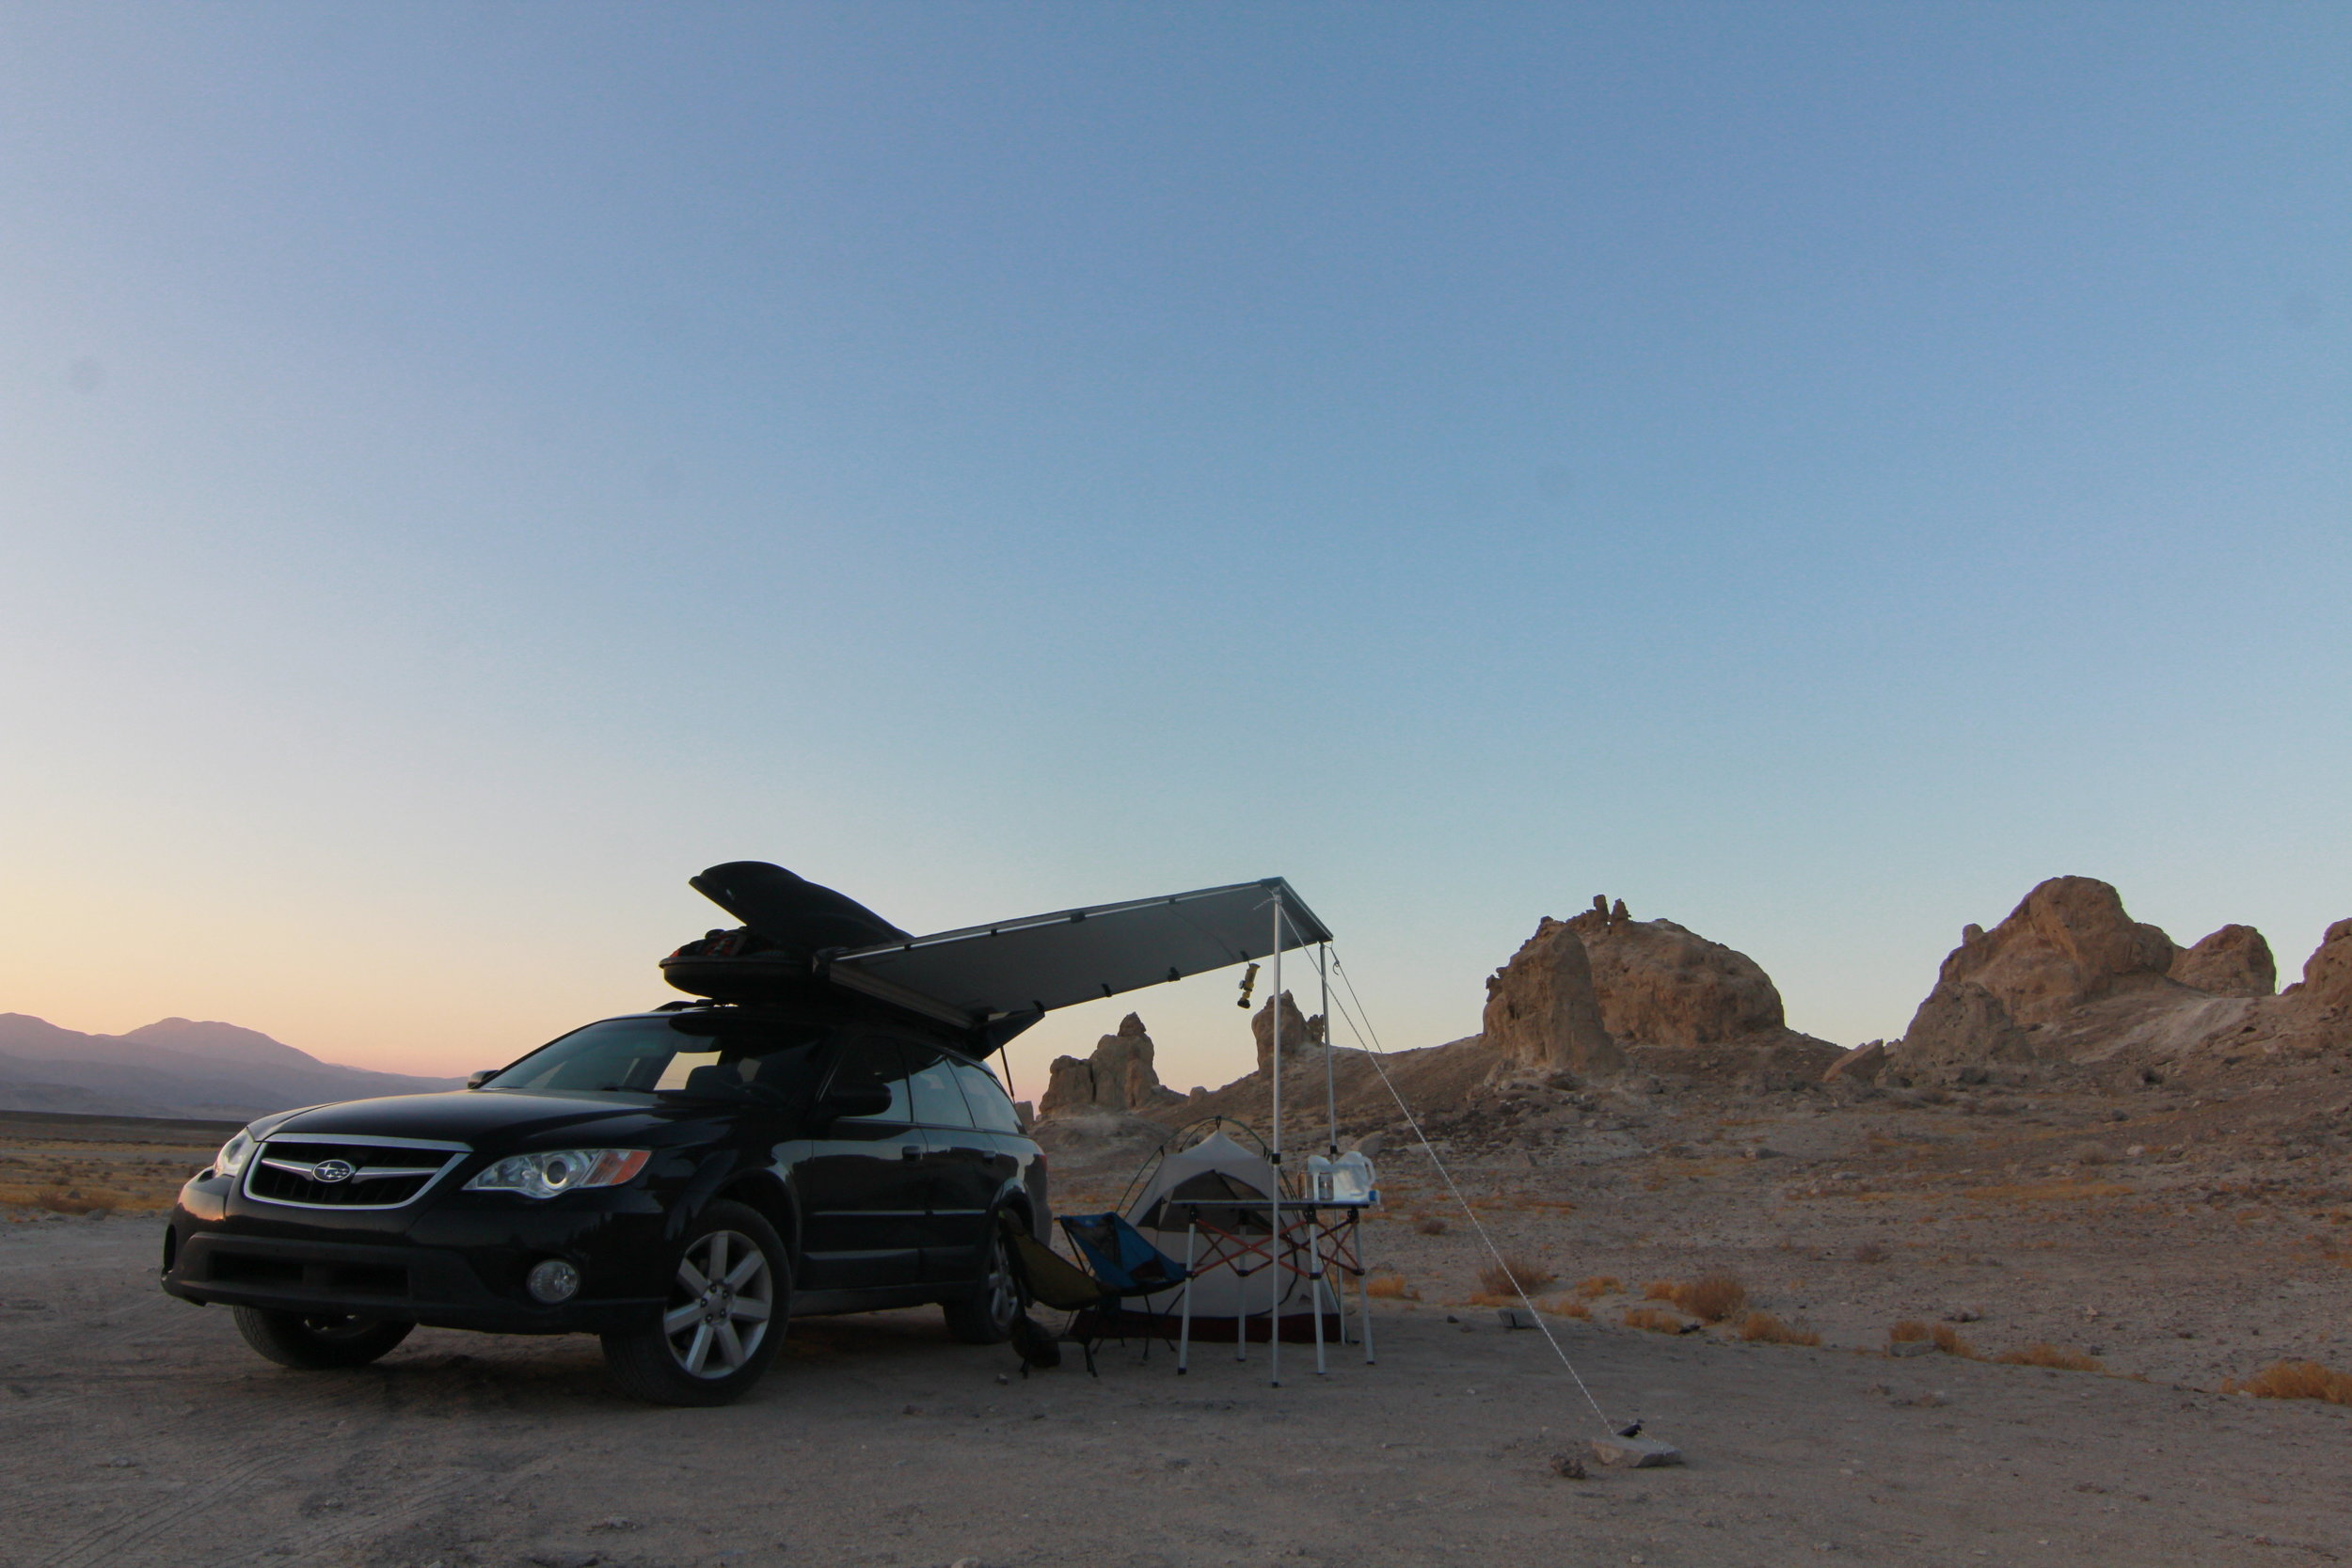
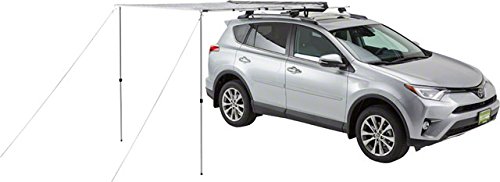
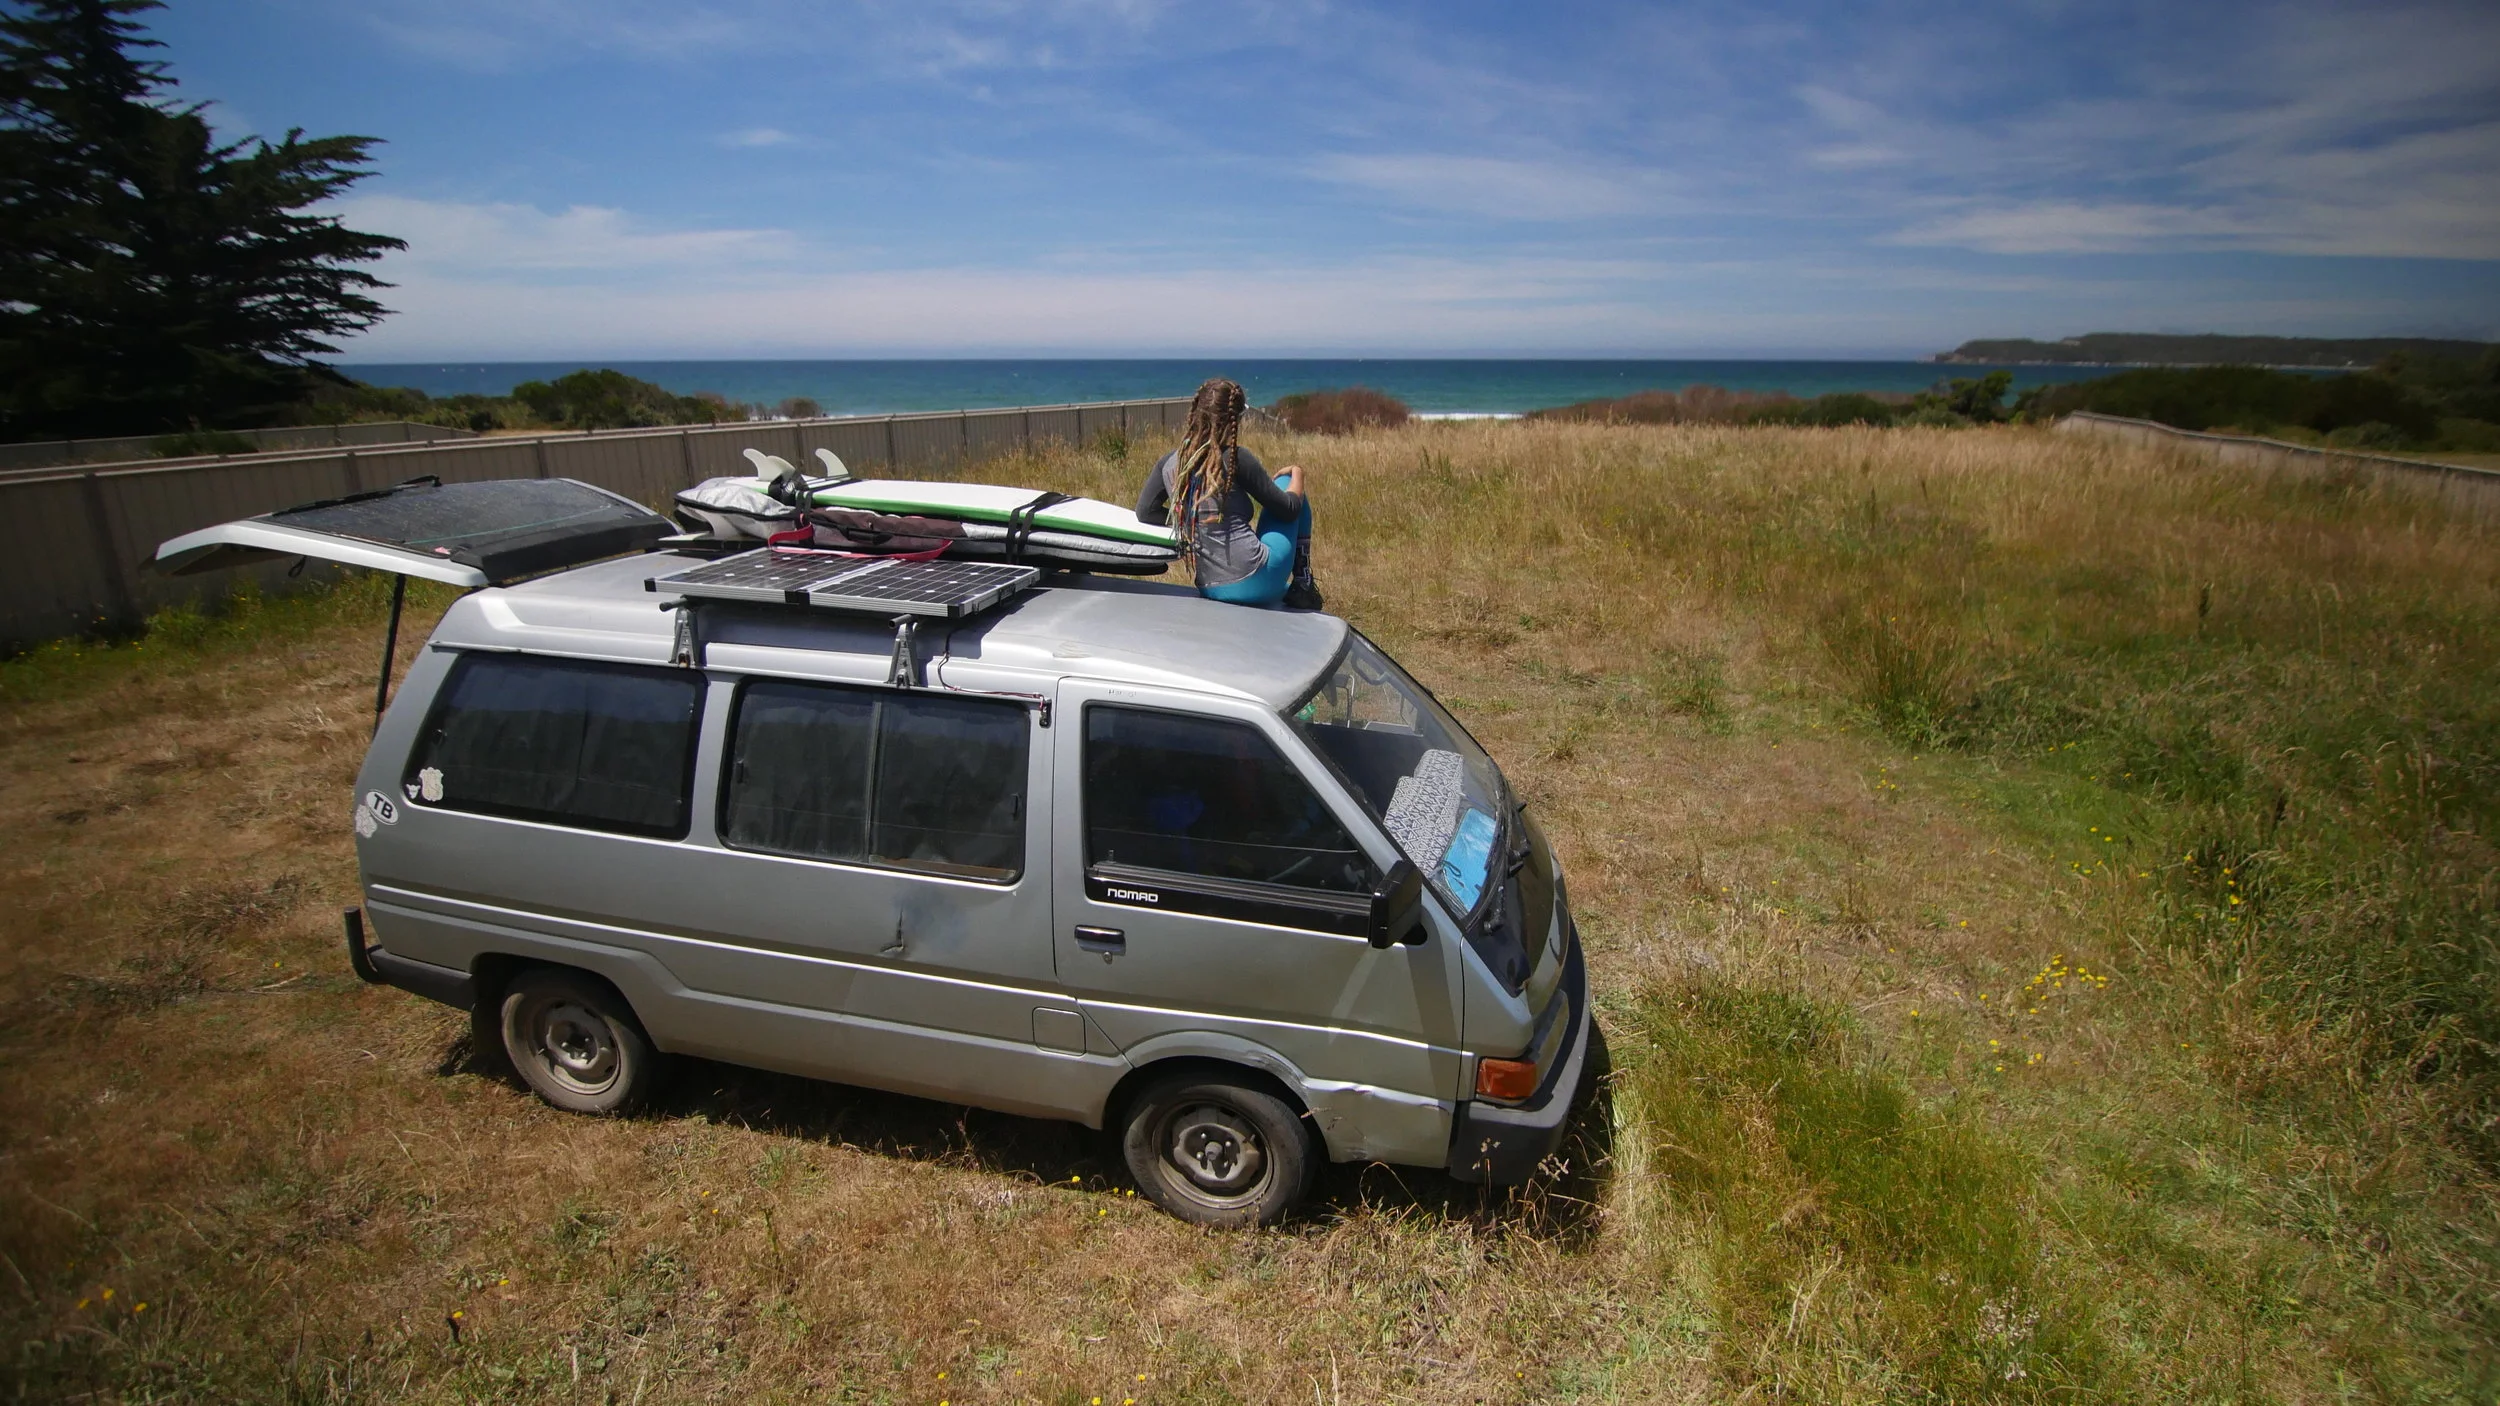
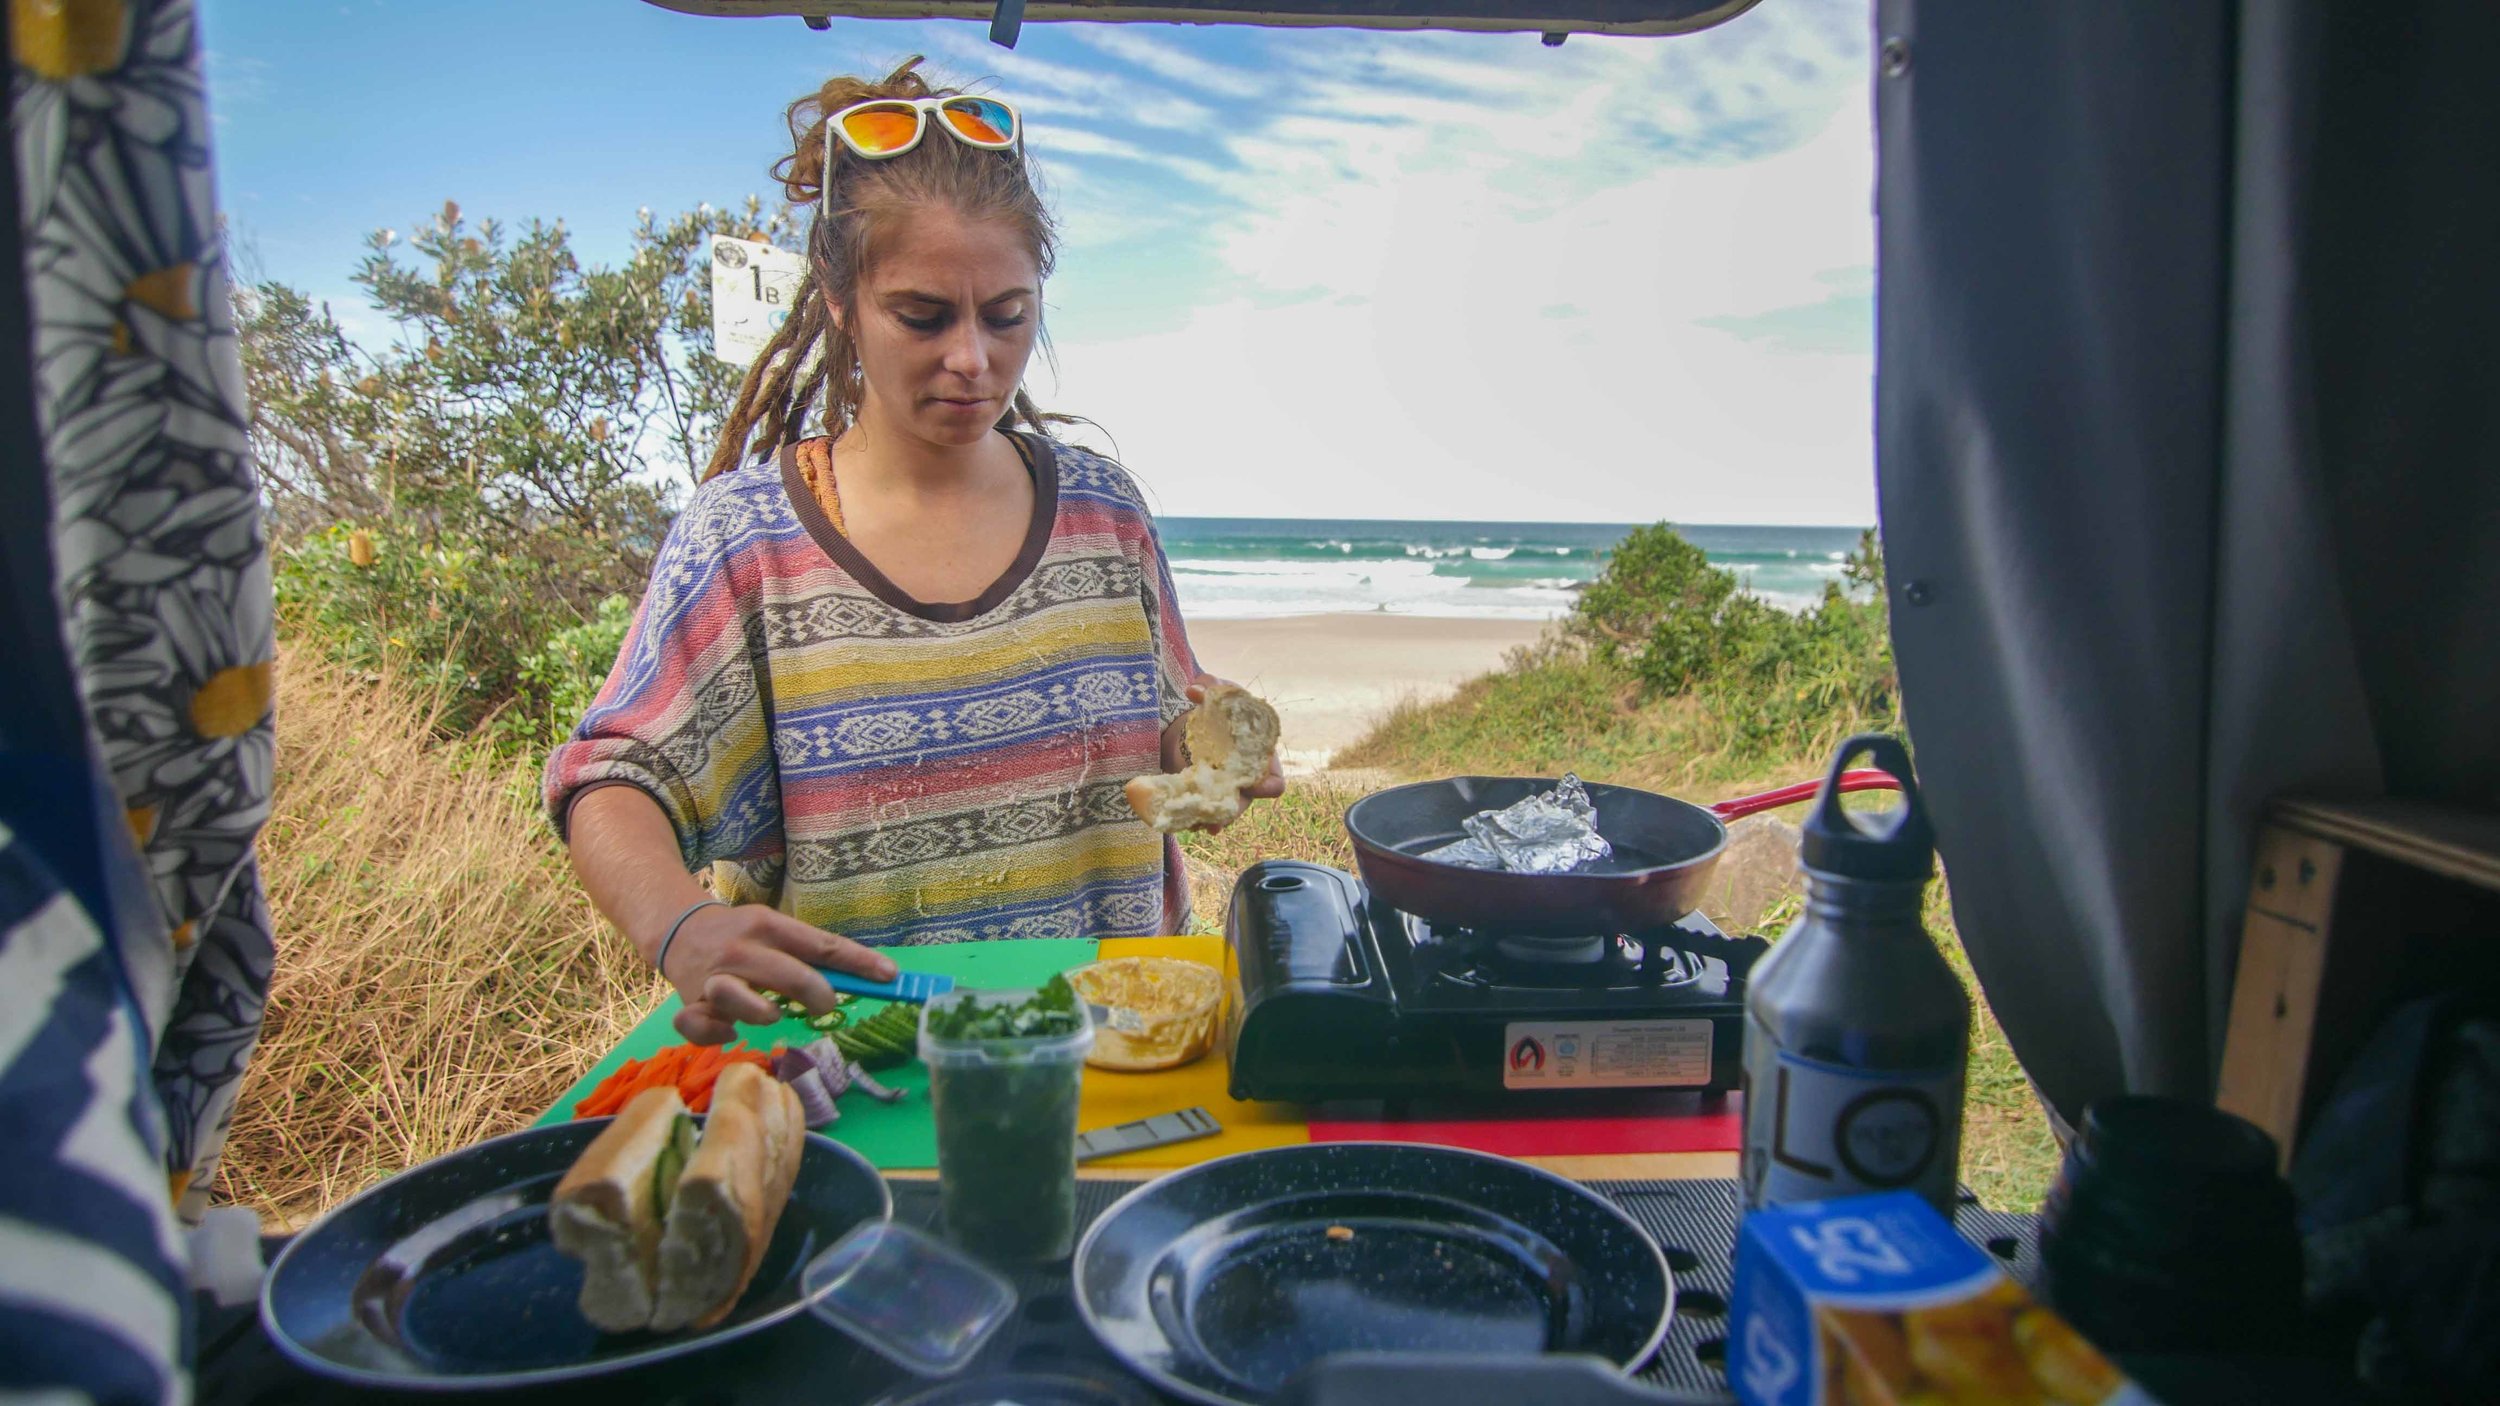
I threw on an old bike rack I found sitting around my parent’s house for the mountain bikes. I also added a Thule Slim Shady awning that I got at REI.  When we were in Australia, we saw thousands of rigs with awnings.  We saw what a benefit they add to the outside of your vehicle especially when you’re a small vehicle and need a place to chill in the shade.  We’ve already used it quite a bit and it has kept us dry and comfortable outside during rain storms, hot days, and rainy nights.  It's awesome to have the awning on the Subaru because it basically gives you a patio to chill on out front.  Another thing we just recently discovered is wrapping the lower part with tarp to create walls, while cooking makes cooking easy in wind and cold.  

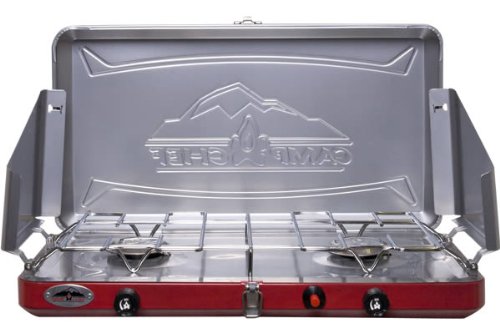
We also know that we will eventually be buying a bigger van and will be utilizing this stuff in there as well, so we bought all the car camping necessities at REI on my new REI credit card (gotta rack up those dividends) during their Memorial Day sale.  We bought the smallest most compact items that we felt were the best quality.  And we've had zero complaints.

1 x Camp Chef Everest 2 Burner Stove

1 x REI Co-op Camp Roll Table 

2 x REI Co-op flexlite chairs

1 x GSI Outdoors folding water cube 5.3g

2 x Klymit Static V Sleeping Pads

We also scored an old school 12v Subaru Outback Thermoelectric Warmer/Cooler (kinda like this one) at a garage sale for $20 and bought a cheap power inverter at Home Depot to power regular AC while we drive. 

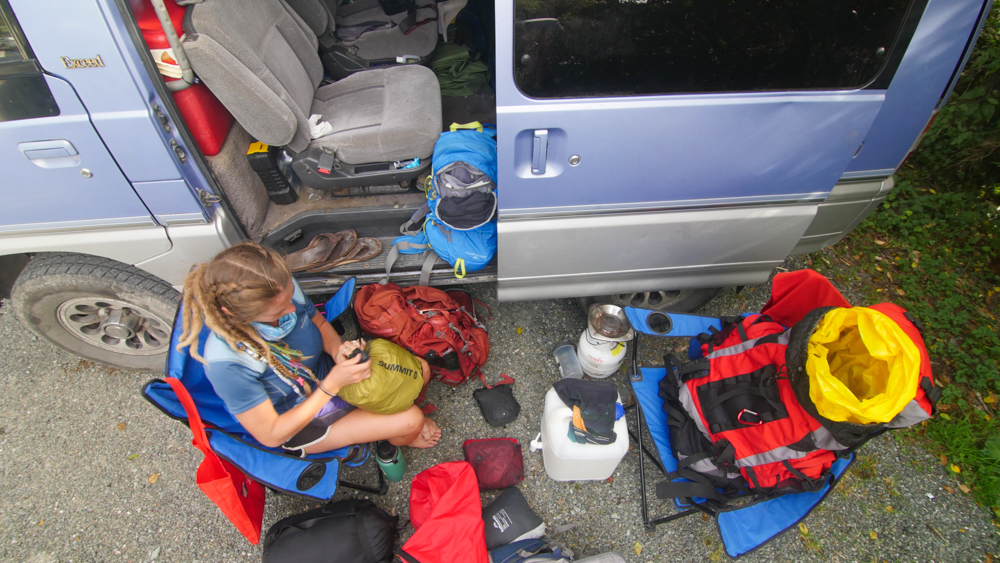
I will admit traveling out of the Subaru is tough.  Most of the time all of your shit is crammed in it and there is no space.  A few times we have set our tent up just to put all our gear inside it so we could sleep in the car on a cold night.  We had it very packed up for our two month long trip to California and Burningman. It made it difficult but, normally we would never have near as much gear.  When we travel light, it's great. You know where everything is and everything has a place.  We are really enjoying the gas mileage and the versatility of the Outback. We have taken it on so many dirt roads and have depended on the AWD so many times.  The Outback really is an amazing vehicle and it's been a fun, but challenging experience traveling out of such a small car, but it makes us very eager to get into a larger vehicle. 

Van #2 Cruz - 1991 Mitsubishi Delica Camper Van Converison

Mitsubishi Delica 4x4 Campervan

Cruz was a wild three month ride in New Zealand.  We bought him the first night we landed in Auckland, in the pouring rain.  We found him on backpackersforum.co.nz a few minutes after it was posted.  We ended up buying Cruz for $3500 NZD. 

He was a 1991 Mitsubishi Delica 4x4, 4 cylinder turbo-diesel.  The Delica is such a bad ass rig.  However, we found it very crammed on the inside and had a very awkward interior setup. It's only saving grace are the very maneuverable back seats.  Both fortunately (money saving wise)  and unfortunately (design wise), the van was already built out.  Both back swivel seats were left installed and the bed folded on top of them when they were reversed and pushed to the front.  There was little room underneath the bed for storage, but other than that literally no other options for storage.  It came with a pretty awesome cooker and a shitty cooler and really shitty chairs.  

We had a very small budget for our vehicle and already exceeded it with our van purchase so re-doing the interior was out of the question.  So, we headed to the Mecca of cheap things anywhere in NZ, K-Mart.  We bought storage shelves and containers for the backend and a few random baskets for it.  After our last van, Damon, this was a major step down of functionality and design, but we figured it's only 3 months; so, we could handle having a terrible build out and only basic necessities, while basically living out of our backpacks.  The only power we had was our beloved Anker 21W foldout solar panel and a 26800mAh Ravpower portable power pack.  So, yes, we were those grungy travelers with power strips out charging multiple devices.  

Lucky for us, NZ is pretty chilly even in the summer. So, we never had to use a cooler or deal with ice.  We would just store everything under the bed where it stayed nice and chilled.  We used our cooler to store bread products.  We had to buy containers for under-bed food storage, after we discovered that we had picked up a mouse along our travels. We finally caught our tiny furry roommate, Arthur, towards the end of our trip.  

Cruz ended up being a pretty awesome van.  Other than one major break down involving the starter motor, which had ground out the ring gear. That caused some transmission issues and ran about $1600nz to get everything taken care of.  Other than that, it ran like a champion, especially after the repair.   

Easily the best things on the Delica are the 4x4 and ground clearance.    We now had the freedom to go on the beach, ford rivers, and climb to secluded camp sites.  If we had the opportunity to buy a Delica in the US for what I paid, I would definitely snag one. However, they are rare and expensive.  We figured, if you were a solo traveler and were able to take out one seat and not have the folding bed, add some cabinetry to one side, then, you would be set.  We found it very crammed in the van all the time.  If it wasn't for the seats to sit normal an upright, I would have lost it in that small space.  

Ideally, this van would be amazing to build out for road tips and surf trips but, living in it full time wasn’t ideal.  It’s easily one of the most versatile mini vans on the planet, and I’ve seen some amazing Delica set ups on line but I wouldn't live out of one for the long term.  

5 Tips on how to free camp anywhere and never get a ticket

We've all seen the glamorous pics of vans parked in epic locations overlooking an amazing beach or a serene landscape.  While staying overnight in a remote location is very possible in your van, sometimes you have to force an illegal camp in unfriendly areas.  We've put together five ways to help you never receive a ticket and you can sleep soundly with peace of mind.    

1.  Don't cook and loiter where you're going to sleep.  If you're in an area where the authorities are cracking down on vanlifers, go to a nearby park where you can cook and chill out until you're ready to pack up and pass out.  The authorities are always on the lookout for camper vans that look like they are posted up getting ready to sleep.  We've been notified countless times that we can't camp somewhere just because all the lights are on in our van at night and we're just hanging out and relaxing.  Also, grumpy neighbors that hate us vanlifers are quick to call the authorities for campervans that look like they are going to stay the night in an illegal spot.  So before you shack up for the night, get all your cooking and loitering done in a public place where it's more accepted. 

2.  When it time for bed, have your rig 100% set up so when you pull up to pass out for the night you aren't shuffling through your shit.  I also recommend a 5% tint and some black out curtains to keep those wandering eyes out of your business.  What we do in places like Byron Bay, where vanlife is on serious lockdown, is we hangout in the popular spots like main beach, or Wategeos until the posted time where parking is no longer permitted.  Sometimes, we even sleep until the allowed posted time and set an alarm to move to a neighborhood.  Apartment complexes are good because there are always so many cars parked out front.  Once you park for the night, it's lights out. That means, no latenight instagraming or any headlights on. Any suspicious behavior will likely get a call to the authorities.  

3.  Get acquainted with your pee bottle.  One of the more glamourus parts of vanlife is pissing in a jug.  If you're like me and have to pee many times in the night, you'll want a large jug.  If you're in an area with no facilities, going in and out of your van to pee on the street will likely get you a complaint and a hefty fine.  And no one likes their neighborhood smelling like piss...so be respectful and leave no trace. Once you wake up in the morning, just dump all your wiz in a nearby toilet.  

4.  Late nights and early mornings.  Sometimes camping in illegal areas is the only option.  We lived on the esplanade in North Burleigh for over 4 months, while working on the Gold Coast.  Staying up late and waking up early is the way to go.  If you're up before the neighbors who are most likely to report you to the authorities they cant prove that you actually did camp overnight.  Although it can be draining, you can always catch some z's during the day when its allowed.  What I recommend is hanging a towel up or a wetsuit or just have some gear out so it looks like you were up early have a swim' surf, or work out. The key here is trickery.  You have to outsmart the authorities.  

5.  Always check signage in every parking lot.  Lots of car parks will have the rules posted on a sign.  Whether its a no camping sign or a no parking between certain hours, it's going to be hard for you to claim you didn't know when the sign obviously states what you can and cannot do in the car park.  Also, don't incriminate yourself--make the authorities do their job and catch you red handed.  Countless times we've had a knock on our window around 9am, after a camp, and we've been asked if we camped.  Since we have read the signs, we usually just claim that we arrived after 5am or just a simple "no" always worked for us.  It's very hard for the authorities to prove you've slept over night unless they catch you in the middle of the night. 

Happy camping!

4 Most Frequently Asked Questions About Vanlife

Frequently Asked Questions living out of a van

Because I can only write the same message back to people so many times, I've decided to write a little blurb on it. I'll address more frequently asked questions as they roll in... if you have a question that you would like to ask us email us (hello@vankookz.com) or shoot us a direct message on Instagram. 

1. The top question we get: How do you live the life you live financially?

Most people guess that we are either rich or sponsored. But no, we are neither. Although, we are open to both :) 

What I like to tell people is it honestly takes more courage and perseverance than it does money. Having a steady paycheck is what we are all conditioned to be use to. It's that safety blanket we all clutch on to. It's the reason we take shitty side comments from bosses and come back day after day. We need to pay rent and we need to buy groceries, at the very least, and that pay check does that. Yeah, we participate in that life every so often. We save up enough money till it is time to hit the road. We both bartend and Kevin gets paid to do what he is passionate about every so often, videography and photography gigs. He does everything but, weddings because they are stressful as hell. But, we basically work, work, work, and save all our money, while living frugally out of the van (you don't need a van to live frugally). We don't buy anything but groceries. No new shoes, no new iWatches, no happy hours with co-workers, and no new anything we don't NEED. It takes some re-wiring. So, don't be hard on yourself at first. Everyone loves to spoil themselves after a hard weeks work, but always remember to think bigger picture and put that cash back in your piggy bank. 

The initial start up (buying a van and kitting it out) of Vanlife can be expensive, which is why I suspect most people eyeballing the lifestyle don't do it. But, if you think about it...Once you have a van, you shed that need to pay rent. You have a roof over your head. Your expenses and need to work so many hours change dramatically. You go from shelling out $800-$1500 on rent per month and putting all that hard earned in your pocket. All you really spend money on is: gas to fuel the adventures, groceries to keep the moral high, and you may or may not decide to buy a nationwide gym membership for showers at $30ish dollars a month. You also shed that cable and internet bill and simply add more data to your cell phone bill or on a more frugal side, you find out that the library is the most amazing public institution that you never utilized. You can charge all your electronics, use wifi all day, print stuff for cheap, and even browse the travel book section to plan your next route on rainy days. 

On top of all that, you learn that to be happy RIGHT NOW, you need less things than you think. Actually, in this case, less is more. The more things you own in the van, the more they begin to piss you off, especially if you don't use them everyday. They get in your way and they take up storage space for things that you actually need and use daily. And what that revelation leads to is the end of the consumerism for consumerism sake lifestyle. You don't spend all your precious hard earn greenbacks on dumb shit because your cable TV show had some advertisement that sold you on some dumbass watch or shoes or some sale on whatever the hell people are buying these days. Sorry, we have been out of that loop for a while. 

It is basically a frugality lifestyle. You spend money on experiences and memories, not things. Things bring you momentary joy, but that joy fades as quick as the next model comes out ;) 

Frequently Asked Questions living and traveling in a van, vanlife.

2. What is your Budget on the Road?

This was a learning curve for us. We started with a $180 per week budget. That was supposed to include food and gas. This budget actually worked sometimes, when were were chillin in remote areas eating random meals of random left over ingredients with no stores in sight. But most of the time, that barley covered the gas, when we were exploring and driving a bunch. We bumped our budget up to $400 a week and that was way more realistic. We spend about $200 a week on gas, $150 on groceries, $50 for miscellaneous (eating out or beer--which we kinda gave up outside of the US because it's so expensive).

Frequently Asked Questions vanlife

3. How do you shower? 

Showering for these two hippies has never been a priority even when we lived in an apartment or house, haha. Baby wipes do wonders for those days in between showers. But this answer is unique to the situation. In Australia, we would post up at beaches surfing, working out, tanning, doing anything beachlife...At the beaches in Australia, they had cold beach showers at every beach. We would shower there or we had amazing friends that would let us come take showers at their house. We also had one of those cheap camp showers. We would put it up on the roof to heat up and we would shower when it got warm from sunlight. 

In New Zealand, there are paid shower places, due to the crazy amount of people traveling around the country in their vans and RVs. Public pools and Rec centers are always good places to hit up for showers. We love to jump in the icy lake or river waters in New Zealand and clean up that way. We never use soaps or shampoos when we jump in the pristine lakes around here. We feel throwing our dirty sweaty bodies in there for 5 minutes is enough polluting to those waters ;) We've seen other vanlifers using cheap terrible shampoos in the lakes and it makes our skin crawl, because you can literally drink out of any lake in New Zealand. Their lakes are that pure, but if people are rubbing SLS's and sulphates all over the largest organ of their body, their skin, then jumping into the lake to rub it off.... it isn't very nice to their body or the environment :( 

Easiest option is to grab a gym membership with locations nationwide. That way, if you go on a roadtrip, you can pull in and grab a shower whenever you feel dirty. 

vanlife Frequently Asked Questions

4. How do you do laundry?

This is also unique to the situation. In Australia, we basically lived in our bathing suits. So we had little to no laundry, but when we were working we had some. We would do it at a friends house or just keep up with it daily. I would wash underwear daily and hang them in the van to dry. I would do this in bathrooms whenever I could be sneaky and prepared enough. Laundry mats are pretty expensive, so we avoid them at all costs. We only go there for big loads combined with rainy days. Sometimes when we go on multi-day hikes, our laundry backs up. We've been known to utilize a really strong shopping bag...fill it up with water, Dr Bronners, and dirty clothes (we've learned to keep socks separate). We hand wash inside the bag and line dry on a sunny day. It's very old school, but we are use to it now. 

Cheap and easy van eats

Vegan camping food, vegan eats, traveling vegan food, how to be vegan while living in a van, what do you eat when your living in your van

Even though we are vegan, every time we whip up a meal, people seem to be drooling over it. Most of our meals are very simple, cheap, fast, healthy, and for the most part whole food meals. These recipes aren't exact measurements and you can change up or leave out some ingredients. After a year living in a van, we thought we would share some simple meal ideas forthose of you just starting out.

Breakfast

Vegan breakfast on the road, vegan camping breakfast, vegan camping

Fruit and Nut Oatmeal: 

**What you will need....

_ A bag of plain $2 rolled oats will do fine. We are going to spice it up. 

_ Cinnamon

_ Sugar of some sort (I grab a couple extra packets from coffee shops to take on hikes)

_ Trail mix of your choosing

_Peanut butter (optional- we rarely do this, but feel fancy when we do

_Coconut shreds (optional)- we always do this, but we always put coconut shreds on everything... if you don't have it or don't like it, don't worry. It will still be good. 

**Making the breakfast magic happen....

1. Put a handful of trail mix in with your desired amount of oats. 

2. Teaspoonish of cinnamon & sugar

3. Add the peanut butter

4. And then pour boiling water over all ingredients and mix together

5. Add coconut spreads on top!

6. Enjoy

**Preparing this Breakfast for a Hike...

Add all dry ingredients into a ziplock bag. (If you shop in the bulk section, save those bags and reuse them for hikes....that way you don't have to buy a box of ziplock bags.)

We eat this almost every day still find it delicious, everyday. If you are getting bored and want to mix it up, try a new trail mix variety. 

quick easy vegan camping food, vegan camping food, vegan eats, smashed avocado

Smashed Avo Toast

_ Good bread

_ Avocados

_ salt & pepper

_ chili flakes

  1. Toast the bread

  2. Smash the avocado

  3. Spread the avocado on toast 

  4. Add chili flakes, salt and pepper

  5. Add cilantro on top if you like

  6. Enjoy!

Lunch

Bahn Mi Van Meals, Camping Food, Vegan Meals, Vegan Camping food, Vegan Van Life

Bahn Mi

**What you will need...

_ Seasoned Tofu (in Australia, we liked the Macro Brand from Whoolworth's--It's non-GMO)

_ Cucumber 

_ Carrot

_ Cilantro (Coriander)

_ jalapeños 

_ baguette 

_ hummus (optional, just replaces mayo...cuz mayo is disgusting)

_Sriracha

**preparing this sand-o

  1. Cut the carrots into matchsticks, cut the cucumbers into coins, slice the jalapeños, prep the coriander and slice the baguette down the center and cut in half to share.

  2. Pan cook the tofu out of the package. When it is warm enough take off heat and place on cutting board. Slice tofu pieces in half so they will fit on the sandwich nicely 

  3. Spread Sriracha and hummus on both the insides of the baguette

  4. Place the tofu, carrots, cucumber, jalapeños, and the coriander inside the baguette 

  5. Chow down on one of the fastest lunches that isn't a PB&J!

Easy Van food, van vegan food, eating vegan while on the road, vegan food on the road, vanlife vegan

Speaking of PB&J

When we are close to going over on budget, we like to chow down on some PB&Js because they are cheap and before this trip, I don't think I have had one since I was in grade school. But, even then, I think I traded it with someone for something terrible. 

What we like to do here is spice upthat grade school lunch. I am sure we aren't the first people to think of this, but in case you haven't.... here's how we do it.

**what you will need

_ Good bread. None of that nasty white bread shit we all use to beg for as kids. 

_ Good peanut butter.... Usually I am an almond butter fan, but with no steady income, I have reverted to peanut butter. It's cheap. I like Pic's or Fix and Fog (kinda pricey, but pretty damn good) here in New Zealand. 

_ Coconut shreds

_ Bananas 

_ Jam, jelly, fruit preserves...what ever you call it....how ever you like it--Get that. 

  1. It's simple. Make a sandwich with all above ingredients. 

  2. Enjoy.

Raw vegan camping food

Raw Cucumber Salad

This is one of our favorite dishes to whip up after a hike. It is so simple and fast. 

**what you will need

_ cucumber

_ capsicum (bell pepper)

_ red onion

_ can of chickpeas (or black beans)

_avocado

_tomato

_clove of garlic

_cilantro (if you have it, don't worry about it if you don't)

_cumin

_ ground coriander

_salt and pepper

**how to prep this dish

  1. Make a guacamole with the avocado, tomato, minced garlic, some diced red onions and cilantro. 

  2. Add the spices into the guacamole. Again, as much as you see fit. It will taste plain as with out it. 

  3. Coin the cucumbers then cut them in four. So they look like pizza wedges.

  4. Cube the bell peppers

  5. Drain the beans

  6. Add all ingredients together with the guacamole and serve.

  7. Enjoy. 

  8. You can also enjoy it as a wrap, as pictured.

Vegan Camping Food, Van Food, Traveling Vegan Food, Vegan Food on the road, Quick Vegan Food, Healthy vegan camping food

Falafel wraps 

If you are a van lifer in NZ, you probably shop at pac and save. They have a Falafel mix that makes this dish easy as! If you are living in Australia, there are heaps of pre made ready to heat and eat falafels at most all grocery stores. If you are living in America, well America has everything at every store... so I am sure you can find some mix or pre-made ready to heat at any grocery store near you. If not, get creative and fill it with anything else of your choice. 

**What you will need...

_ Falafel mix or premade falafels

_ Wraps

_ Purple Cabbage

_ Hummus (we make our own sometimes smash a drained can of chickpeas and add tahini)

_ shredded carrots 

_ Sriracha 

_ Tahini

_ Cucumbers

1. Pretty straight up, add all ingredients in a wrap and eat burrito style. 

We love to take these on long trails. You can mix up the homemade hummus with black beans instead of chickpeas or any other style of beans with chili flakes to make it more Mexican tasting. 

Dinners

Fancy as Ramen

**What you will need...

_ Packaged Ramen (we get the brand that has the soy sauce, sriracha, seasoning, and fried onions included)

_ Broccoli

_ brown onion

_ mushrooms

_ carrots 

_ bell pepper (capsicum)

_ garlic cloves

_ a couple inches of ginger

Preparing the Ramen...

  1. Cut all the veggies. Cut the Broccoli and mushrooms in quarters. Cut the carrots in coins or half coins. Slice the onions and capsicums. Dice the garlic and ginger.

  2. Boil the water. 

  3. Put the ramen with seasoning in big enough bowls to make a soup while you wait for the water to boil. (I always add extra seasoning as well. I add some cumin, ground coriander, chili flakes, and rosemary) I also add the ginger and the garlic in with the dry noodles to await the boiling water. They both will make your broth taste real nice. 

  4. Pour the boiling water over the noodles and seasoning, cover and set aside. 

  5. Pan cook the veggies with coconut oil or an oil of your choice. 

  6. When the veggies are done cooking, toss them in with your ramen

  7. Top with more sriracha and soy sauce

  8. Chow down.

Vegetable Curry

**What you will need

_Broccoli

_ brown onion

_ Potatoes (Any kind will do)

_ mushrooms

_ carrots 

_ bell pepper (capsicum)

_ garlic cloves

_can of chickpeas

_can of diced tomatoes (or two tomatoes diced)

_can of coconut milk

_a good curry powder (we use Empire in New Zealand)

_chili flakes (if you like it hot)

**Preparing the Curry

  1. Cut all the veggies. Cut the Broccoli and mushrooms in quarters. Cut the carrots in coins or half coins. Slice the onions and capsicums. Cube potatoes. Mince garlic. 

  2. In a heated and oiled pan, throw in the stuff that takes the longest to cook: broccoli, carrots, potatoes. 

  3. Once those veggies have had a proper head start, throw in the rest of the cut veggies. Add a bit of curry powder . Just enough to get the veggies seasoned a bit. You'll put the full amount in later. 

  4. Throw in the canned stuff when the veggies seem to be properly cooked. If you are like us, half of your meal will be gone from "checking if it is ready" by the time it is actually ready. 

  5. Add in the curry powder (I also add my own turmeric, cumin, salt, pepper, rosemary and coriander to taste) Sorry there are no measurements. I don't have room in my van for measuring cups. If you are in a van, you understand. Eyeball and taste test it. 

  6. Serve up in bowls and enjoy!

vegan camping food

Veggie Bowl

_ brown onion

_ Potatoes (Any kind will do)

_ mushrooms

_ bell pepper (capsicum)

_ garlic cloves

_ can of black beans

_ avocados

_ tomatoes

_ cumin

_ ground coriander 

_ rosemary

_ salt and pepper 

_ Coriander herb (cilantro) 

  1. Dice all the veggies.

  2. Throw the potatoes in an oiled and heated pan and let them get a head start. 

  3. Once those have a proper head start, throw the rest of the veggies in... wait to throw the beans in until the very end... 

  4. Spice up those veggies with as much of the spices as you like... I put heaps of all of it in there. 

  5. Serve in a bowl. top with cilantro and avocados

  6. Enjoy

How to save heaps and live cheap while in Australia. 

Vanlife austrlaia, saving money on the road, Saving Money road trip, saving money abroad

Australia can be a pretty expensive place to visit.  However, there are a few ways around this, if you’re willing to make a few sacrifices.  Follow our 8 step guide to saving cash so you can maximize your holiday and save some serious dough.

Step 1:  You’ll need a van to live out of.  We have heaps of tips on how to live in your vehicle here. Once you have a van and are living out of it you can kiss rent and expenses good buy.  Also, you’ll want to prepare to live in a van so pack very lightly and bring only the essentials. We’ve put together a list of van must haves here.   

Step 2:  You’ll obviously need a job to bring in some dollaridos.  If you’re planning on heading to Australia check out our crash course for obtain a work holiday visa.  If you’re able to get work in Oz you’ll be very happy with your wage and your paychecks.  If your living in a vehicle and working you will start to see the money pile up.  

Step 3:  Food and dining can be expensive in Australia.  Although it will be difficult you’ll want to resist all urges to eat out at expensive Australian cafes and restaurants.  Woolworths and Coles will become your most frequently visited businesses.  Make sure you utilize the plethora of BBQs at any park in Australia and enjoy the luxury of dining at the beach.  This is one of our favorite Aussie rituals. Outdoor cooking facilities in this country are luxurious and each one equally unique, some even have sinks, and boiling hot water dispensers.  BBQs at the beach beat a $30 meal at a restaurant any day.  

Step 4:  The price of booze in this country is outrageous.  If you like to have an adult beverage here or there be prepared to shell out $16-$25 for a 6 pack and $45-$65 for a 24 pack.  We basically gave up drinking in Australia apart form knockoffs (Shift Drinks) after work.  Boxed wine aka “goon” is your best bet for cheap grog running form $10-$20 per box, we were never a fan of goon, we thought it was complete shit… Which it is.  Also drinks out at a bar are easily $10+ so be prepared to drop some serious cash if you want to get on the piss.  *HOT TIP* Any time you visit Coles/Woolworths (grocery store chains) look at your receipt, there are alway booze deals on it which are usually $10-$13 dollar six packs, which is an amazing deal in this country. 

Step 5:  The good thing about living in your vehicle is that you won’t have any room for additional “things”.  We tend to buy a lot of things we don't need when we live in a house our an apartment.  But once you’re in your van you can’t buy any unnecessary crap because you simply don't have room for it.  You’ll find this to be one of the best parts of vanlife.  Say goodbye to buyers remorse.  Simplify your life and spend your hard earned money on experiences and not things.  You’ll discover this to be one of the most rewarding parts of vanlife and you’ll find yourself to be much better off mentally and financially.  

Step 6:  Once you’re on the road we found that we could really stretch our dollar if we would stay in one area for a few days.  If you have stocked up at the grocery store and have the essentials you need to get buy for 4-5 days, you'll notice that you spend significantly less than if you are traveling and going to the store every day.  We all know that we go to the store for 5 items and come out spending $50 without even knowing it.  So stock up and move slow and enjoy the Aussie lifestyle.  

Step 7:  Fuel aka Petrol can fluctuate so much in a week in Australia.  If you see cheap petrol, fill up.  Gas prices can go up 20 cents per liter in one day.  Also, hold on to your Coles and Woolworths receipts they always have fuel offers at participating petrol stations where you can save up to 8 cents per liter. 

Step 8:  Spend time outside with nature.  Go on a hike, hang out at the beach, go for a surf, or just enjoy the outdoors.  It’s free and it’s the best and most authentic way of traveling.  Check out a few of our guides for traveling Australia cheap on this page.  

Step 9:  Live and die by your budget.  This should be actually be step one.  Sticking to the budget is our most important rule.  What we do is set  a weekly budget and pull out that budget in cash from the ATM.  Having cash helps you track how much you're spending.  If you're blowing through your budget way too easy, set a more attainable budget.  We found that around $400 per week for the two of us was enough.  If you're going through cash too fast, revert to Step 6.

Everything You Need to Have Before Starting Your Vanlife Adventure - Vanssentials Checklist

Vanlife, van life checklist, how to live in a van, what do you need to live in a van

Alright, you've found your van and you are ready to hit the road.  While sometimes you can be lucky enough to cop a van with all the bells and whistles that's ready to rock and roll, most of the time you'll be purchasing a basic van with maybe just a bed in it.  This post isn't aimed at how to build out your van. It's more of a guide to help the traveler get their van ready to hit the road on a budget in a new country.

Water - 10+ Gallon (20+ Liters) drinking water tank with an easy pour spout.  You'll find that water is one of the most important resource in the van. You'll use it for cleaning as well as drinking and cooking.  If you have room, we recommend a drinking water tank and a auxiliary tank that you can fill anywhere. You'll use for dishes/washing/etc.

Portable Gas stove Swap and Go tanks are the way to go.  Even look into a fold up dual burner set up that runs off propane.  Small portable cookers are wasteful and each butane bottle has very little cook time.  Also, it's a chore to always hunt down and buy the butane.

Cookware and utensils - We highly recommend a cast iron skillet; it's extremely easy to clean and care for.  You'll also want a kettle for coffee/tea and boiling water for meals.  A saucepan can be handy but not mandatory.  You'll need eating and cooking utensils, such as, a 3-in-1 spork with a knife on it. It's an incredibly useful tool.  Also, a spatula, a few good knifes, a couple of plastic small cutting boards, stackable bowls (we never use plates), plastic coffee mugs, and kitchen scissors come in handy so many times.

Food storage - This can be the most tricky part of vanlife.  Ice can be a pain in the neck and it can ruin your food. It constantly melts and the whole cooler shuffle can be a pain in the ass.  A powered fridge is the best way to go, but can be expensive and out of your budget, if you're only using the van for the short term.  For this item, do what's best for your situation.  Currently, we aren'tusing a cooler, but we are vegetarian; so, it makes food storage easier.  If your eating meats and other perishable items, you'll have to go with ice.  My best advice on ice is to put all your ice in large ziplock bags, then when the ice melts you won't have a food pond. Also, you can transfer the melted ice into your water bottle, if it's from a good source.

Bin and Containers - Living out of your vehicle will be much easier, if you have organized chaos.  Get specific bins for clothes, produce, dry food, toiletries, spices, cooking utensils, and any other random items you need to put somewhere.  Once you get all your shit organized and into specific container,  you won't have exploding van syndrome every time you try to find an item.  Get creative and reuse good boxes or packaging. We are inspired everyday by some organization techniques by other vanlifers!

Curtains - You'll have to get creative on this one, but you will definitely want some type of window cover for privacy and a little bit of a sleep-in on bright mornings.  We've found curtain wire to be the most effective way to set up some privacy drapes.  Also, sewing isn't always required. You can just cut holes along the top and weave the wire through the fabric. Or we used the hemlines of black sheets. The first option is the easiest.

Lights - While you could get away with just headlamps and flashlights, but blinding each other can get old.  Relying on your car's dome lights is dangerous, as your battery can die and leave you stranded.  It's happened to us.  We recommend solar powered Christmas lights or rechargeable / USB powered lighting options.  The cheapest option is battery powered lights but, depending on your country, batteries can be quite expensive to replace. 

Car care essentials - We can't stress enough how important it is to have back up fluids for your vehicle.  You want a few quarts of oil for your car.  Also, antifreeze concentrate, power steering fluid, even spare belts have come in handy for us, window cleaner to mix in with your wiper water are all items you should highly consider carrying around in your van.  Since most travelers are in ELVs (end of life vehicles), you should always be on top of your fluids. It can make or break your trip. Last but not least, a good pair of jumper cables. I don't know how many times we swore we wouldn't use them because we would "be careful," but they saved us countless times we left those headlights/domelights on. 

Music - If you are traveling, you'll want a lot of music. More than you'll ever think you'll need. We download long mixes off SoundCloud from our favorite DJs. Put as much as you can on an iPod. Unless you have a fancy 200+GB iPhone, you don't want music taking up your adventure picture space.

WikiCamps App - This app is in the AppStore for most countries. It is a community used app with comments, pictures camping spots, grocery stores, gas stations, drinking water refill stations, prices, libraries, public pools (for showers) and everything and anything else useful you can think of. It's a game changer.

These are a few options to get you up and going. We've also put together a checklist to help you get all the vanssentials to start your advanture.

Freeloading with style

vanlifeaustralia

Freeloading with Style

Let's face it. When you're living in your van, your freeloading off all the community's facilities and the government tax dollars.  It's not a bad thing at all.  We lived in Australia in our van and only paid $8 dollars the entire time on camping.  We live in our vehicle for the freedom it brings not only on the road, but the economic freedom we have from rent, mortgages, utilities, and other cost that arise while living in a home.  Some people despise our lifestyle and give us dirty looks or don't even say hello back to us in the morning while they walk on past with their dogs. Unfortunately most of the time, other backpackers/vanlifers have left a bad taste in their mouths making all of us look bad.  If everyone freeloaded with a bit more style then, we woulda all live in peace and harmony. Here are a few tips to help this happen...

Clean up after yourself.  Littering and trash is easily one of our biggest pet peeves.  How hard is it to clean up after yourself after a night of camping?  Well apparently, it's very difficult for some people. This is the #1 reason locals have no respect for vanlifers.  This also leads to the best spots being shut down. 

Clean up after others.  While we are still on the litter subject, we may as well talk about being a steward to the land.  I don't know how many times we've taken home more trash than we can fit because past campers have filled up a rubbish bag and chucked it on the ground at their spot and left.  We always try and leave the place cleaner than it was when we arrived. 

Human waste.  Not all spots have toilets, people ask us all the time where we take care of business when out in remote areas.  This is hiking 101. Everyone should carry a shovel on them to burry their turds.  It's recommended to bury all poo at least a foot or more deep.  No one likes to encounter a nice smelly pile of shit while out enjoying nature.  Also, toilet paper should be buried with it's companion.  Pee jugs are the answer for urine, same as shit, no one likes pulling up to a spot that reeks of piss.  All the ladies out there if you do have to pee in the bush, it's absolutely unacceptable to throw your TP on the ground. This is slowly becoming an epidemic. Wipe your pee pee and take the TP back with you and dispose of it properly. If you are on a hike, carry a ziplock to collect TP and dispose correctly, but by no means should you ever leave a trail of TP anywhere. 

Respect at least a 10pm quiet time.  As van dwellers, we share the space we live in and sometimes it's peoples backyards. Nothing will get the authorities called quicker than rowdy crew.  You not only put yourselves at risk for a fine but the others that are camping around you.

Respect the fire bans.  I know how tempting it is to pull up to a beach or campsite and instantly light a fire.  Shit, for the first 6 months while in Australia, we never had an opportunity to have fires due to restrictions in our favorite spots.  Think about it this way, if everyone disregarded the fire bans, every site would be a massive burn scar and all the bush and trees would be picked apart and that isn't exactly leaving no trace. 

Keep secret spots secret.  With the rise of camping apps like WikiCamps and social media geotagging, epic spots are becoming a bit less epic.  It's a bummer to have one of your favorite spots turn into a dump or a backpacker haven because everyone decided to post the location on a social media platform.  I'm not saying to keep it a secret just to yourself, you can always share the info with other trusted campers.  But once it's on the World Wide Web, any kook can have access to it... which could lead to the end of your favorite spot. 

Remember that you share the environment with other living creatures.  With this being said, if you must take a shower or clean your dishes in a waterway or the ocean, please use trusted natural products that do not harm the environment.  It pains me to see someone using their oxide shampoos and conditioners in waterways.  It's not safe for you and it's def not safe for the environment.  For a list of natural cleaners check this out.

Cig Butts and other smoking apparatus.  If I had a dollar for every cigarette butt I've seen and picked up, I'd have a fully loaded 4x4 custom sprinter van with a mother-in-law suite.  This also goes for homemade bongs.  Hey, I like to have a toke every now and then too but, could we stop chucking the homemade Gatorade bottle bongs and cigarette butts on the ground.  This is one item I have completely given up on as it makes your van and hands smell rank as, not to mention picking up your homemade bong and disposing of it properly is a risk for me getting caught with it and I'm not down for that.

If it's not from your body, don't put it in the potty.  Just have some courtesy for the bloke that has to clean some of the rough toilets we come across. It clogs their gear and makes their job rougher than it has to be.

Last, but not least, respect gets respect.  Respect the land and other vanlifers and you will be treated with some of the most amazing experiences ever.

At the end of the day, we're human and we're all not perfect. Sometimes, we accidentally litter or maybe we are out camping celebrating with friends and being a bit too loud.  This post isn't to come off as a rant. I just want to bring it to vanlifers and backpackers knowledge to be aware of their surroundings and the effect their actions can have for everyone chasing this lifestyle.  If we want to continue to live the lifestyle we do without it being compromised, we all just need to freeload with a bit more style.

Our first van... Damon - A Year Abroad in our 1989 $500 Nissan Nomad Campervan Conversion

Vanlife Australia

Our first van purchase was an incredible life changing experience.  We were lucky enough to buy our van for $800AUD with few mechanical issues.  After putting on a "new" set of second hand tires (which I highly recommend), and installing a new battery.  We were ready to hit the road.  

 The Build-Out

Fortunately for us, the van had a basic bed platform built out and a few trap door type storage doors over the wheel wells.  We had added a some high-class K-Mart furniture that happend to fit perfectly.  We also built out some food storage with metal drawers for all of our food and added a spice rack to the back of the unit.  We also built simple storage boxes on the top of the K-Mart furniture and an additional one on top of the food storage so that items wouldn't fly everywhere during transport.

While just a bed was cool at first, we learned that we needed a multi-functioning piece of furniture so that the only option inside the van wasn't just laying down or hunching over.  We built a modular bed that could be turned into a couch, as well as, a place to cook and prepare food out the back of the van.  Refer to the pictures below.    

 Keeping the Food and Beers cold

After a few weeks on the road, we realized that we were in extreme need for a better option to keep food cold.  Australia is a hot continent.  Dealing with melting ice basically everyday, we realized that ice and a cooler wasn't a sustainable option for life on the road.  We searched for days high and low we finally found the perfect fridge freezer for the space, a Waeco CF-18.  We were able to power the fridge with our auxiliary 75 amp hour deep cycle battery that was powered by a isolator charged the battery, while we drove.  

 Infinate power

We soon discovered that once we would find the perfect surf spot to hang out for a few days that we would not drive the van enough to charge the battery. So, we lost power to the fridge.  Our next step was to progress to a solar system.  We bought a 120 watt solar panel with a built-in regulator that our sparky friend helped us install the panel to the roof racks and then hard wired it to the battery.  Now, we were able to harness the power of the almighty Aussie sun as it charged our battery all day, as well as, still having the ability to charge as we drove to a new destination.  

After a few months, Damon was set up and vanlife became so enjoyable with cold food, beers, and basically infinite power.  We drove Damon over 40,000 kms, roughly 25,000 miles, down the east coast of Australia to Adelaide, and then back up to Sydney where we eventually sold our beloved companion to one of our good friends for the deal of the century.  

 Huge Lessons of Simplification from Living Small

Living out of a van taught us so much that year.  We learned to simplify our lives and things we once thought we "needed" became unnecessary.  We only bought what we needed to sustain our lives on the road i.e.: food and gas to get around.  Once there is no space for unnecessary items, you no longer buy random stuff beacuse you have nowhere to put it and you can no longer justify spending money on it.  We were able to work and save more money like we never had in the past.  

It had been a life changing experience for us.  We plan to one day live off the grid in a tiny sustainable home and living in an extremely small space, like a van, has taught us so much and has prepared us more than anything ever could have for living small. 

Powering your home on the road - Beginner's Guide to 12 Volt Power

How to power your home on the road.

 One of the most popular questions is how do we power all our electronics while living in our van.  While there's a few ways to have a power source in your vehicle, it all boils down to your individual needs.

Auxiliary batteries - Deep cycle batteries are definitely your best bet to have a legitimate power source.  There are various sizes of batteries depending on amp hours. The higher the amp hour the longer the battery will hold a charge, as well as, the longer it will take to charge.  If your going to be serious about living in your vehicle, you're going to want at least one auxiliary battery. 

Charging your Aux Batteries

Isolator -  An isolator will charge your battery while you are driving.  This is a good option for those who are continuously driving everyday.  What this will do is charge your aux battery while driving after it has charged your car battery.  Basically, after your car battery is charged all the alternator's power goes to waste so you may as well have that power go to your aux battery.  When we first began our life on the road, we just used an isolator until we were posted up somewhere for 4 days with our Waeco fridge drawing power all day. eventually, the aux battery was drained.  Depending on the size of your aux battery, it can take up to 8 hours of driving to recharge it. so, we switched to a dual system of both solar and an isolator.

 Solar Power -  With technology increasing every year for solar panels, they just keep getting better and better and the prices continue to drop.  You can get an incredible deal on solar panels on eBay or even second hand from internet classifieds (cragislist/Gumtree/TradeMe).  Also there are heaps of solar shops popping up all over the place.  We got a 180W panel for $200 from Supercheap with a built-in regulator in Australia.  I highly recommend solar if you are in an area that receives plenty of sun.  The ideal solar set up will continuously charge your aux battery so you can basically have unlimited power.  We had never once lost power with our set up of 180W Solar on a 75amp Deep Cycle battery that was charged by both the panel and the alternator via an isolator. 

Accessories

Power inverters - Power inverters can be a great way to power anything that isn't 12 volt. Such as, laptops or anything you would plug into a wall at home.  This is a great convenience so you don't have to buy additional 12 volt chargers for all your electronics like camera battery chargers and computer chargers. I highly recommend setting up the inverter to work with your solar system.  Then, you'll feel like you never left home with infinite charging.

 12 volt USB ports - These days so many things charge via USB. What we do is buy an outlet for the car that plugs into the cigarette lighter and wire it straight to the aux battery. That way, you can use it when the car is off.  With multiple 12 volt ports installed, we plug in the dual USB 12 volt power points; so, we can have up to 6 accessories charging at once.

 Portable solar chargers - With the demand for solar increasing everyday, companies like GoalZero and Anker make incredibly convenient portable fold out solar chargers.  We currently use a 20 watt Anker fold-out solar charger to charge phones/camera batters while we are posted up chillin at the beach.  We even take it with us on hikes so we can always capture the moment and never worry about our devices dying. It can charge two iPhones in about 40 minutes in full sun.

Low Budget? - Another option is to go old school.  Currently, as I write this from the passenger seat in the North Island of New Zealand, an aux battery, solar panel, isolator, and inverter isn't in our budget.  So what we did is we went to the auto store bought a 12 volt outlet with 2 USB ports and 3 additional 12 volt ports for $25NZD. We plug in 2 additional Dual USB plugs turning the traditional 12 volt sockets into USB plugs for phones and iPads and we use our remaining 12 volt plugs for camera chargers.  Although we can only charge while driving, sometimes we have to be those people at the library/cafe with the surge protector charging 5 different devices.

While powering your home on the road is totally up to your budget and needs, you do need some way to power those devices and keep the beers cold.


Happy trails!

Buying a van in Australia What You Need to Know

Buying a used van in Australia is different than the process we are used to in the States.  Here are a few things you should look into before you make a purchase you could potentially regret.

 Finding your Wheels

Your best place to find a vehicle is on Gumtree, basically a Aussie version of Craigslist.  I would shy away from travelers, as most are on a budget and mainteniece is low on the todo list and most have little have knowledge of cars, and they end up treating their vehicles like shit.  So stick with the locals.  

Look into a tradesmen aka "tradies" vehicles.  For two reasons, they are very inconspicuous and have no side windows so you are less likely to be a target for council and other authorities.  Also, tradies rely on their vehicles for their income. So, the vehicle will be well maintained and looked after.  It may be messy with paint all over the inside, but a small clean up will be the biggest of your problems.    

 Roadworthy Tests

Any vehicle that you buy must pass a roadworthy test (RWD).  Basically, what this means is that the vehicle has to be safe for the road.  Here are a few things to check out.

Indicators - Blinkers, whatever you want to call it, they must be flawless.  No chips and no broken pieces.  If there are chips in the indicators, be ready to buy an entire new piece for the busted indicators.  This can be tough because most vans are a bit older and out of production, which means, you'll be at the junk yard hoping you can score a flawless indicator. 

Tires - Tyres, as they would spell it in OZ, must be pretty much perfect. Any wear and you can kiss your RWD certificate good-bye.  We highly recommend buying second hand tyres from a scrap yard they can only sell you tires that have enough tread to be RWD.

Brakes - Obviously, you will take the car out for a spin.  Give the breaks a good test.  Make sure they aren't squeaking. Also, inspect the pads.  Do they look worn? Rusted? All this will effect your RWD.  Although new brakes won't break the bank, they will be something you will have to replace if they are too worn. 

Rust - If the car has any body rust, it will basically be impossible to get RWD.  Give the under-body and body a good inspection.  Rust is proabably the main contributor to not getting a RWD certificate.

All the small things - Even wiper blades and mirrors are on the list. Make sure the wiper blades are in good condition and that the water dispenser works all this will be checked.  Also, cracked mirrors are a no-go. 

Make sure to pop the hood (aka bonnet) and look at the engine. Is it clean? Check the underneath for oil leaks? How does the battery look?  Check the fluids.  Low fluids can be an indicator of a careless owner.  We had bought a vehicle with barely any water in the radiator. Had we checked that out and seen that red flag we wouldn't have basically threw all our New Zealand travel money away for a laundry list of repairs that almost made us cut our adventure short due to low cash flow. Take time to look at it.  If there are any signs that say no-go with your gut, there are plenty of fish in the sea. Don't go biting on the first car you look at.     

If any of these issues pop-up and you really want the vehicle, use these to your advantage to get the asking price down.  We've talked owners down hundreds of dollars from their original asking price just from the list of items we knew we would have to fix in the near future.