

DIY Cheap & Easy Van Flooring
There are so many options for flooring these days at the home improvement stores that it can get overwhelming and expensive. Luckily for you, the Kookz got your back. We are going to show you how we put flooring, framing, and insulation in our VW van for around $20.
Step #1 - Remove everything!
We started off first by removing all the seats. Since we are only keeping the folding back seat, we will recycle the other two. We were also lucky to start with a bare floor and we didn’t have to worry about a heavily glued down sub-floor so this made step one easy.

Step #2 - Frame your floor
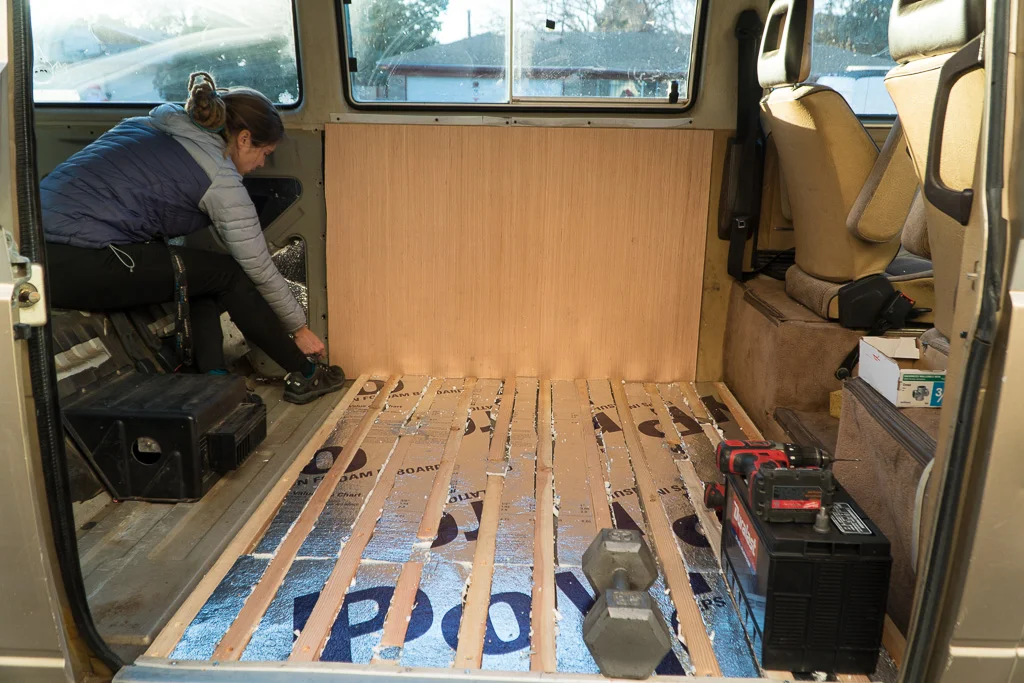
The next step was to create some wood slats to secure our floor. We used one inch slats and set them in-between the bumps in the floor. Be careful where you drill here! Get under the van and make sure you aren't drilling into any parts when you attach the slats to the van floor. I used one inch self tapping metal screws and countersunk all my screws int the framing so the the floor would lay on flush. Also, I recommend getting under the van and put lap sealant (https://amzn.to/2tKYOGd) on all your screw heads underneath to seal them from potential water damage.
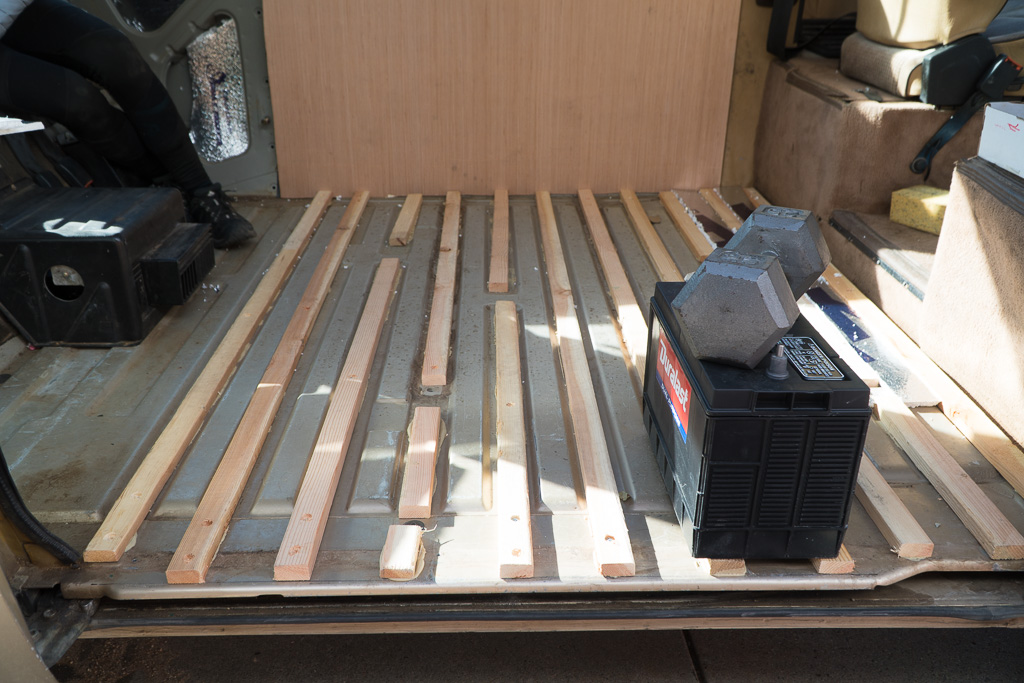

Step #3 - Insulation
Next, we insulated the floor. We didn't insulate our current van’s floor enough and it’s our #1 regret. For insulation, we used 1/4” inch ploy board in-between each slat we though raising the floor up a bit with a air/insulation gap would be nice. We cut and glued the poly board into place and let the glue dry overnight.

Step #4 - Attaching your floors/subfloor
For floors, we are planning on using a recycled gate. We found this in the scrap yard pile in the back yard. We sanded down all the slats and we really like the distressed effect. Plus, it’s real wood! We pin-nailed and liquid nailed all the wood floor pieces to the previously installed slats. We also cut our subfloor out of 1/4” plywood where all our countertops would be. Since you can’t see the reclaimed wood floor underneath our countertops anyways, it wouldn't be worth wasting the wood since we only had a finite amount. We attached the subfloor with pin nails and liquid nail.
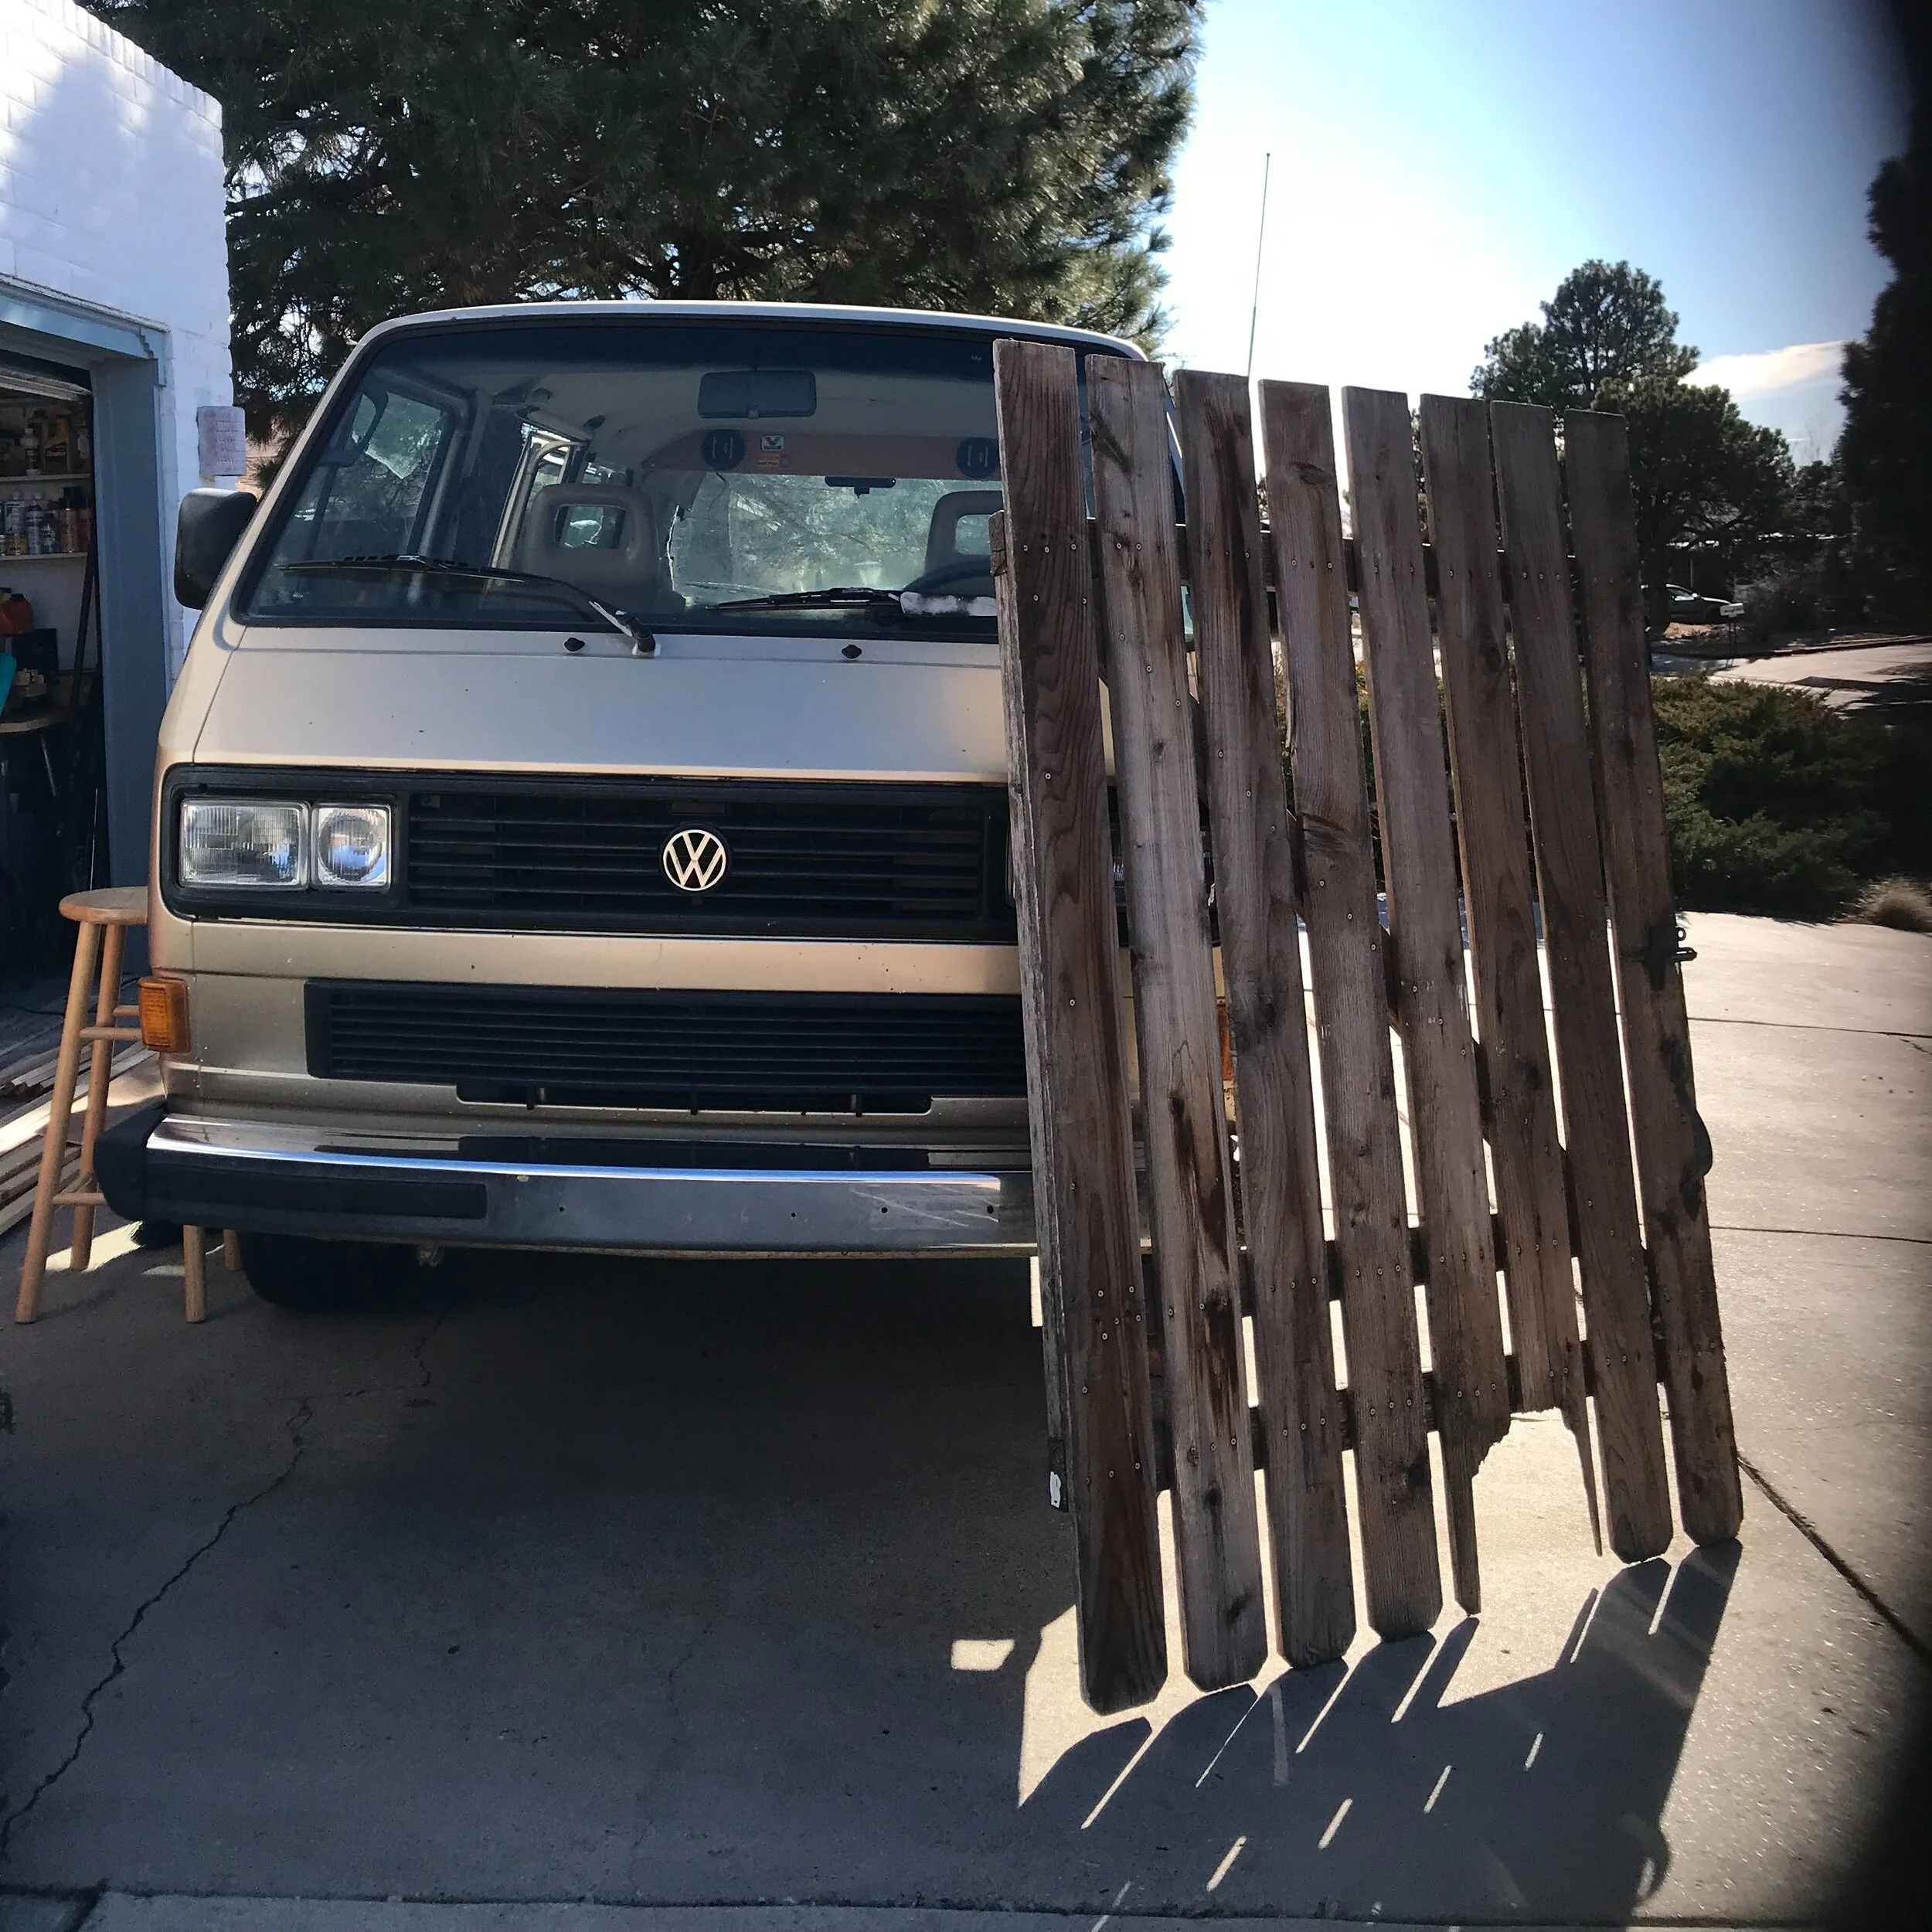
The old Gate we found and used for a reclaimed flooring in our VW.

Here we are using a piece of plywood where the cabinet is going to go. That way, we make sure that we have enough visible matching flooring pieces from the Gate we found.