Four Months of Vanlife in New Zealand - Traveling New Zealand on a Budget

New Zealand was a non stop adventure for us.  We saw so much in just a little over two months. We focused all of our time on the South Island, hiking and camping in all the amazing National Parks.  We Drove well over 5,000 Kilometers and Hiked over 300 Kilometers.  This is an amazing country if you're into the outdoors, New Zealand is a must see for you.  

Video shot on a Panasonic GH4 and GoPro Hero 4 Black.  Motion control timelapses are shot on a SYRP Genie

Music: TJ Willilams - Fleetwood Mac - Dreams (Psychemagik Remix) https://soundcloud.com/tjwilliams-961099352/fleetwood-mac-dreams-psychemagik-remix

Mount Cook New Zealand Van Life

Where to See the Aurora Australis on New Zealand's South Island

The New Zealand night sky is one of the most amazing we've ever seen.  We were lucky enough to witness the Aurora Australis, on a clear night, with a new moon.  If you're in New Zealand and wondering about the status is of the Aurora Australis, you can check out the Aurora Service Facebook page to see if you will be able to see it.  We were able to capture it, here, using long exposures (25 sec) and used a SYRP Genie to get the motion control on the timelapse.

4 Must Have Apps While Traveling in New Zealand

Four of the best apps to download before you start adventuring in New Zealand. Save money, fill up at the pump for cheap, find out how to turn your phone into one of those fancy GPS handhelds and save $200 doing it. Read More at vankookz.com

Hiking and Camping around Mount Cook and Mueller Hut

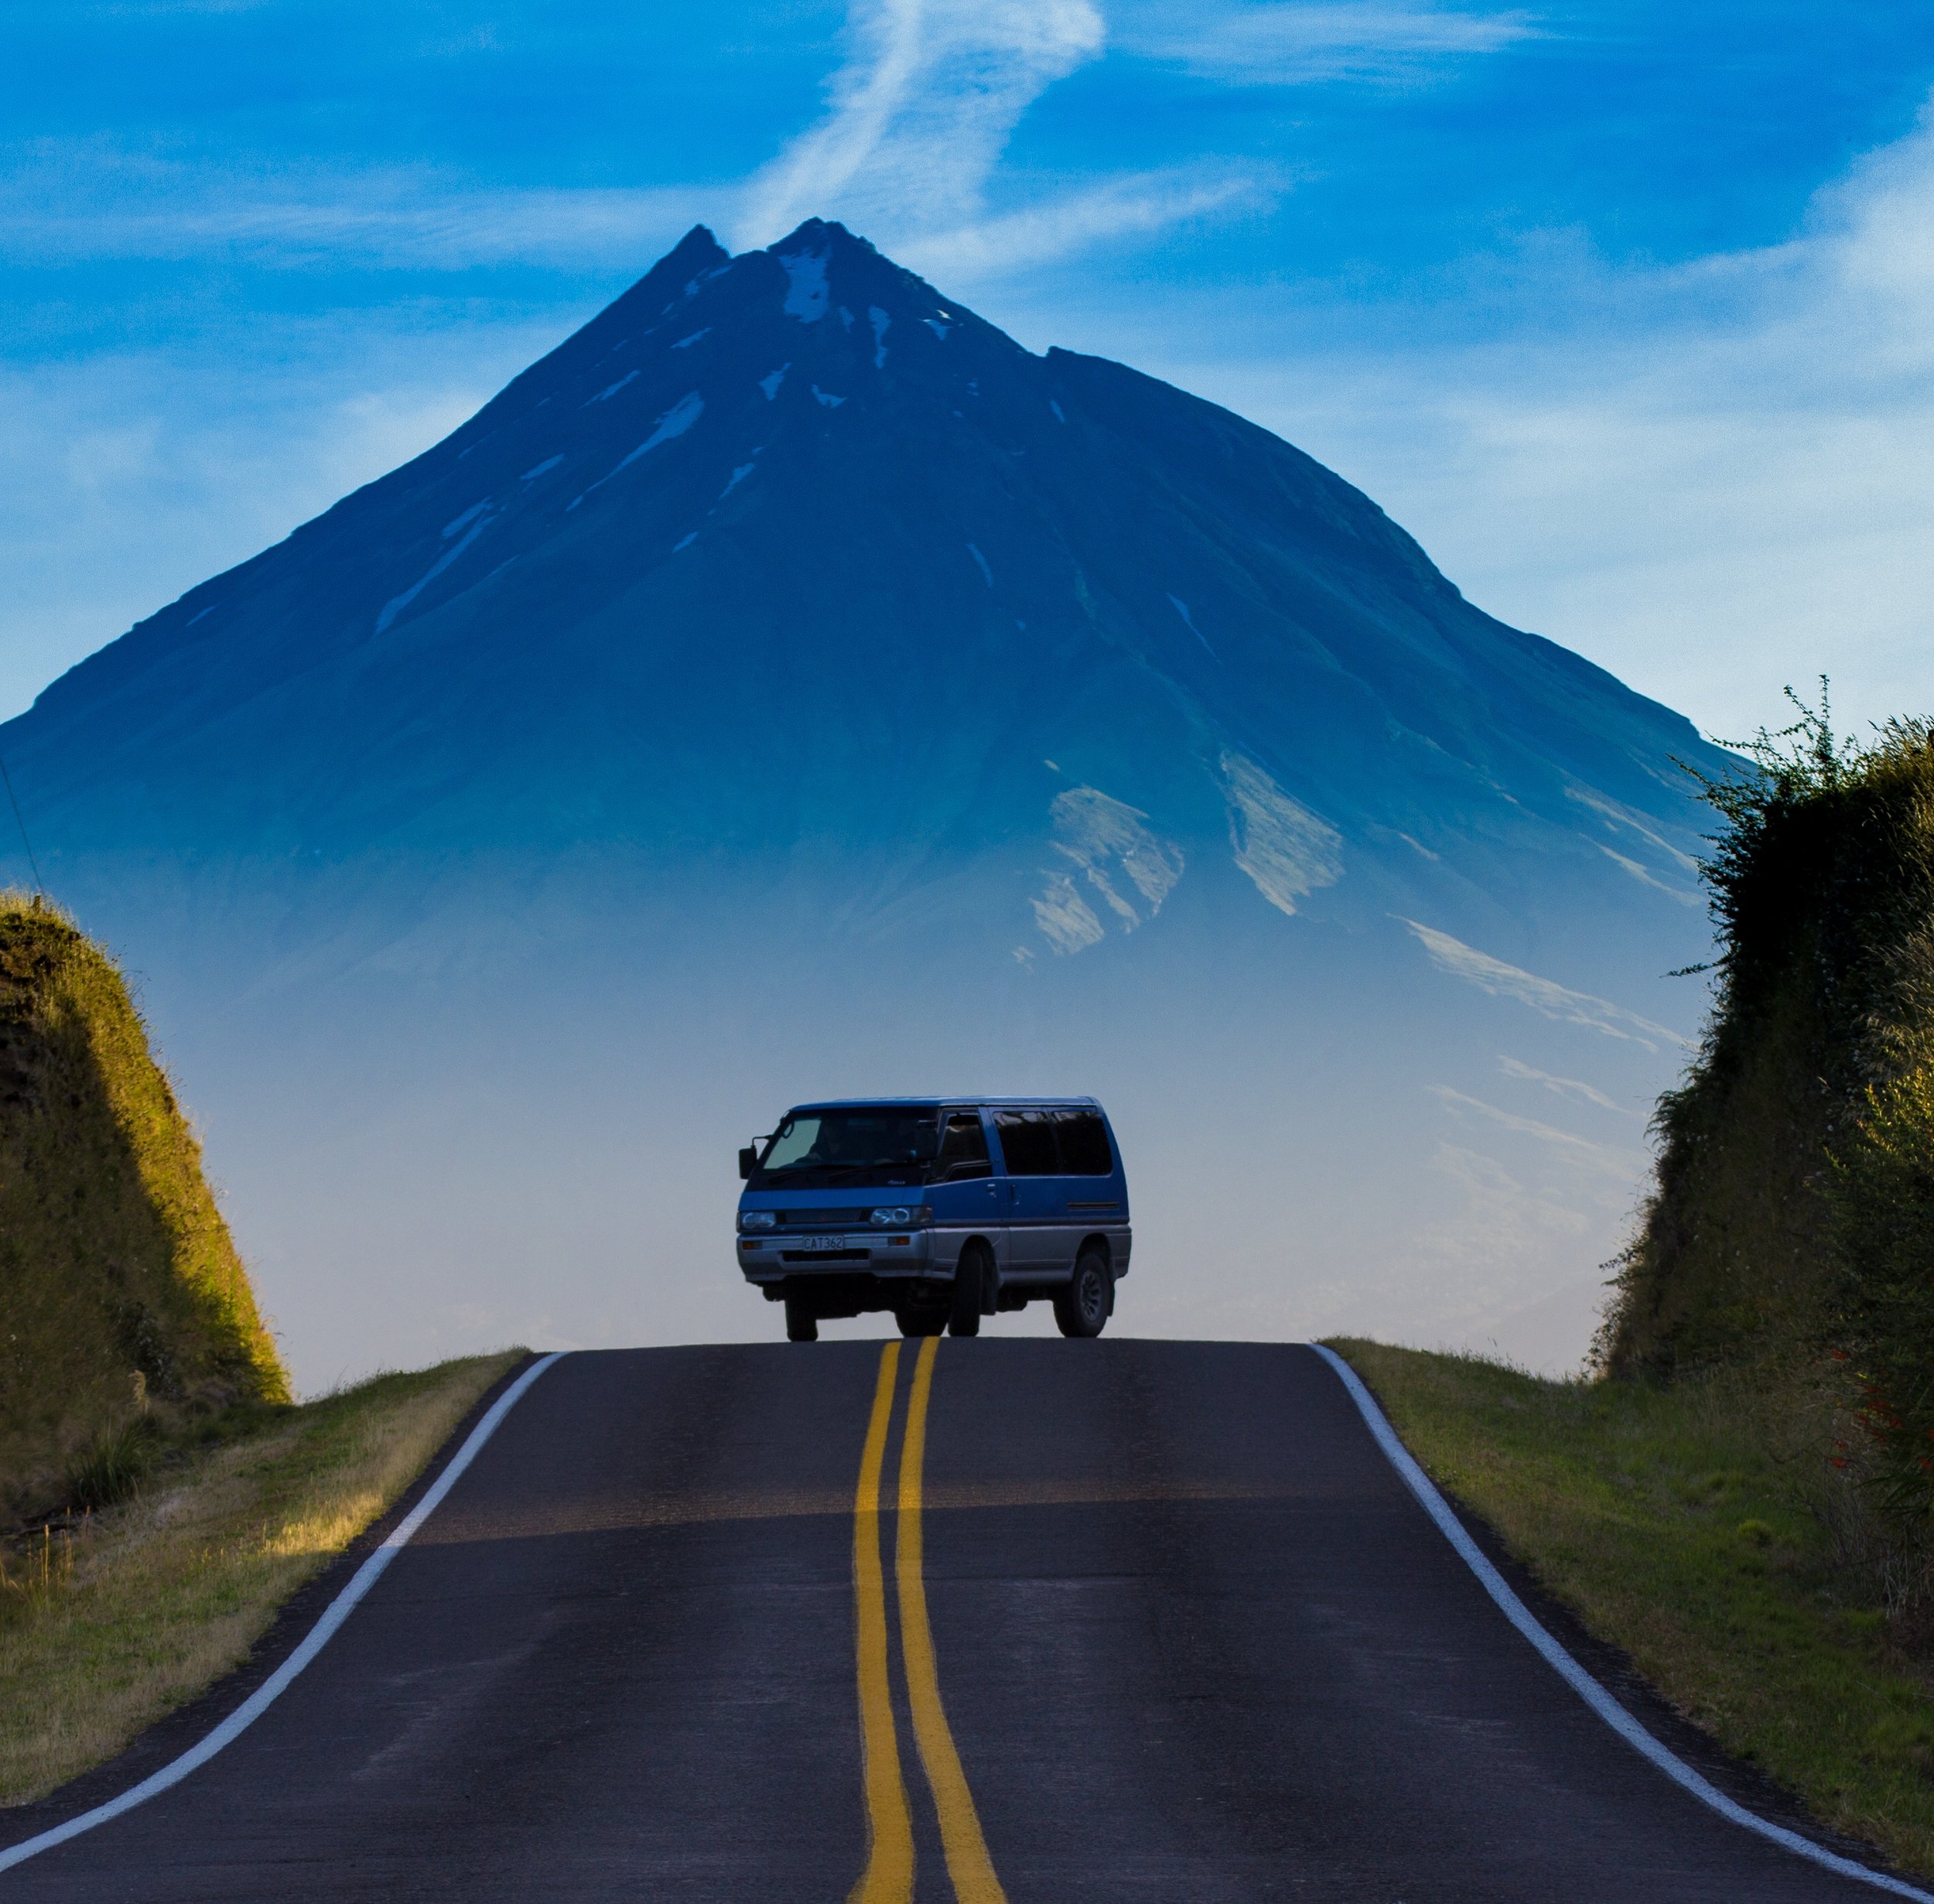
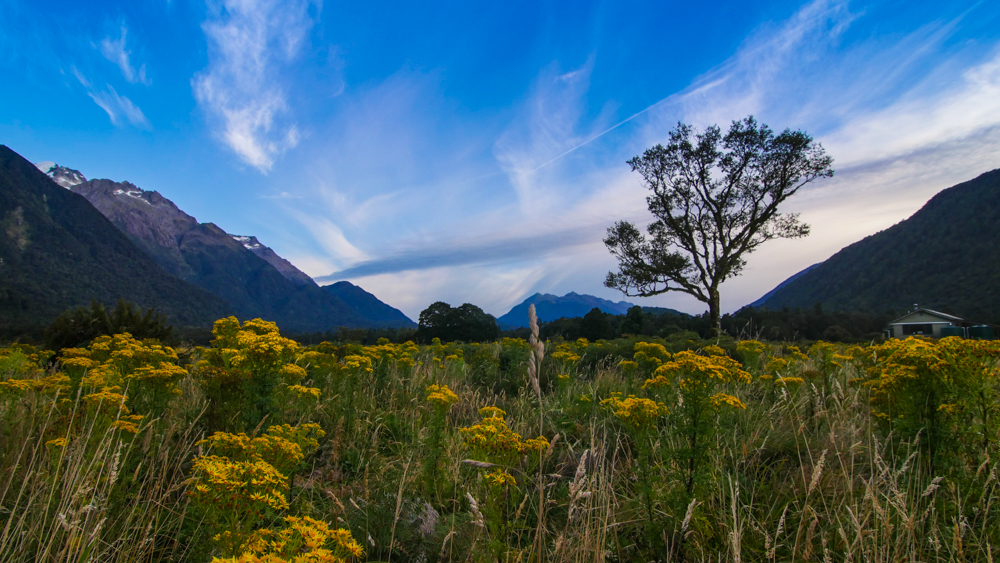
Aoraki/Mt Cook National Park

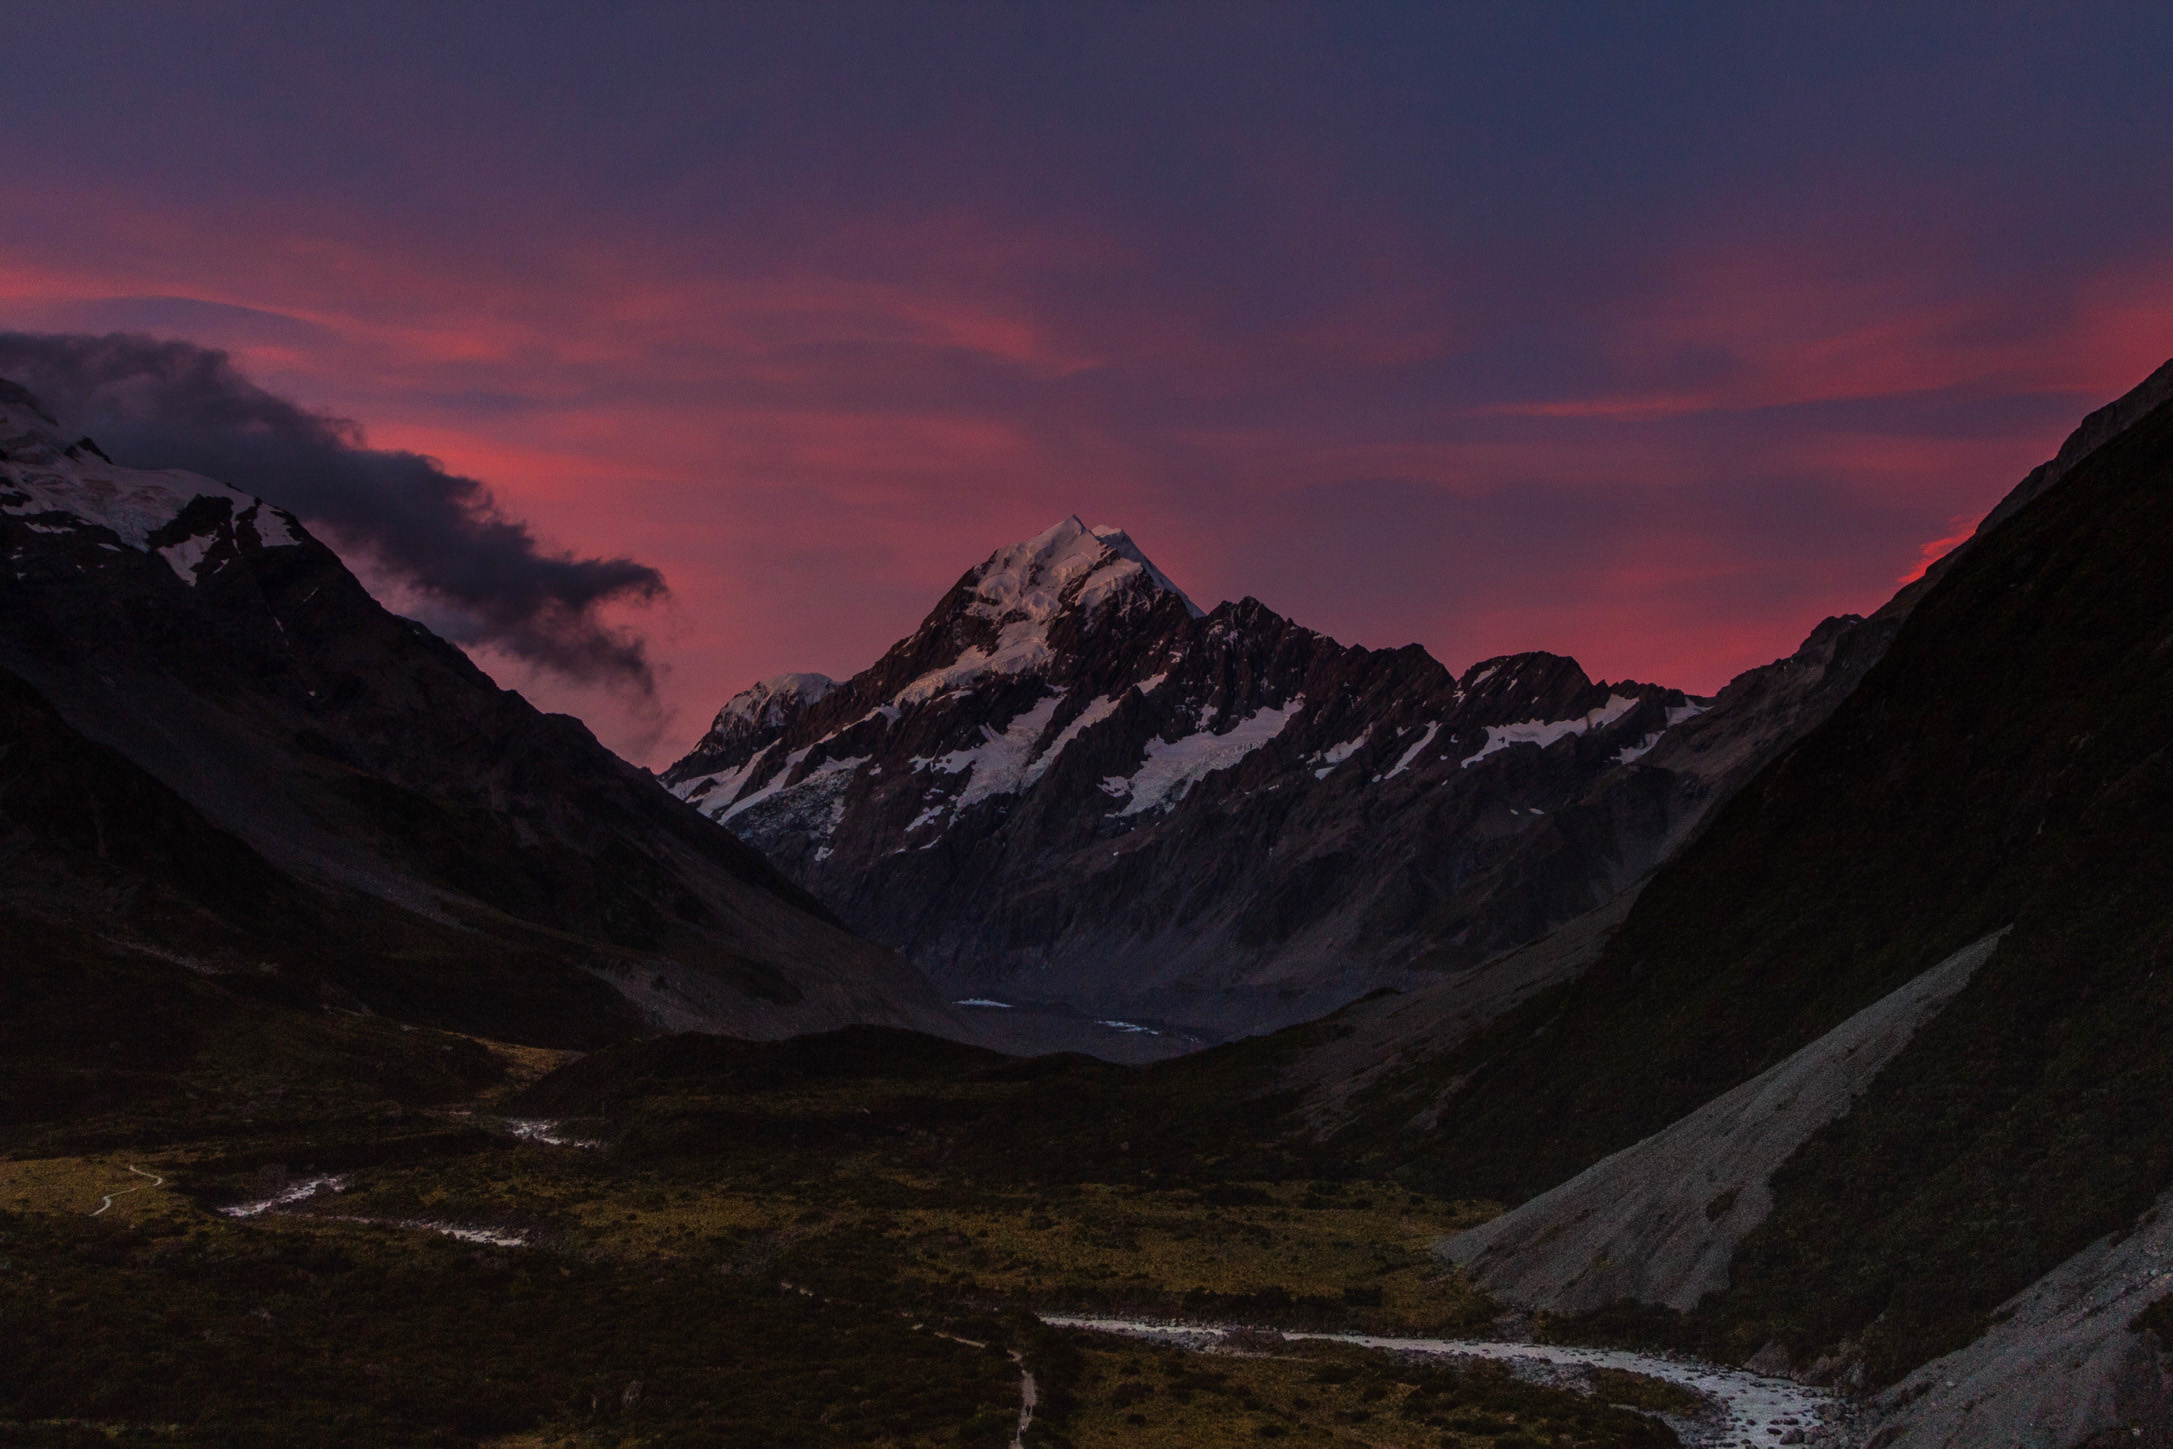
This was our last stop on the circle back to Christchurch and once we got there, I couldn’t believe that we saved the best for last. This was by far our favorite place on the South Island. Mt. Cook is the tallest mountain in New Zealand and whether you are on the West Coast or Canterbury side, there is no mistaking this towering peak. 

The closest place to get groceries in this area is Twizel. So make sure that you stock up so that you can spend as many days as you can in this magical area. 
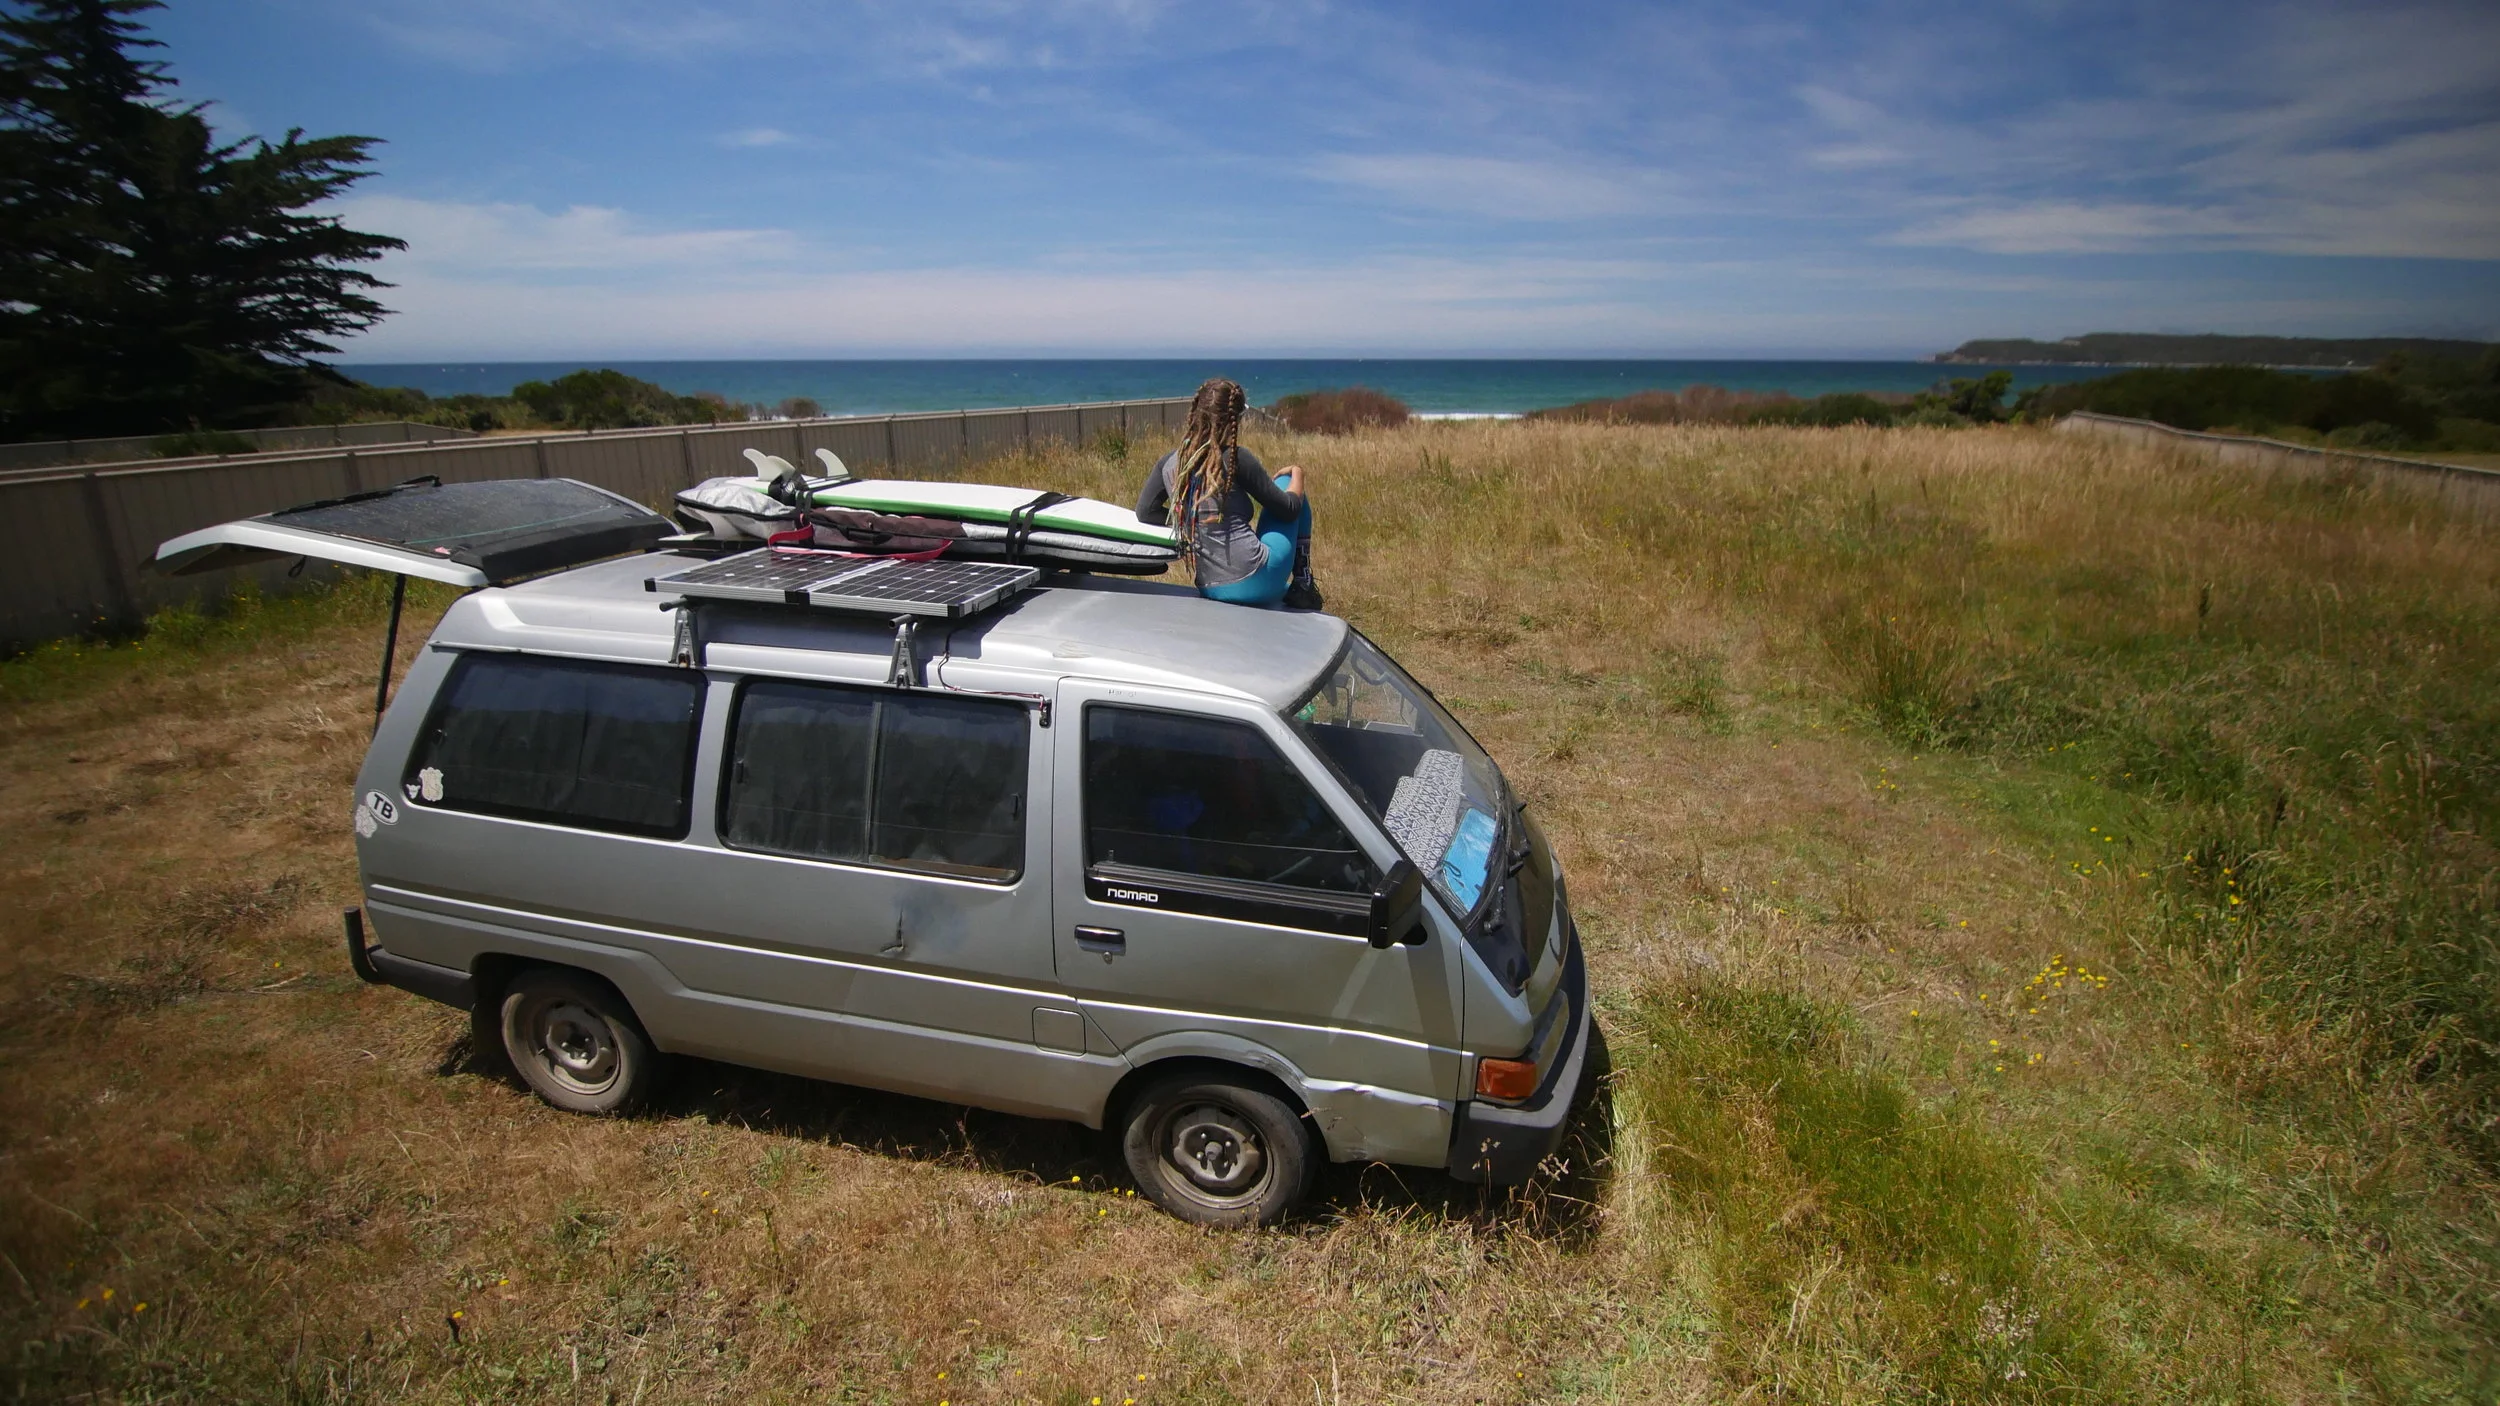
Camping

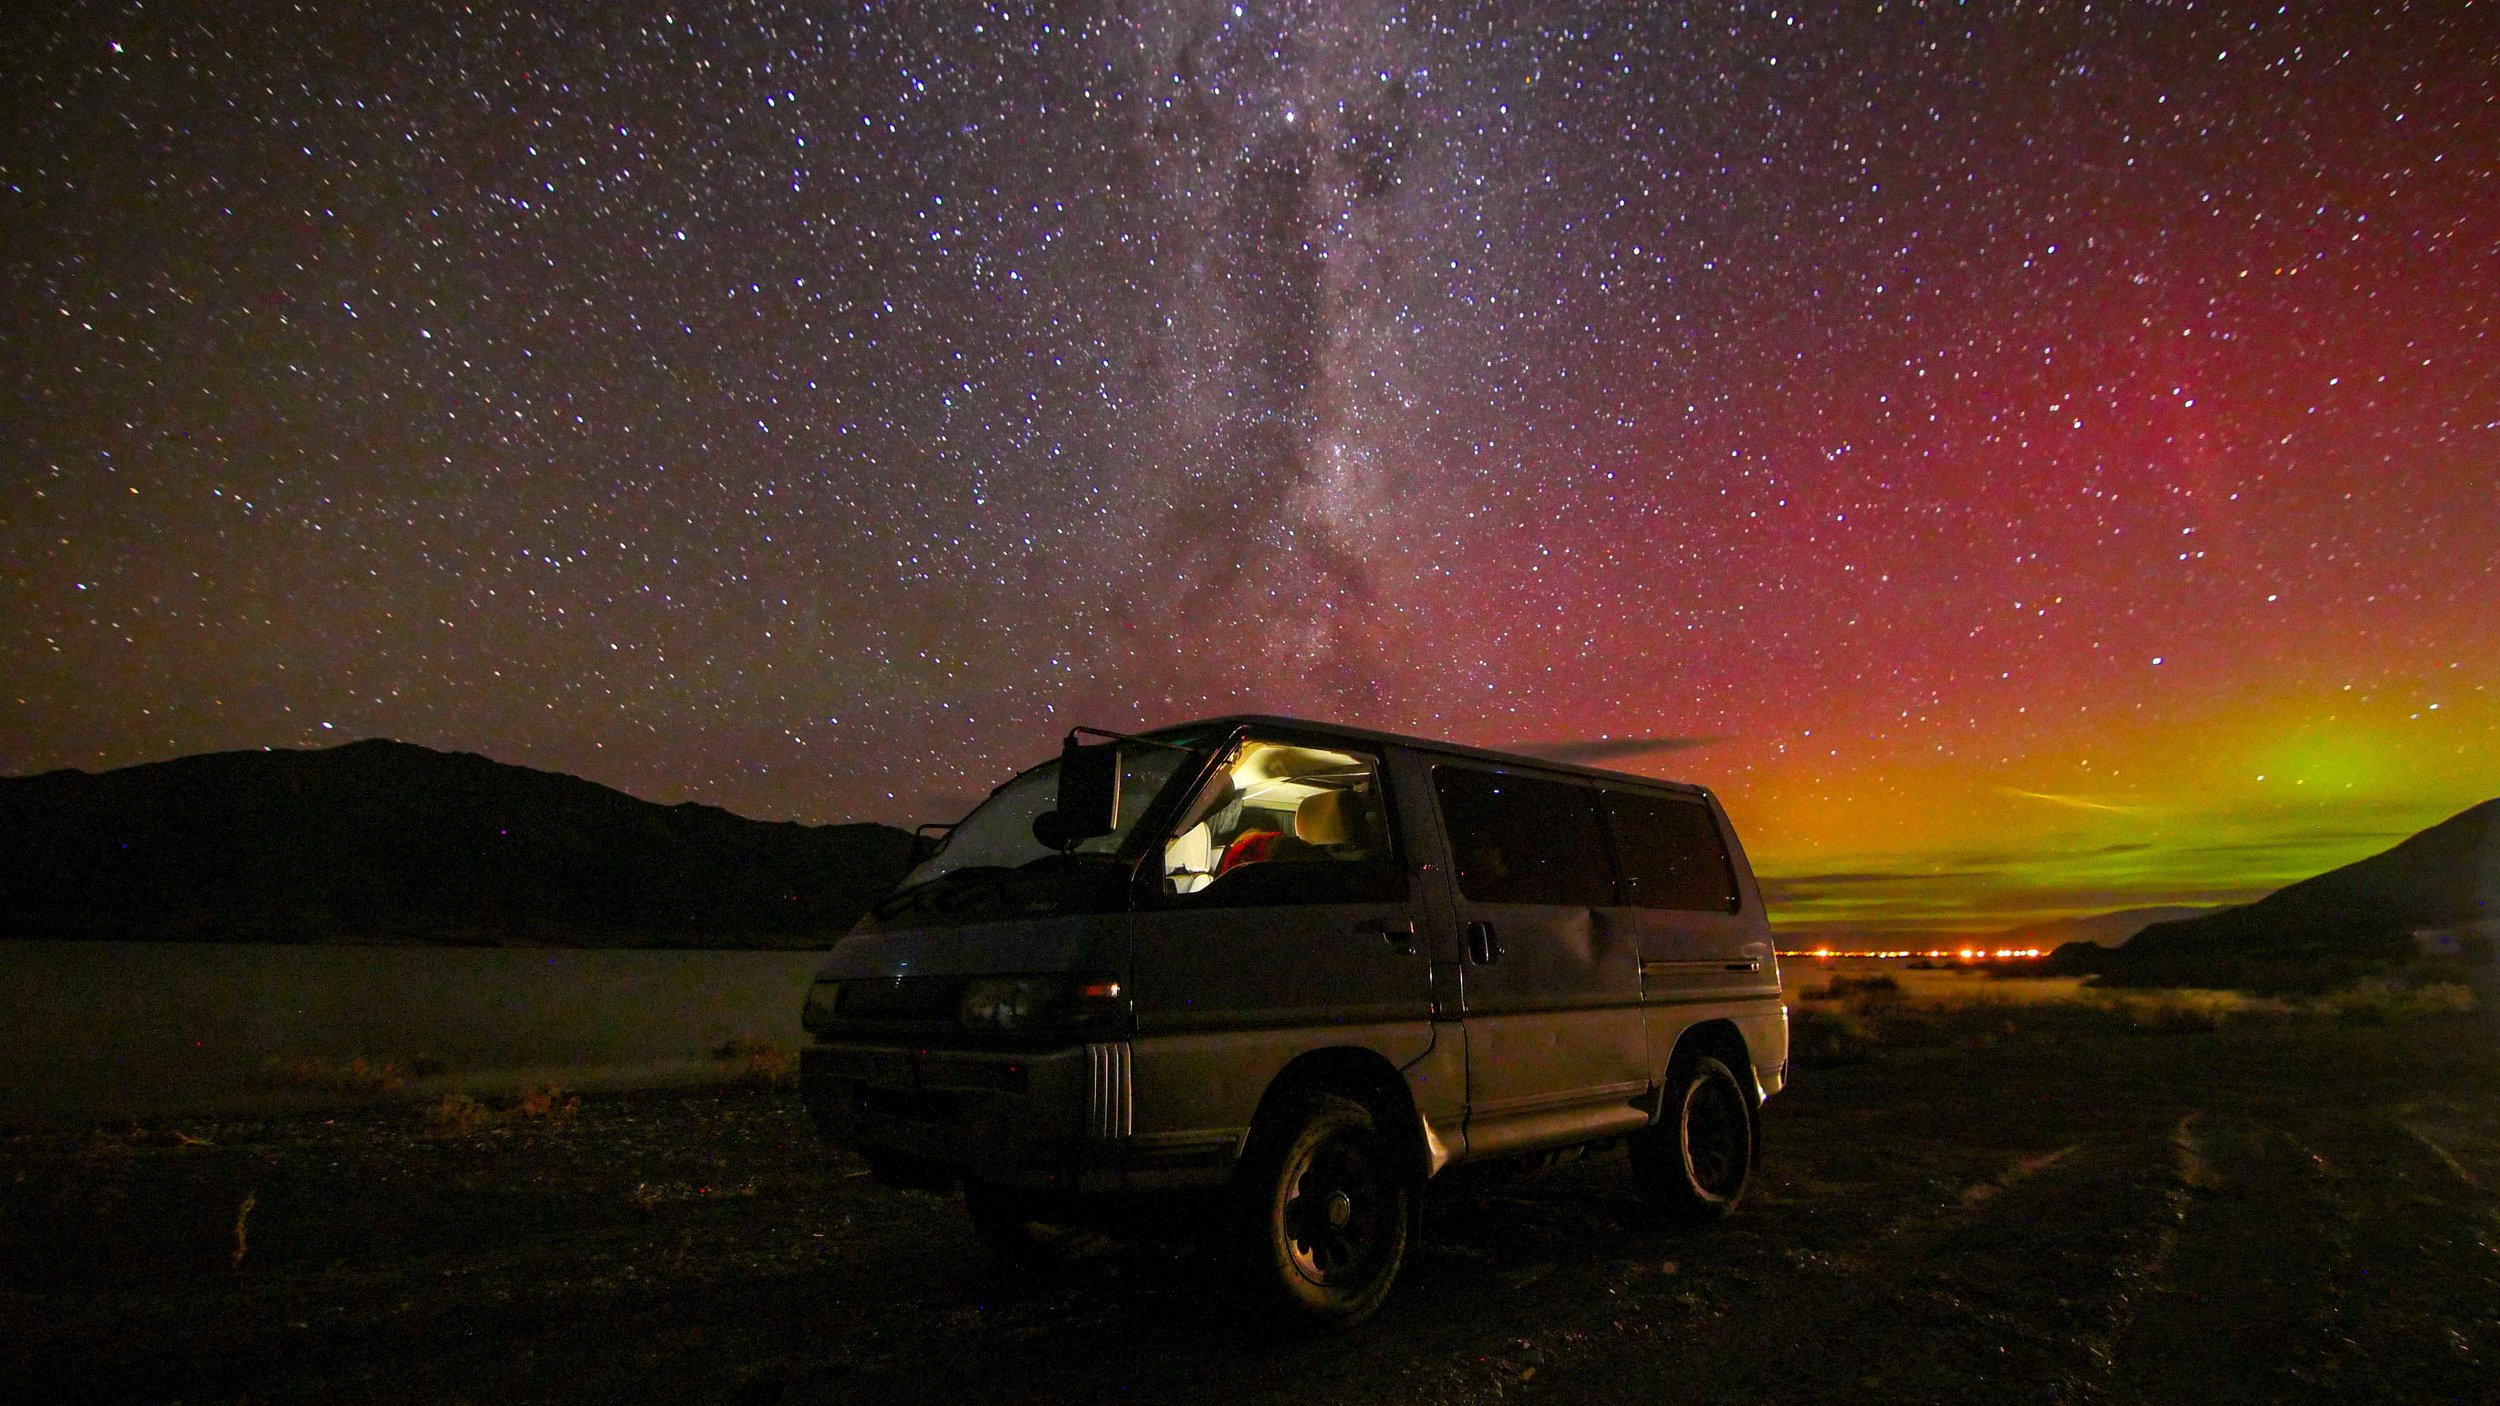
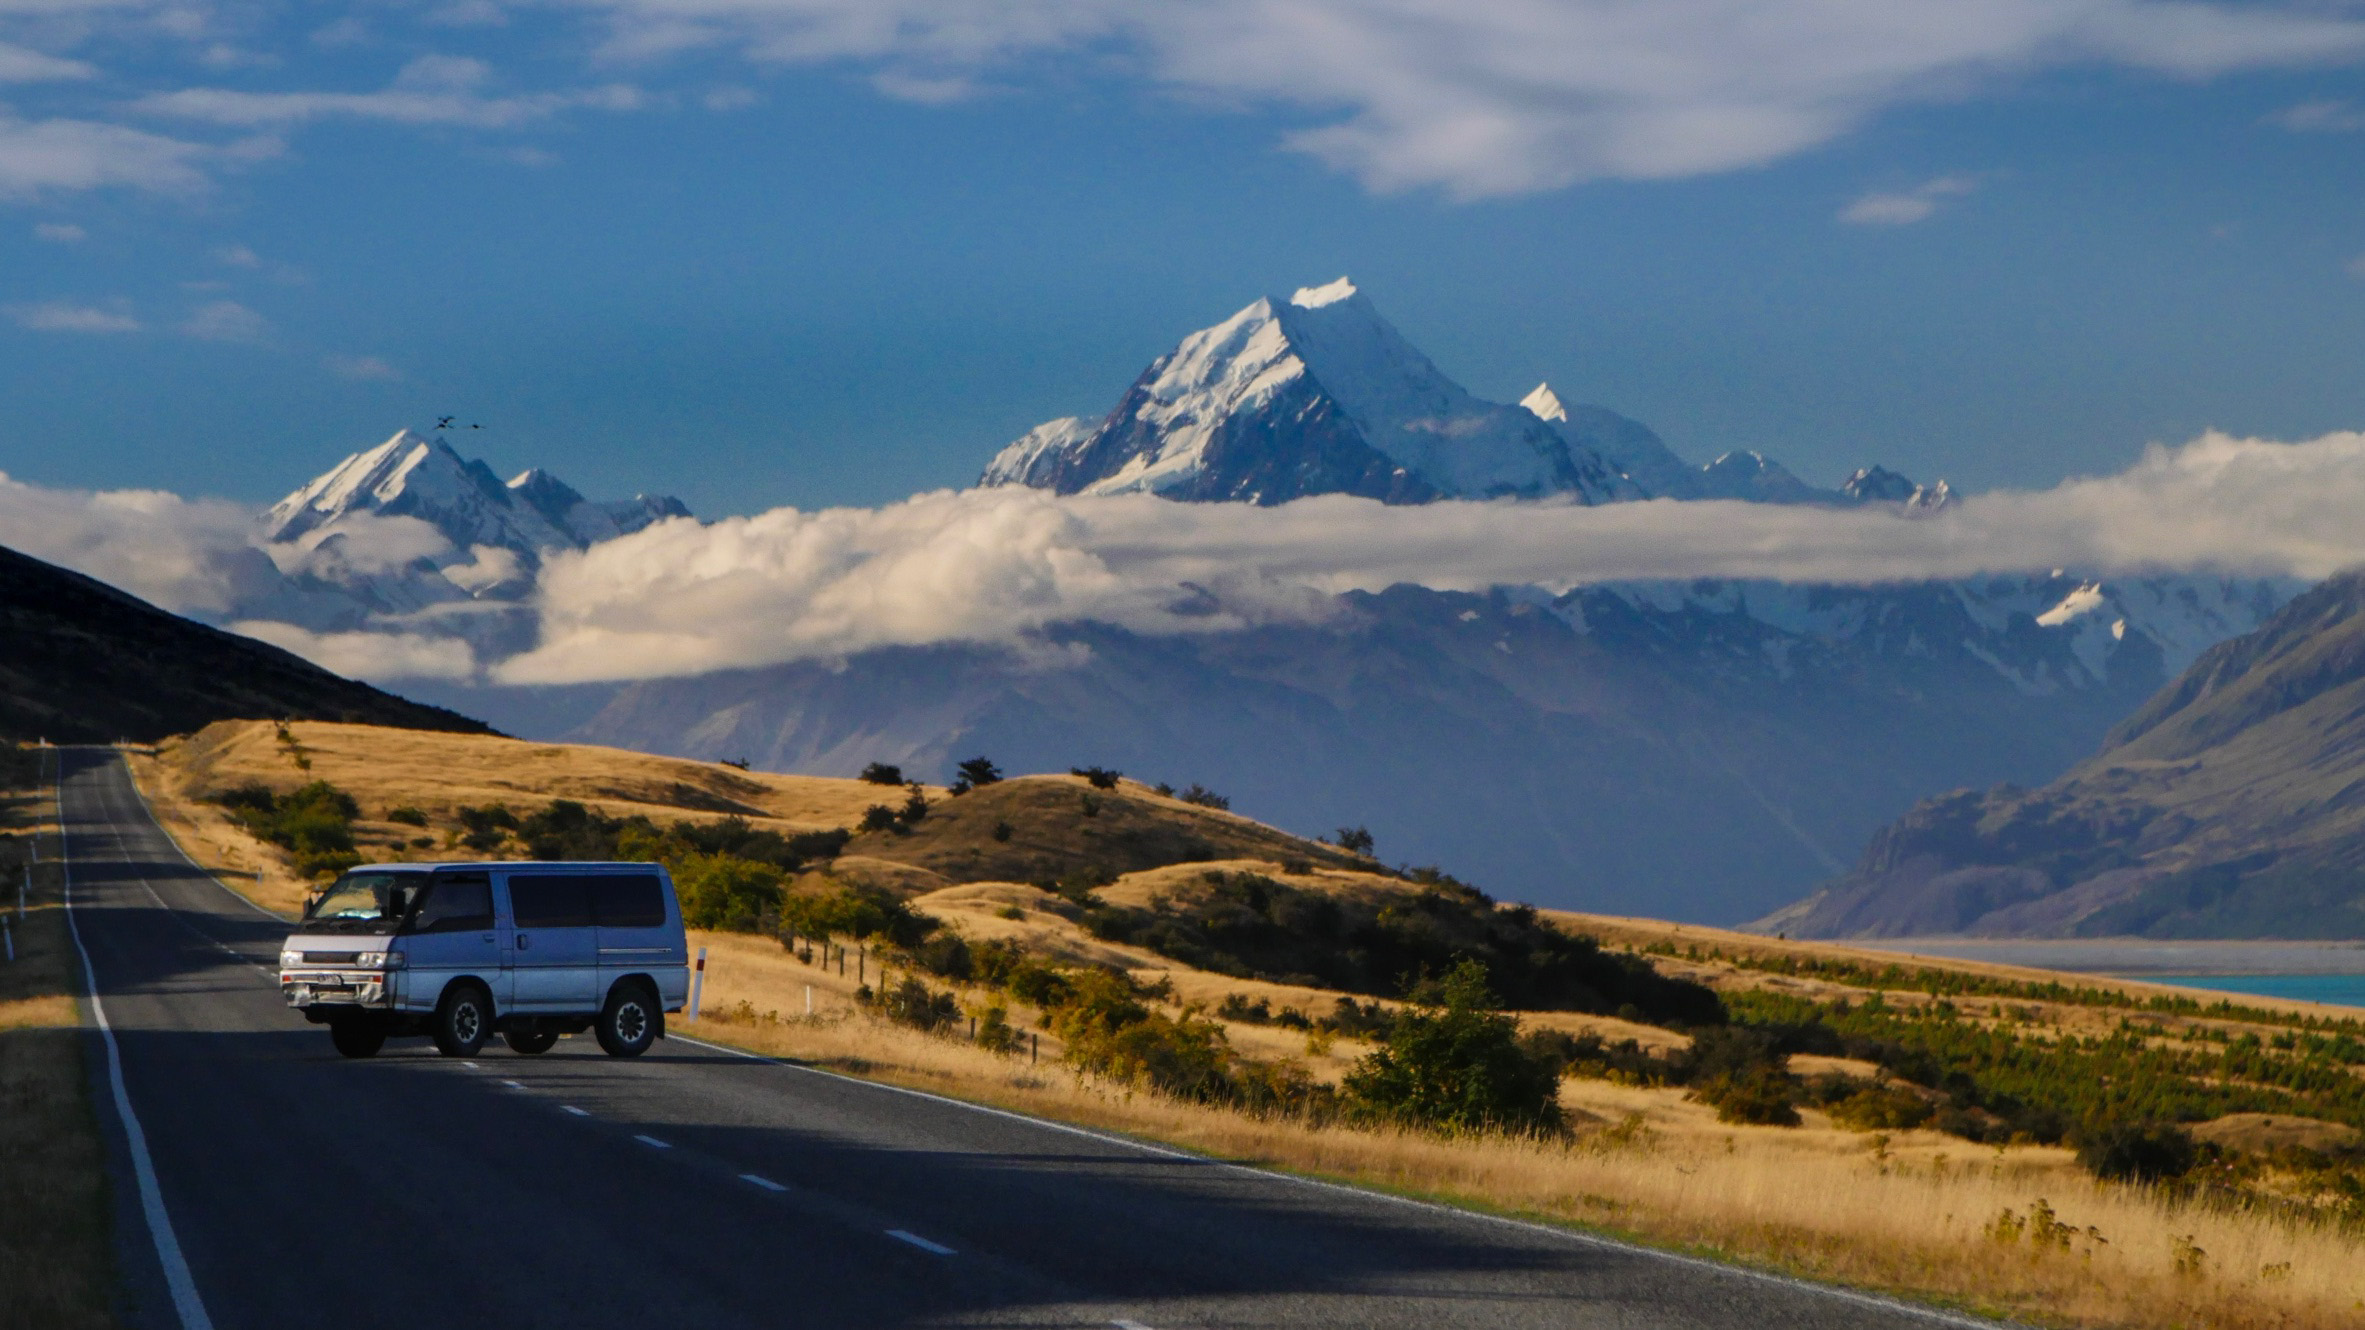
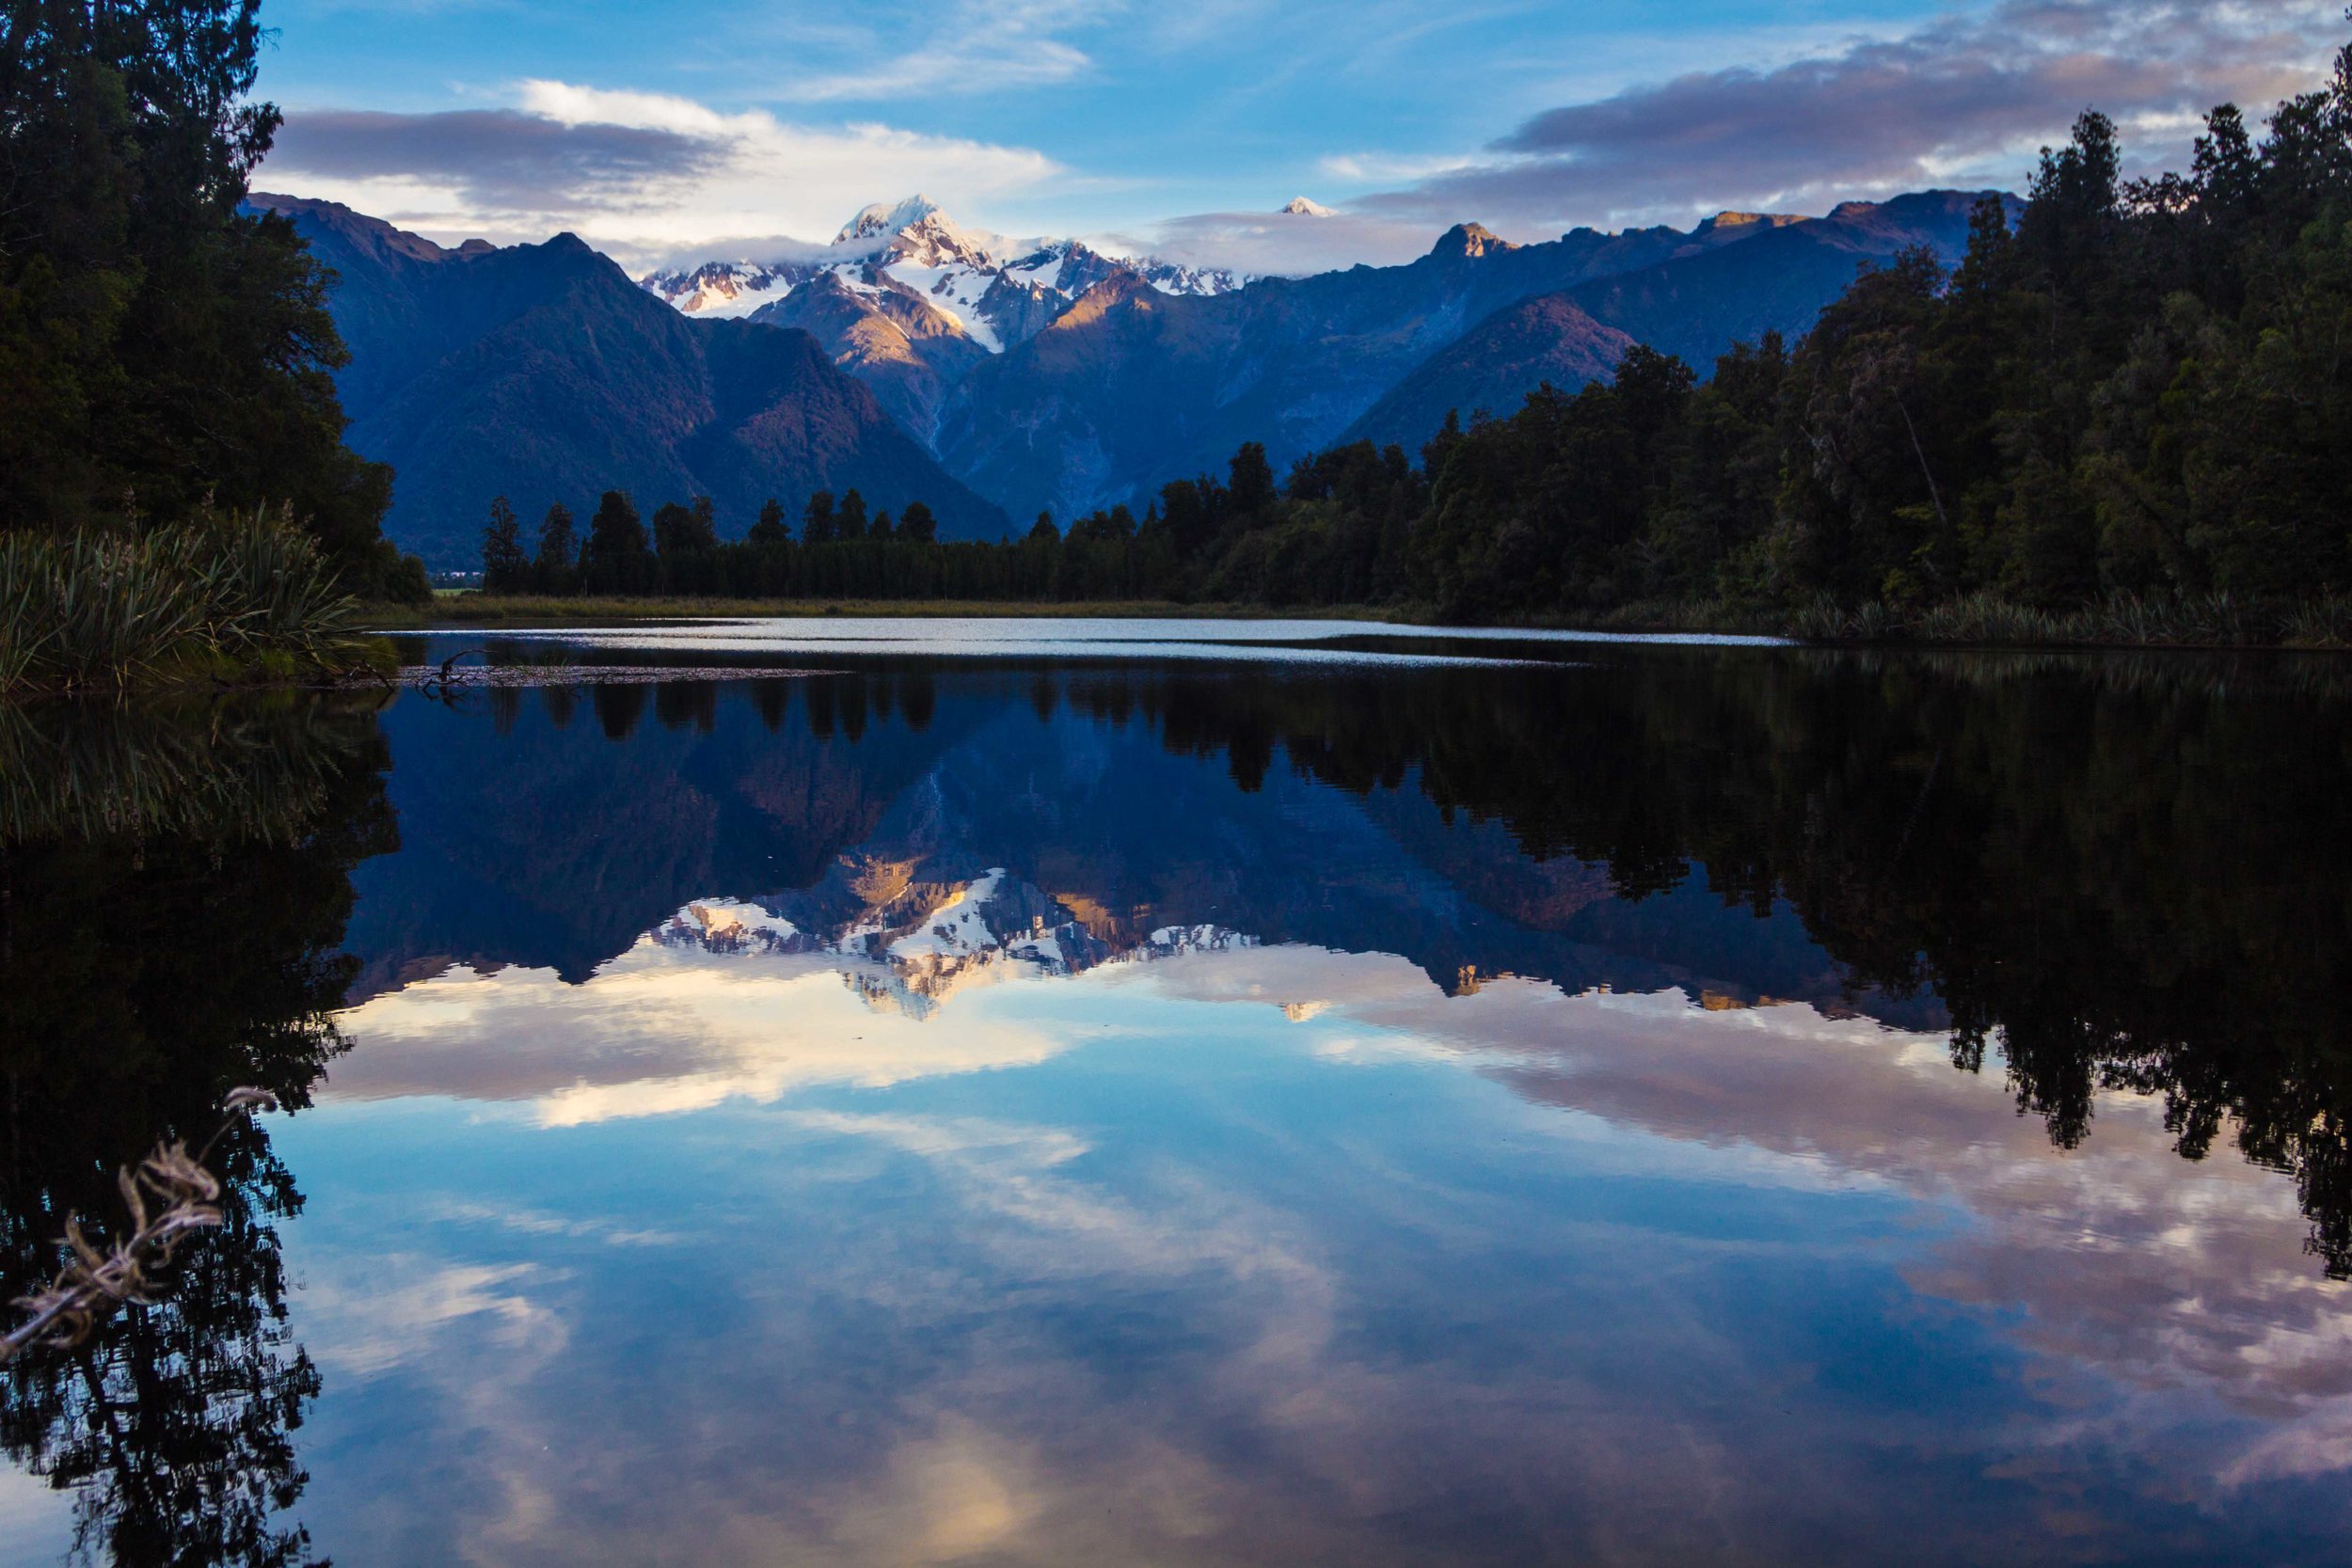
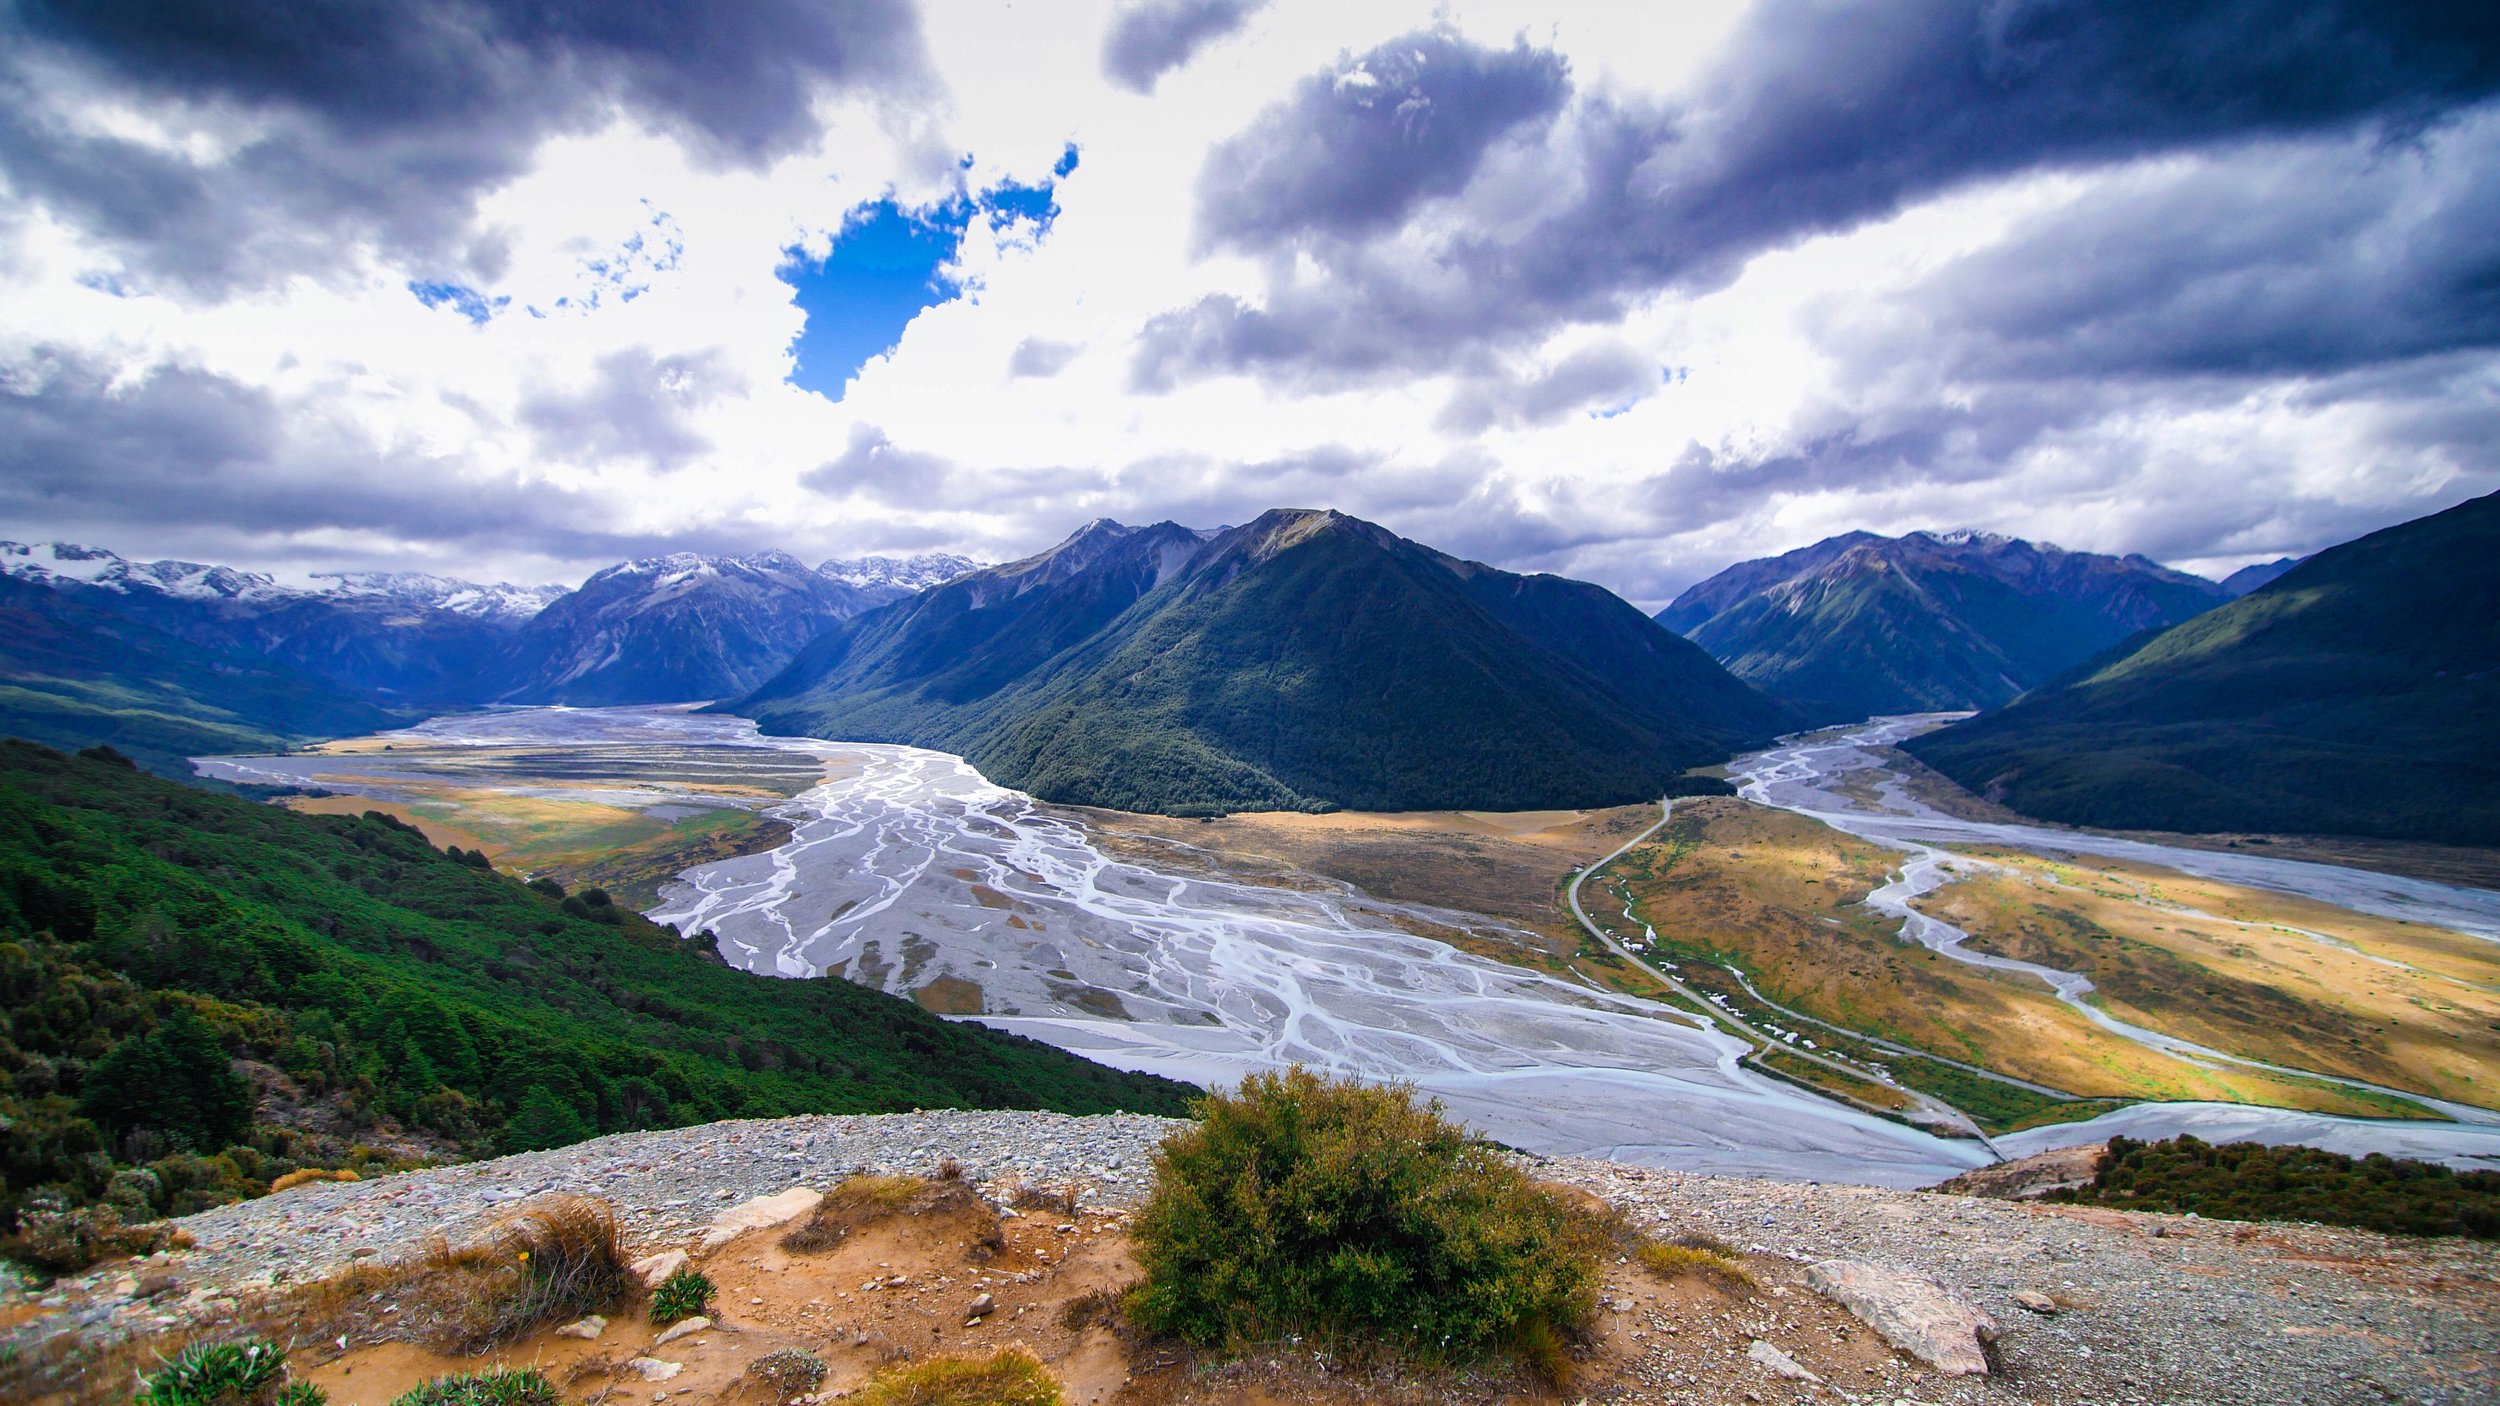
If you are on a budget, there is a free campsite with the most epic view and plenty of space at Lake Pukaki Campsite. It is about 50 minutes from the National Park, but believe me, it will take you longer because of how scenic the drive is. The scenic drive follows the shoreline of the turquoise Lake Pukaki. It’s one drive we didn’t mind repeating. So, we camped at this spot a total of three times. There are some awesome safe spots to pull over and take epic pictures, like Peter’s lookout, on your way to the park. I am sure that you will find quite a few more pull over spots on your way in, as it is very common to do so. 

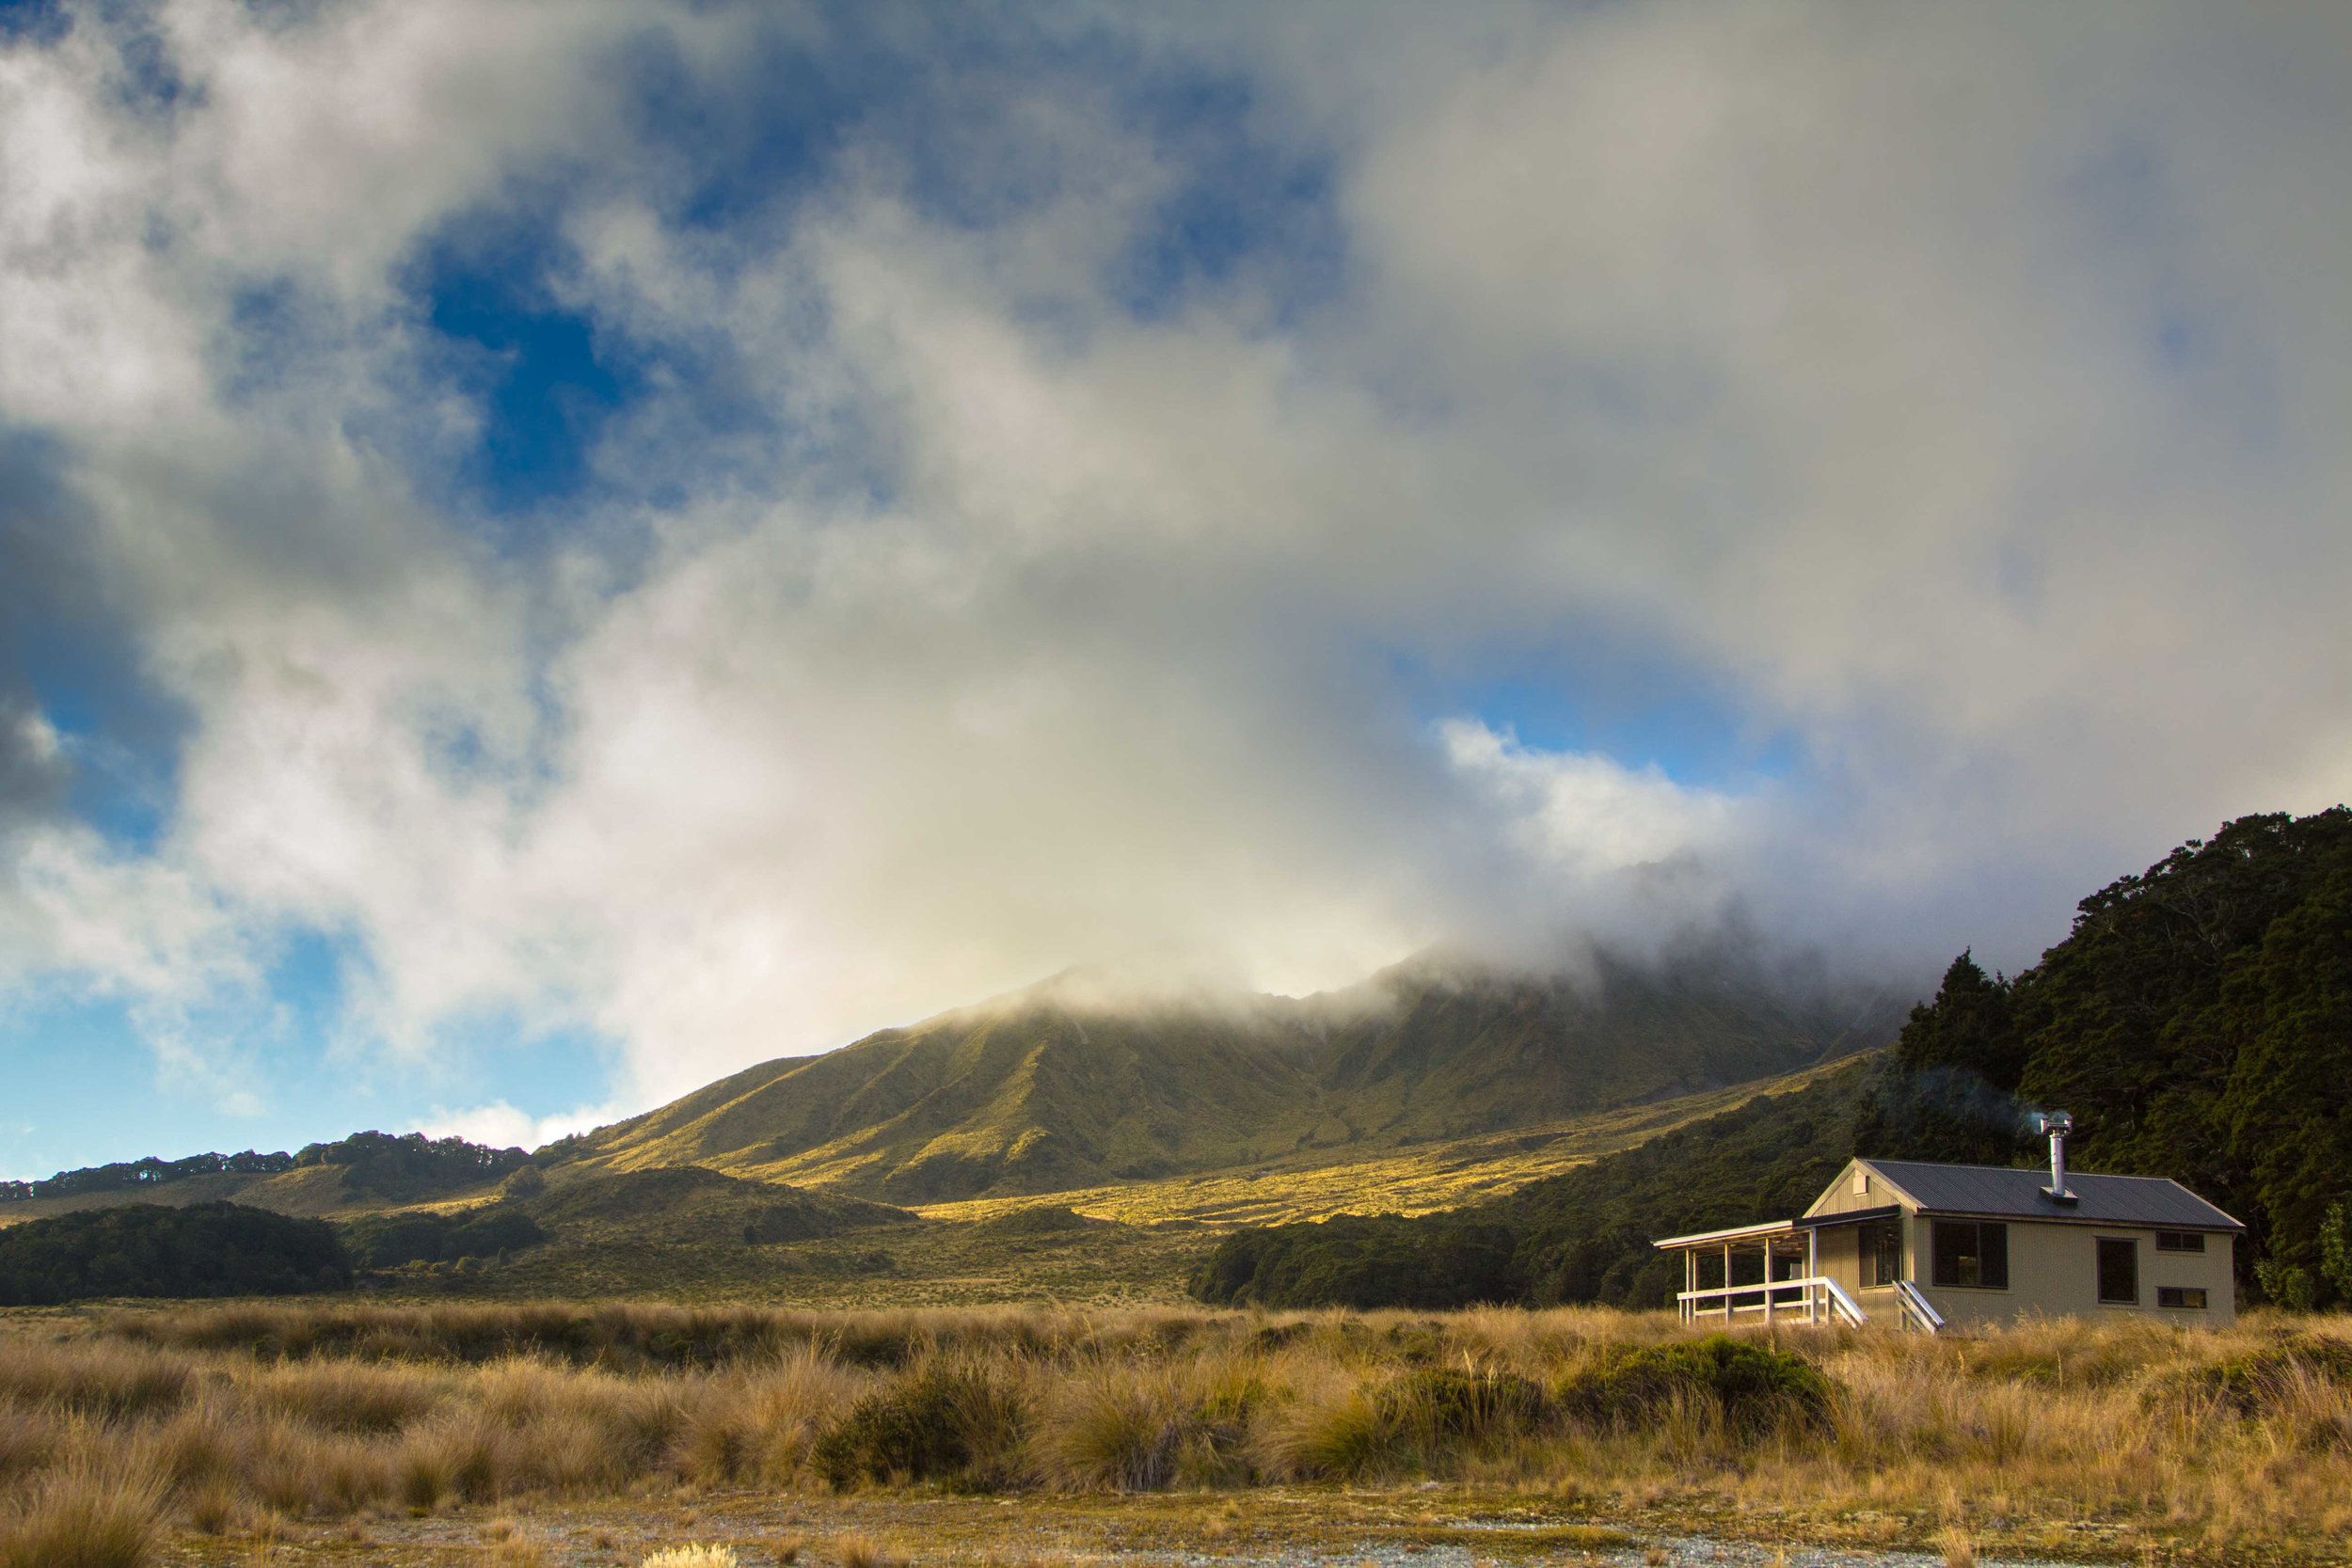
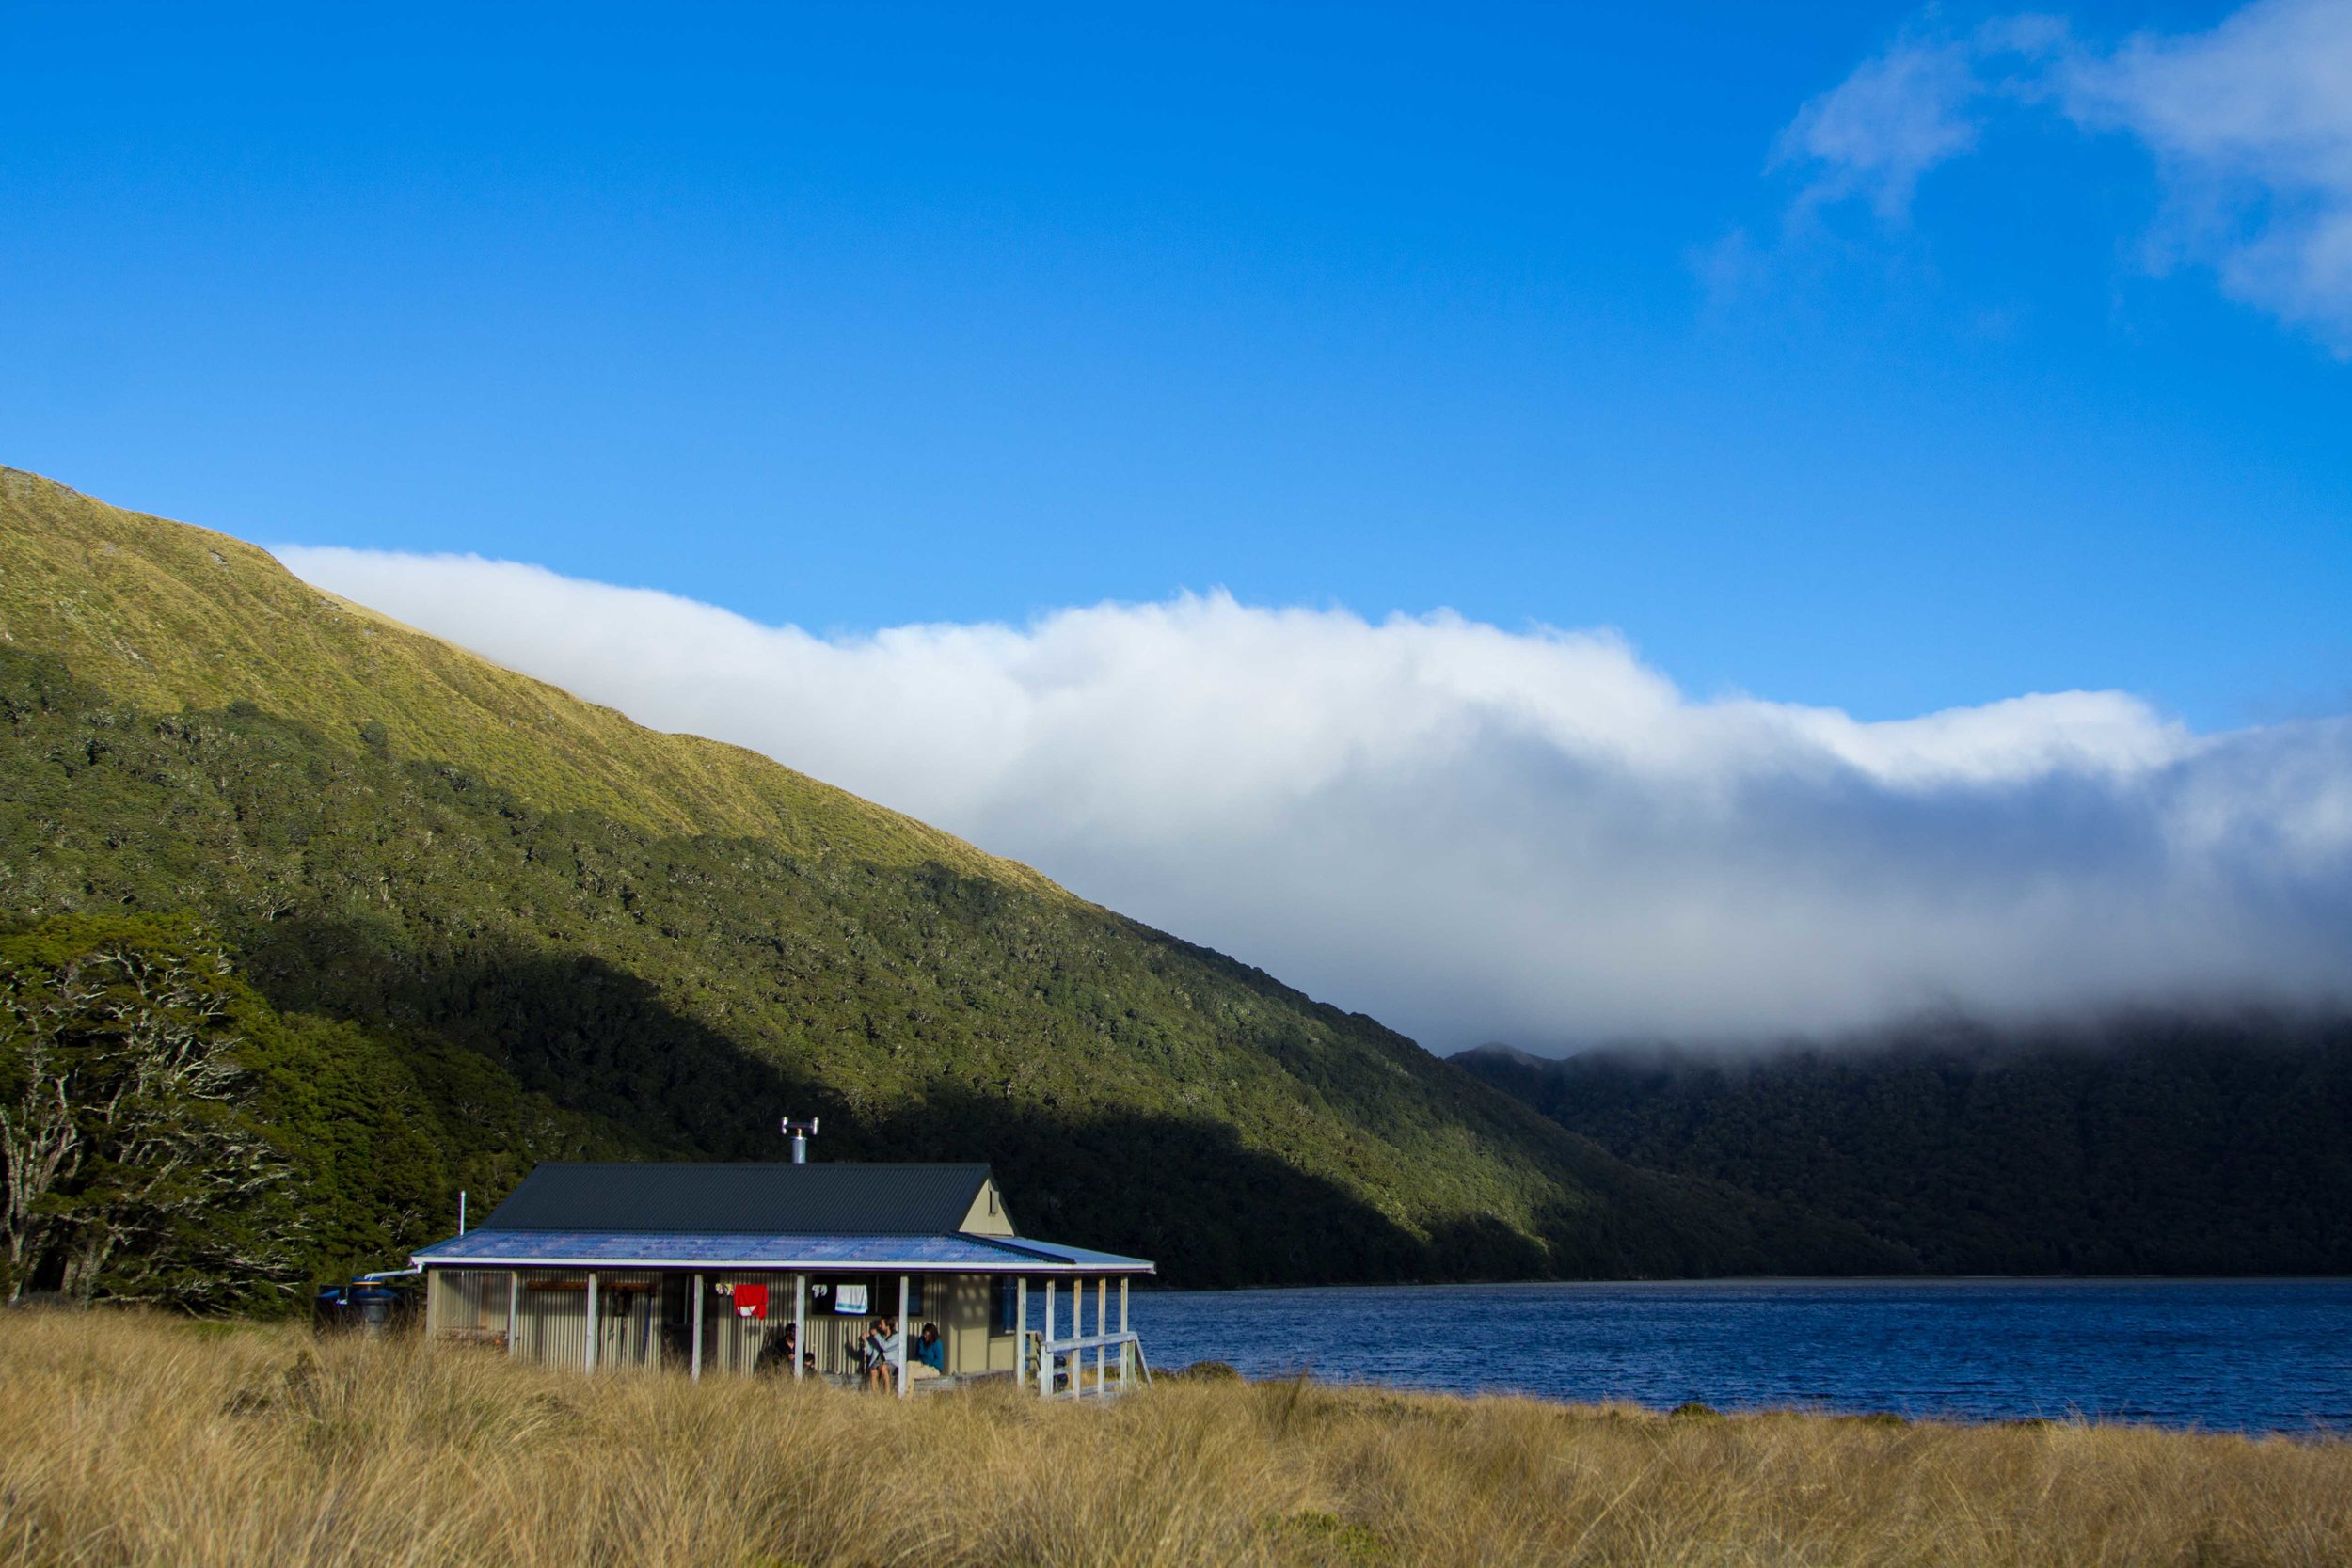
There is a DOC campsite at the base of the Hooker Valley, White Horse Hill Campground. It is a standard $13 per person per night and it has actual toilets, rubbish bins, drinking water, a big enclosed shelter to cook, and epic views and sounds of thundering glacier avalanches from Mt Sefton 24/7. 

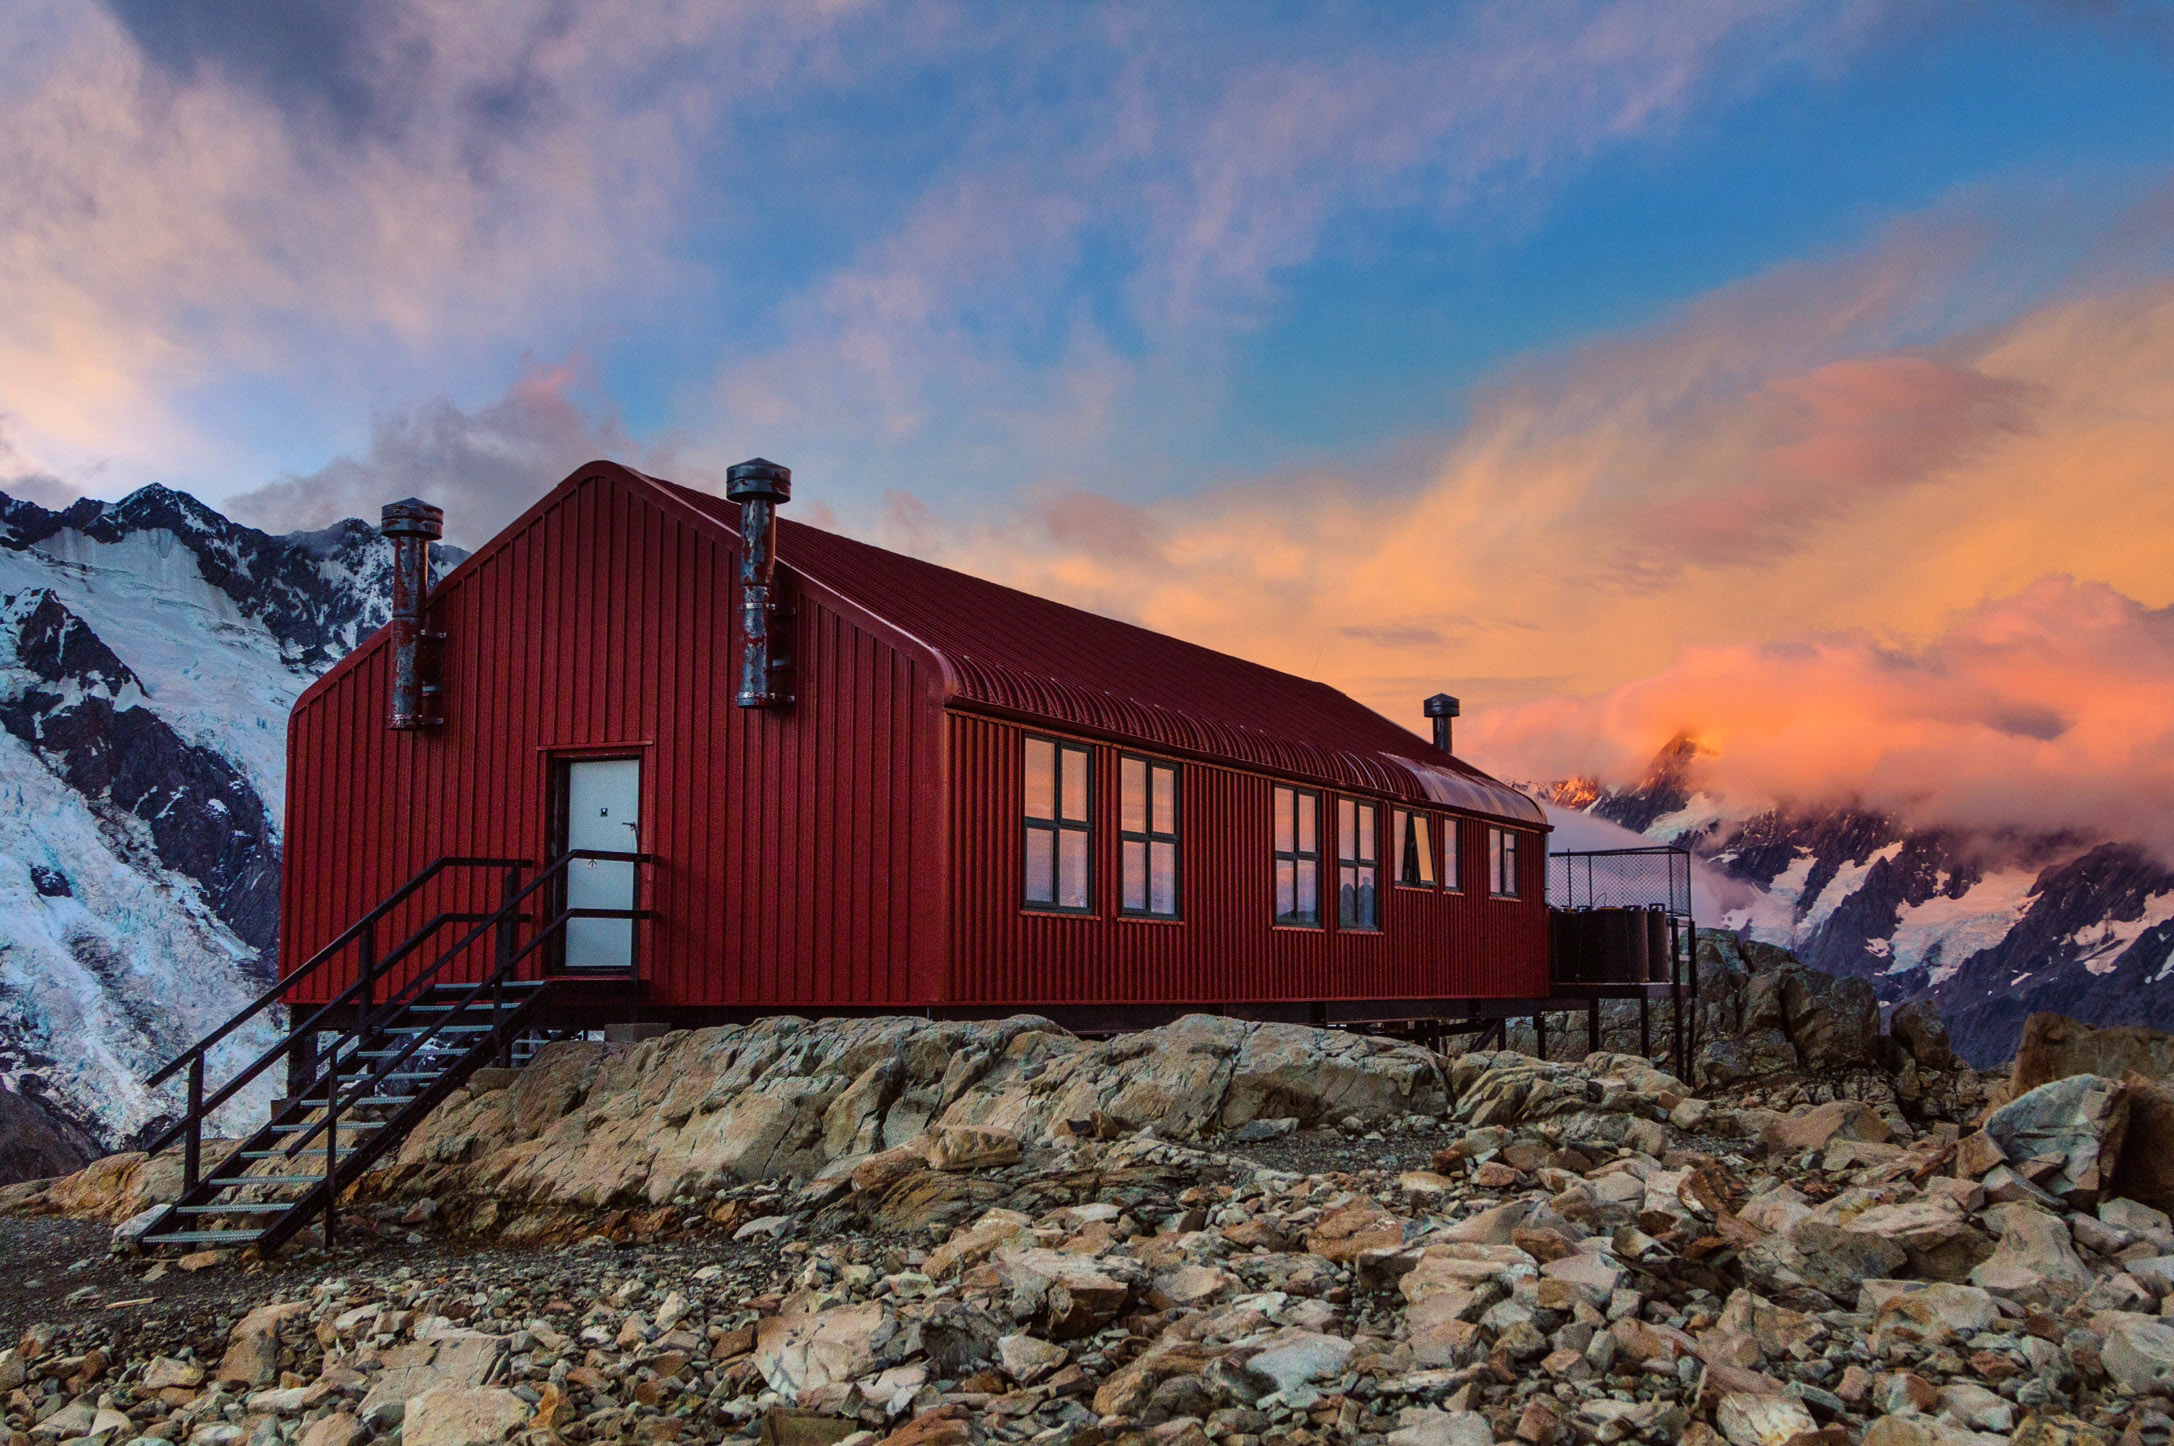
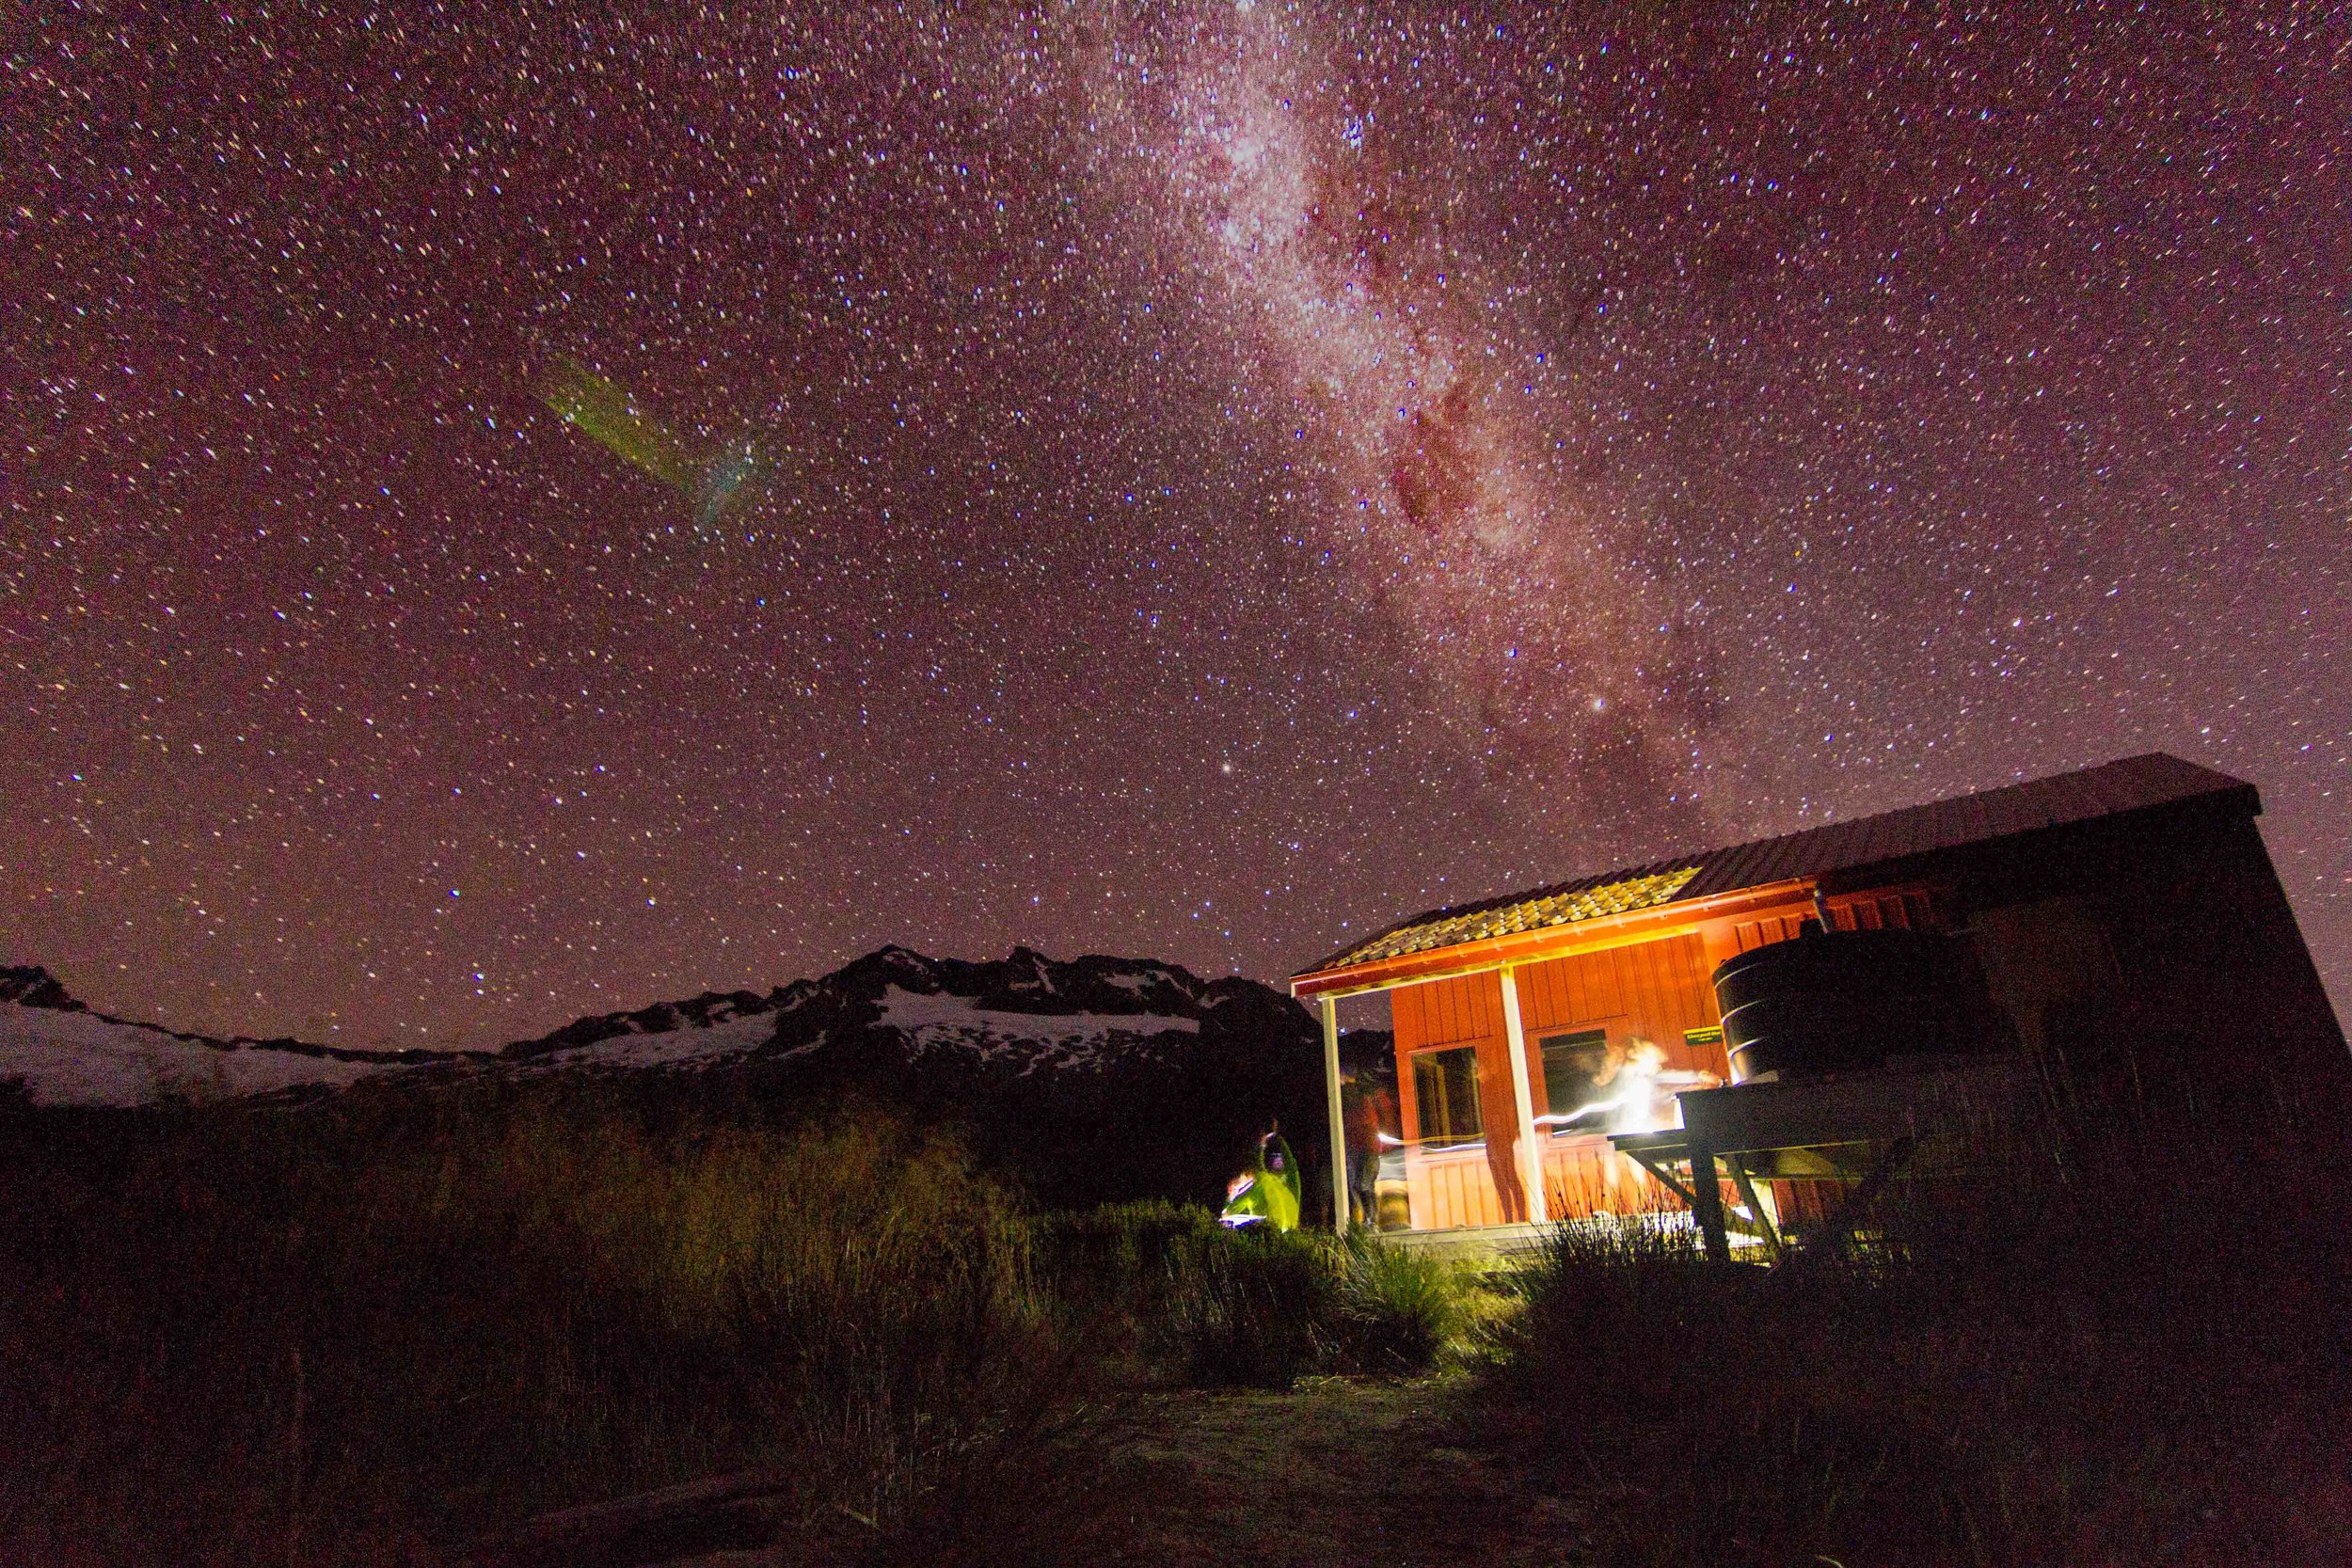
Mueller Hut is 1800 meters straight up and sits below Mt Oliver with views of the entire Hooker Valley, up close and personal views of Mt Sefton, and views of Mt Cook. We had been watching the weather forecast and timing our arrival to the area based on sunny weather combined with booking availability at this hut. It was our last must do hut in New Zealand. We booked the hut for a sunny day, but we totally blew it on checking out the wind aspect. For most of the climb, it is exposed to all the elements, but the most dangerous of them all, on this hike, is the wind. On our first attempt, the DOC refunded our payment and told us it was unsafe to go up, as the wind gusts in the valley below were 90 kmph and expected to exceed 100 kmph wind gusts on the trail. We were so bummed. It was a perfectly sunny day, but the wind could have blown us off the trail and down the side of the mountain. So, be sure to take into account the wind when planning your hike to Mueller hut! 

Finally, there was a window of semi-cloudy weather, some cancellations at the hut, and a light breeze of 5 kmph. We booked it and made the 4 hour drive from Christchurch to get some redemption and get the Mueller Hut experience. It was worth the wait and worth the climb. Booking Fees for this hut are $36 per person per night and it is worth every penny (and that’s coming from these two cheap asses). There are gas stoves and water at the hut. So, no need to bring your cooking gear.

There are also plenty of rock bivvys set up for tent camping near the hut. The hut warden that was on duty, when we were there, was asking tent campers if they had proof of a camping reservation, but I know people do it for free. She scared a couple groups of tent campers off that had hiked up all their gear, without a reservation. (You can get a reservation at the iCenter in the Village). But if you don't have a reservation, I’d say drop your stuff off under the hut, there is a rock bivvy under there. Then, set up just before sundown to avoid that hassle of being scared back down the mountain.

Tramping

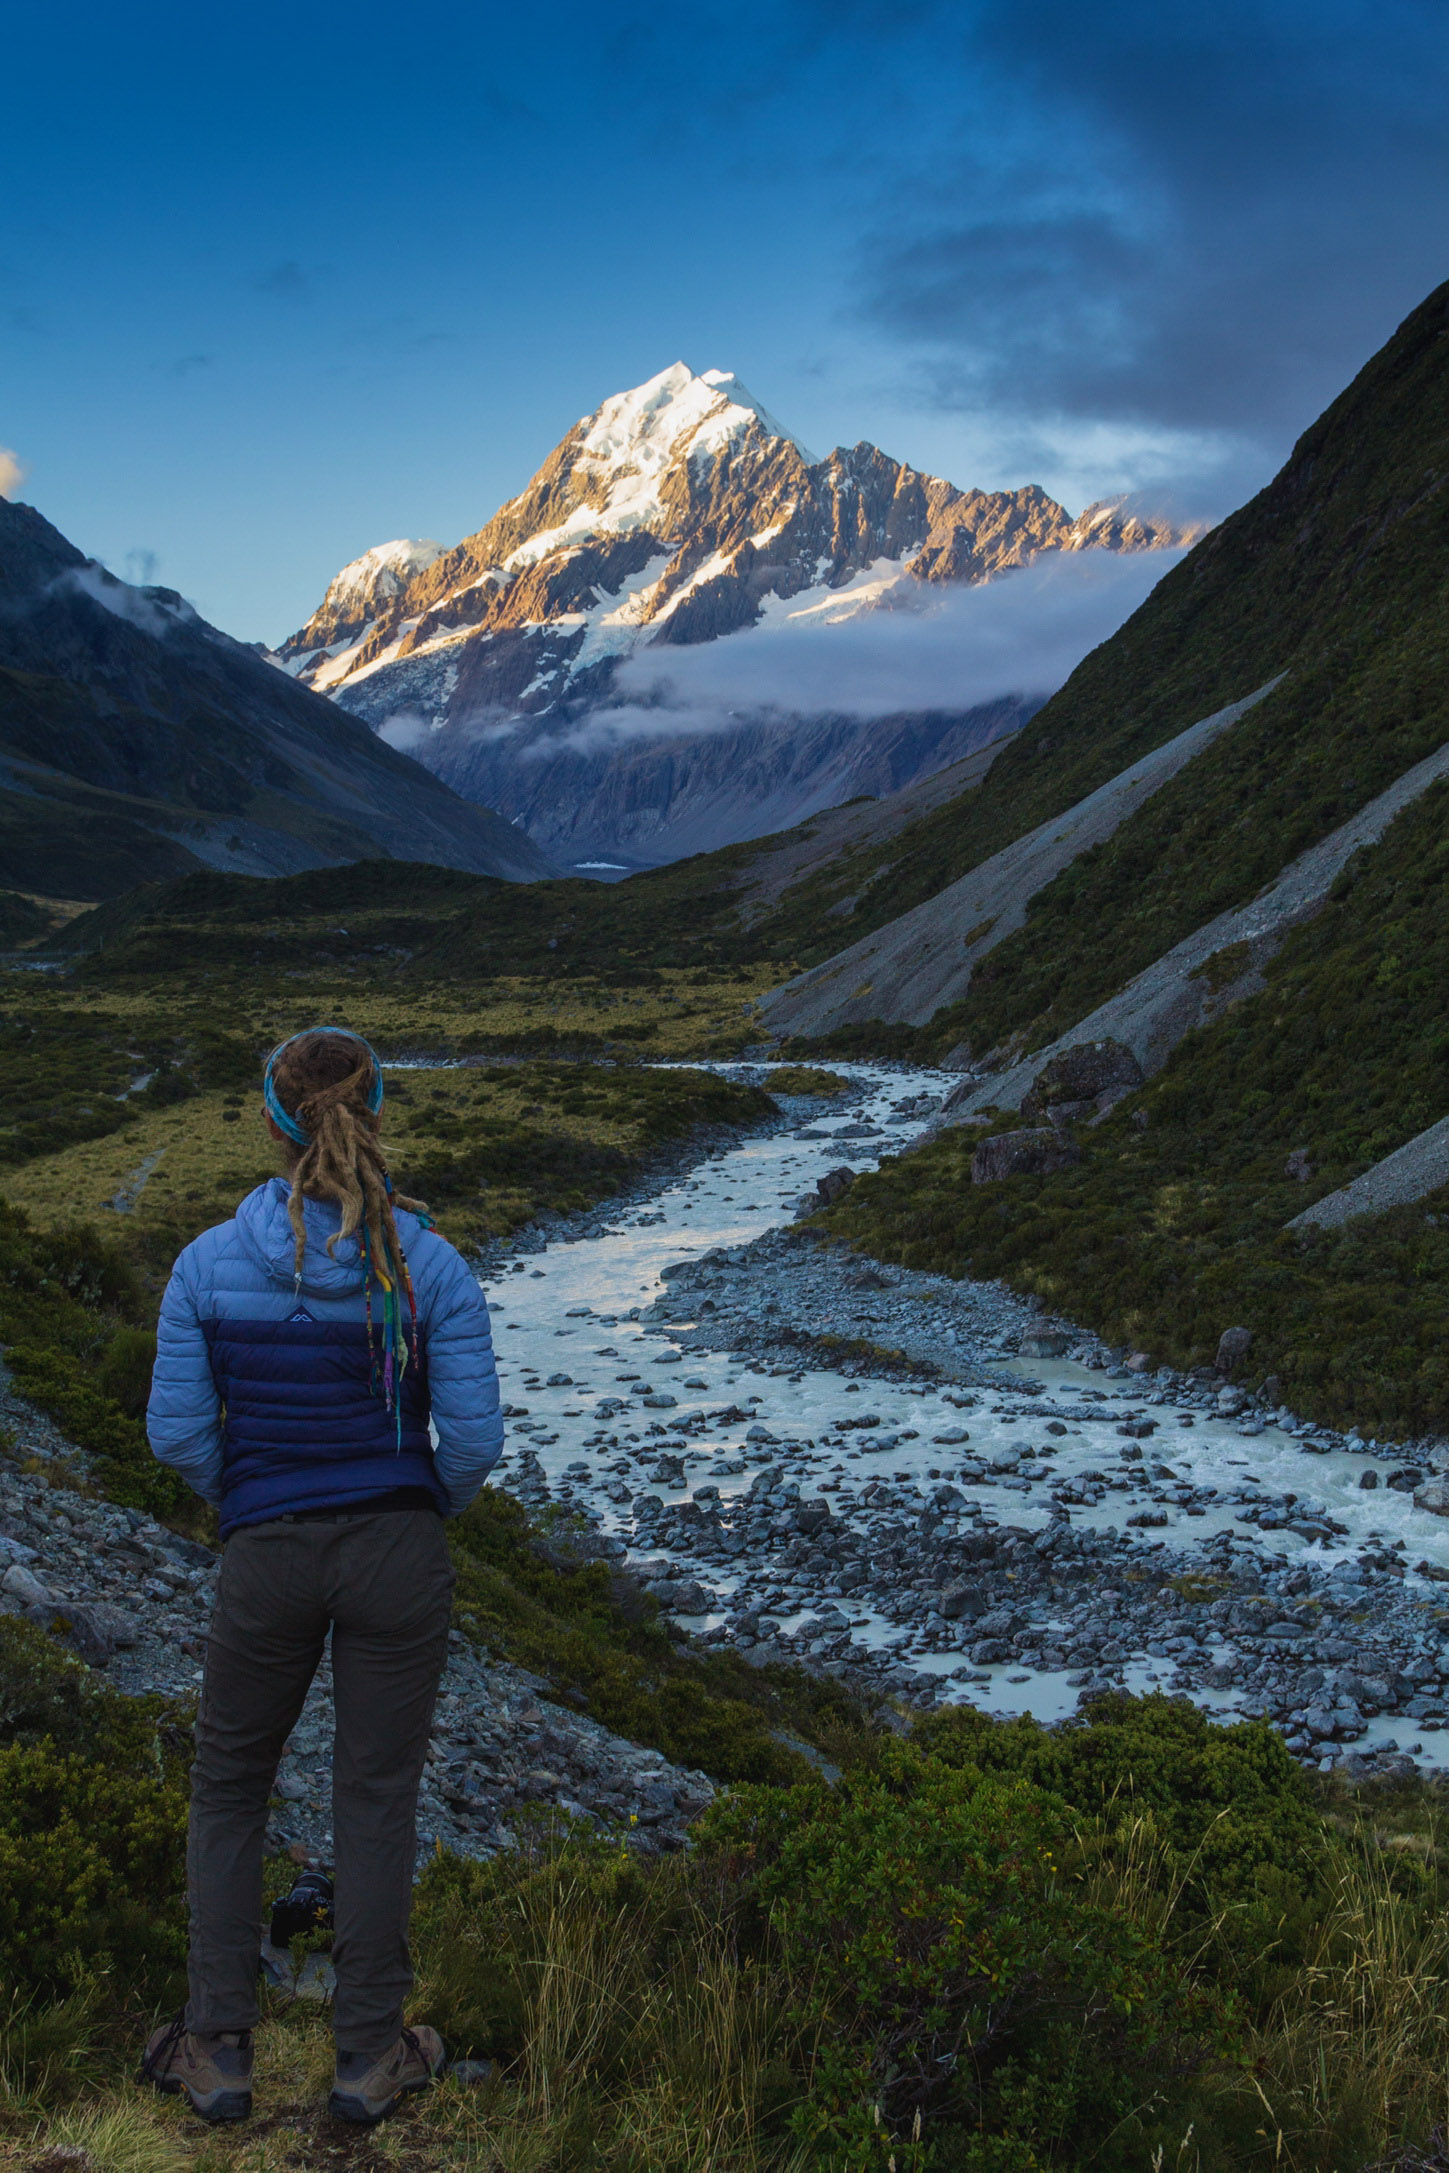
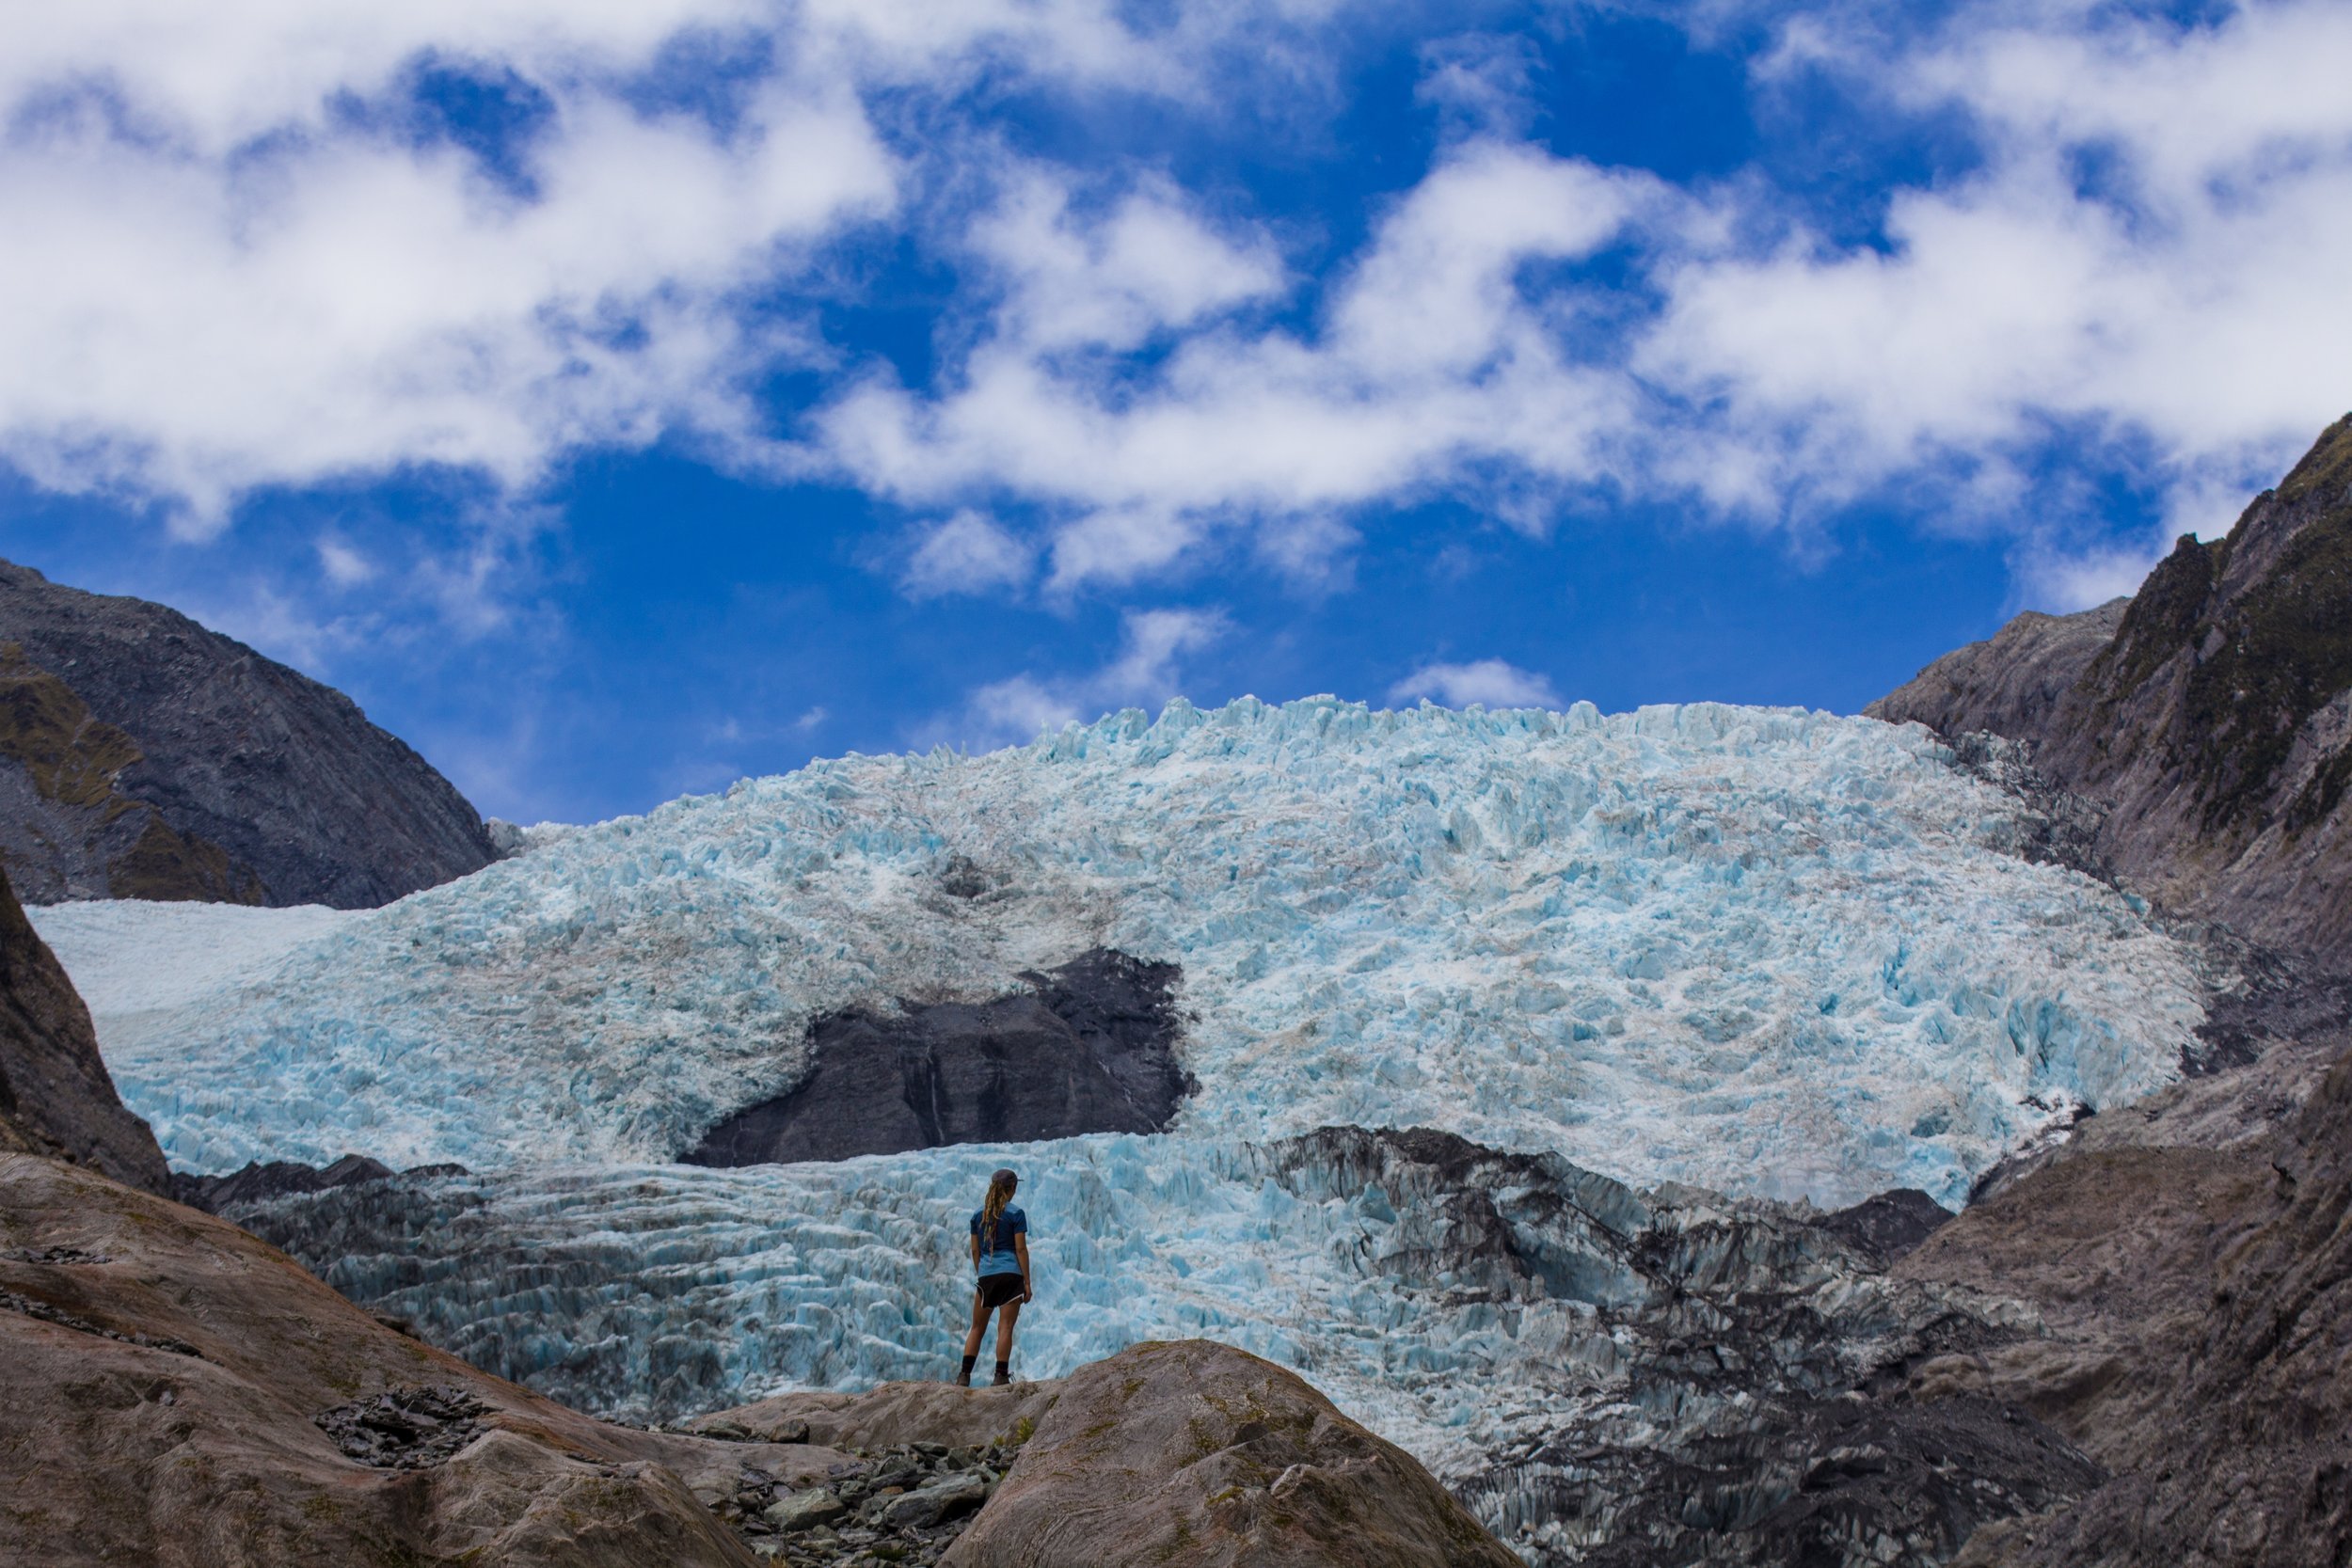
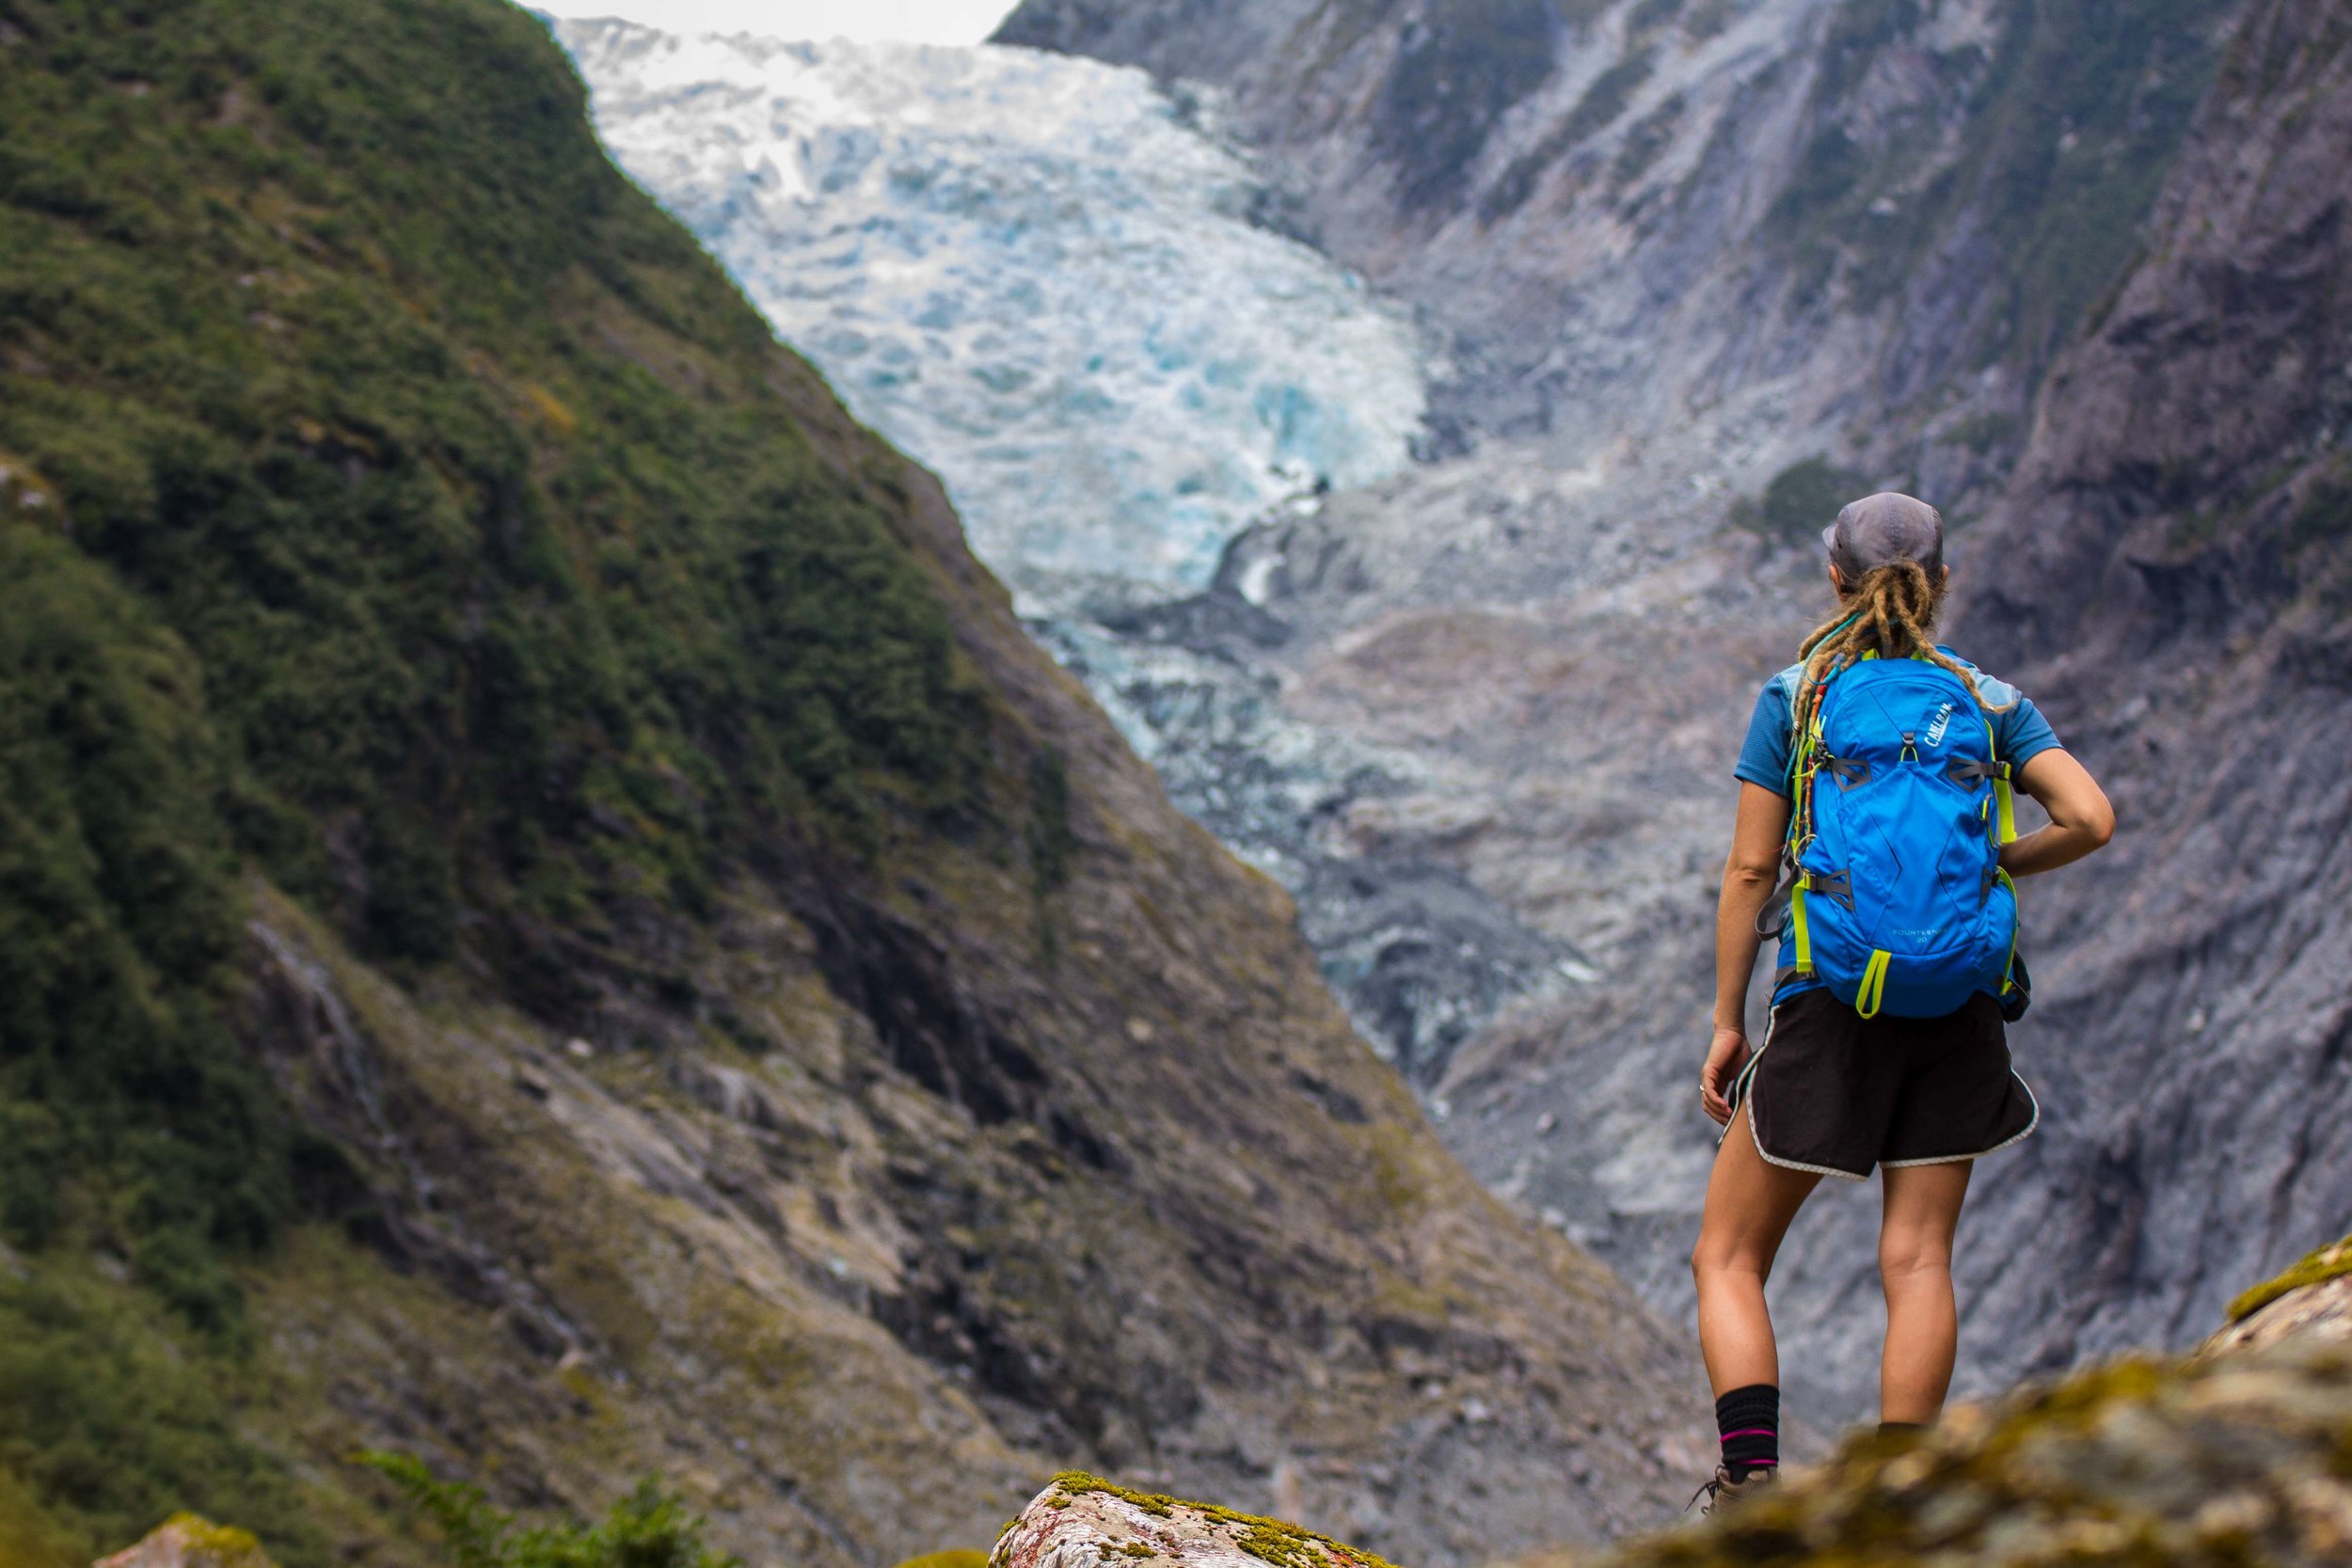
Hooker Valley had to be one of our all time favorite walks (I wouldn’t classify it as a hike or tramp). It was so effortless and beautiful that we did it 3 times in two days. I am not sure there was enough of an incline on the whole trail to even classify as a hill. So, it is perfect for the whole family. While the track is a 10km return, it really didn’t feel like it. There is so much beauty along the entire track that I could not believe it wasn’t officially among the best hikes/walks in New Zealand. This is a very popular track that is very well maintained with multiple swing bridges, look out points, picnic tables, and zig zagging board walks. The trail end is at Hooker Lake, where you will find floating icebergs and epic views of Mt. Cook and probably a few Kias, if you're lucky

Sealy Tarns - This is the most maintained part of the Mueller hut track. It is stairs the entire walk and once you reach the tarns, you are half way to Mueller Hut. On a sunny day, you can get a nice reflection of Mt Sefton in the tarn and great views below. But, I really wouldn’t do this tramp on a cloudy day, unless you are purely up for the workout. 

Mueller Hut - It actually surprised me how many people day hike this hut. They hike all the way up to have a snack or lunch and then walk back down! We thought about doing it the day after we got winded out, but if we made that effort, we wanted to see some stars, a sunset and sunrise. So we decided to wait till we had a reservation, but plenty of people day hike this hut. Once you get up there, you will see why. 

Green Lake Hut - Fiordland National Park's Hidden Gem

Green Lake Hut Lake Monowai Fiordland National PArk New Zealand

We weren't quite ready to leave Fiordland National Park after 5 great days.  We were able to dig deep and find a little gem on the south end of the national park, in the Lake Monowai area.  

Green Lake Hut is a newer serviced hut. It was built just a few years ago and is one of the nicest we've visited.  There are two ways to approach this hut. One is a 5+ hour hike from Lake Monowai Road.  The other, a much easier walk and the one we decided to choose, is a 2.5 hour 6.8 km hike from the Borland Bivy, just off of Borland Road.  This walk is quite easy, with really only one hill to climb towards the end.  The only problem we found was that in a few areas the grass was chest high, at times, making the trail hard to find and sometimes a bit boggy underfoot.  

We would highly recommend this hut, as it is hardly used and you could find yourself with an empty or uncrowded hut.  There are many other options in the area for hiking and overnight hut stays in the Lake Monowai/Borland Road Area.  There is also a free campground at Lake Monowai that we stayed at after the hike.  We really enjoyed this off the beaten path area. It is hardly ever visited by tourist.  

5 Days in Fiordland National Park - Best Hikes and Camping

Fiord Land Great Walk on the budget, Kepler Track, ROuteburn, Milford SOund

Where do you even start in this amazing place?  First off, there are three Great Walks on one road.  There are plenty of trails to spend overnighters or just day hike.  There are heaps of roadside pull over spots for a quick picture as the drive into this place is amazing on it’s own.  This area is amazing and planning a quick trip to Fiordland can be difficult and overwhelming at times.  We had an awesome time in the six days we spent in this outdoor playground. So we thought we would make your life easy and share our itinerary to hopefully help you get together a game plan for one of New Zealand’s best National Parks.

Hiking the Kepler Track for Cheap, Kepler Track TIps, Budget Great Walk Tips

Day 1: Kepler Track Overnighter - If you’re as unprepared as we are, in the New Zealand’s busy season, you’ve most likely found out that A: Great Walks are all booked out and B: They are overpriced and really aren't geared towards the budget traveler.  We found a way around this anomaly and decided to do the Kepler Track our own way. Because after all, there shouldn’t be so many rules on how one should hike a nature track.

We learned from friends that the Kepler Track is really only amazing above tree line from Mt. Luxmore Hut to Iris Burn Hut.  So, what we did was booked a campsite at Broad Bay and walked from the Control Gates car park at about 8am to Broad Bay.  We got to the campsite in less than an hour. We set up camp and packed our day bags (Which we packed inside our overnight packs) for a long day hike.  From Broad Bay Campsite, it’s a fairly easy climb about 3.5 hours up to Mt. Luxmore Hut, where you can stop and have snacks or eat lunch, and even check out the Luxmore Caves, which are 10min away from the hut.  From here, it’s about an hour hike to Mt. Luxmore summit. It’s only a 10 minute hike up to the summit, off the track, you should definitely do it, if the weather is nice.  From Luxmore summit to Iris Burn is where you really start to experience the greatness of this Great Walk.  With amazing views over Te Anu lake, this is a hike that was worth the all day effort of hiking.  From here, if the weather permits, you can continue on to the emergency shelters, which we highly recommend to get the full Kepler experience.  Just remember you have to walk back to Broad Bay, so don't walk too far.  

We ended up doing about 36km in one day, but it saved us from paying $54NZ per night to stay in the two huts. And most importantly, it also saved us 3 days of being on the trail.  Also, if you wish to hike the whole circuit, we recommend parking at the Rainbow Reach car park, hiking to the Iris Burn Campsite or even the Hanging Valley emergency shelter, if you go later in the day no one will catch you and it’s an awesome place to stay the night.  From here, walk the best section of the track and then down to Broad Bay Campsite.  Plan on hitching back to Rainbow Reach car park.  You shouldn’t have a problem hitching a ride since so many people access these tracks all day. Also, you won't miss anything but 10kms through bush from Broad Bay to Rainbow Reach. 

All in all, we paid $18pp at the Broad Bay Campsite.  If we were to pay for the 3 Great Walk Huts we would have paid $54pp/pn, and been on the trail for 4 days.  Although this is a long day walk, its on a Great Walk track that is suitable for the elderly and inexperienced hikers.  If you are a frequent hiker, this long hike won’t be that difficult, especially since you’ll only be carrying a day bag for 90% of the kms. 

New Zealand Fiordland, Kepler Track, Milofrd Sound, Hollyford Track, Lake Marian, Key Summite, ROutburn, Travel New Zealand, New Zealand on a budget (1 of 2).jpg

Day 2: Lake Marian and Milford Sound- Wake up at Broad Bay, pack your shit up and hit the short 50min track back to the carpark.  Hop on the Milford Highway in the car and into the Fiordland National Park.  If you need supplies, Te Anu is your last chance. There is actually a lot more to offer in Te Anu than I expected.  Grab your supplies and hit the last bit of cell service in town and head to your next stop, Lake Marian.  There are plenty of roadside stops along the Milford Highway and each one is a short 5 min walk to a scenic vista or a waterfall, or something amazing.  

Lake Marian is located on Hollyford Road, its the first stop on the road it will be clearly marked with a classic Green and Yellow DOC sign.  The hike to Lake Marian is pretty easy, sometimes steep and root climbing but, takes about an hour to get up there.  Lake Marian has to be one of the most amazing alpine lakes I’ve ever seen, especially after only walking for one hour.  If you have nice weather, you’ll definitely have to swim in the pristine blue glacier melt water.  The hike out of Lake Marian is quick and is about 45min out.  

From here, you’ll have to make a decision on where you want to stay for the night.  You have already passed the last DOC campsites so if you're more of a rule follower, you’ll have to head back to the campsite.  We decided to head to Milford Sound for sunset and astro shots for the night.  We ended up sleeping in the Milford Sound car park and had no trouble, they even have nice toilet facilities open 24 hours (with outlets an outlet for charging in the toilets)! We stayed up till about midnight getting photos and making sure a pesky ranger didn't come around to ruin our fun.  

Milford Sound New Zealand

Day 3: Milford Sound to Gertrude Saddle - You will definitely want to book ahead to jump on a boat ride on the sound.  Since we are on a budget we picked the cheapest option, a $45, 9am cruise with Go Orange, it actually came with a free snack as well.  We recommend jumping on a boat because you really can’t grasp the size of Milford until you get out and onto the sound.  It was a 2 hour cruise packed with info and peppy tour guides.  We really enjoyed it and would recommend it 100%.  After the cruise, we had lunch in the car park and fought with sand flies for a few more hours before we packed up and headed to Gertrude Saddle.

On the way to Gertrude you can stop at The Chasm waterfall for a quick 15 min stop over.  From here, carry on up the road to the Gertrude Valley car park.  We pre-made some snacks before the hike.  

The hike is 3.5km to the saddle and worth every step.  It’s more of a activity than most tracks as you have to scramble up granite and use a rope to climb some sections.  It’s actually a really fun track.  The view at the top are some of the best in Fiordland, you can see Milford Sound from the top as you look across massive glacier cut u-shaped valleys.  It was by far one of our favorite hikes of our trip.  We spent a lot of time up at the top and headed down pretty late in the afternoon.  We had initially planed on camping on the saddle, which we wish we had done and highly recommend hauling your gear up there for a cold but unforgettable experience overlooking Fiordland’s best treasure (if the weather permits).  We cooked dinner in the car park and ended up sleeping there as well.  We saw plenty of campers heading up to the saddle for an overnighter so we figured no one would know if we were in our car or not.

Key Summit, ROuteburn Track, Great Walks on a budget.

Day 4: Key Summit to the Hollyford Track - We woke up in the Gertrude Valley car park and actually ran into some friends from our travels.  They highly recommended heading to Key Summit, and then an overnighter at Hidden Falls Hut on the Hollyford Hut.  We took their advice and we were glad we had ran into them because we weren’t sure of what to do with the last beautiful sunny day.  

The Key Summit Track starts from the Divide Car park just above Hollyford Road.  The track starts along the Routeburn Track and is a Great Walk. So, the trail is a pretty moderate to easy climb to the summit. It takes about 3 hours, round trip, with stopping and hanging out.  Once you reach Key Summit, the hike isn't over.  Pass all the people who think they are done and follow the track that leads up the ridge to the real summit where you will get an amazing view of Lake Marian and the surrounding peaks.  This track really surprised us.  Once we reached the false Key Summit, we weren't that impressed until we saw a trail out the back that no one was taking. It’s an easy walk up a ridge to a far superior view of the area.

After we headed down the track, we packed up our bags once again and headed for the Hollyford Track just below us.  The trail starts at the end of Hollyford road about 10 min down a dirt road.  This easy flat track crosses 15 Bridges 5 Waterfalls and 2 Boardwalks through amazing temperate rainforest for about 2.5 hours.  We really wanted to walk the Milford Track but A: Couldn’t afford it and B: Couldn't book it.  However, we feel the Hollyford track is a great substitute to the Milford track.  At the end of the 2.5 hour easy track, you’ll find yourself at the very nice serviced Hidden Falls Track.  The hut is cost $15. So, a green serviced hut pass or a backcountry hut pass covers the cost.  We wished we had more time to continue on this track to a few more of the huts in this area, as they are very well kept and in amazing shape and lead all the way to the Tasman Sea and back.  We think that the DOC thought this trail would be more popular but, we ended up having the entire hut to ourselves and it was amazing.  

Hollyford Track, hidden falls hut, New Zealand

Day 5: Hidden Falls Hut to Te Anu - After a nice night at the Hidden Falls Hut you can either continue on the Hollyford Track our head back to the car park.  We were completely out of supplies so we opted to head back to the car park and back to Te Anu to get some much needed groceries to continue our journey.  The Hollyford Track looks like an good hike just to do a few easy nights out in the Bush along the pristine Hollyford river and looks like it has some amazing fishing opportunities. 

Heather Jock Hut - A Great Budget Substitute to the Routeburn Track

Heather Jock Hut, Mount Judah, Glenorchy, New Zealand, Free Huts

Just a few km outside of Glenorchy is a right hand turn for the Whakaari Conservation Area.  A very little used backcountry area consisting of a series of old scheelite mining tracks to a few free basic and standard backcountry huts.  The track to Heather Jock Hut gradually leads up 1,400 meters to the hut.  This free basic hut is a blast form the past with 3 beds, no heating, and no facilities, except a drop toilet.  On the way up, you'll pass old mining huts and work sites.  It takes about 2.5 - 3 hours to reach the hut.  It's very low key, with amazing views of Mt. McIntosh and the glaciated Centaur Peaks out of the front French door. 

On the other side of the valley is a very easy climb to recently refurbished McIntyre Hut (2 hrs, 5-Bunks, $5pp/pn) However, if you do decide to hike, on this side, we would recommend heading up to the other awesome free, basic hut, in the area, McIntosh Hut (3 hrs, 4-bunks, free). This hut sits right on the saddle of Mount McIntosh, and has far superior views than McIntyre Hut below.  

If you're looking for something off the beaten track in the Glenorchy area and don't want to pay a fortune to walk the Routeburn and still want to access some overnight huts, the Whakaari area is a great option for you.  We didn't see anyone on the track both days and had the 3 bunk hut to ourselves on a Saturday, in early march. 

Roy's Peak Overnight Camping

Roys Peak Camping, Wanaka, New Zealand

The track to Roy's Peak is just a very short drive, bike ride, or hitchhike from Wanaka town center.  The trail is a wide series of switchbacks all the way up to an amazing look-out.  This is a good place to take a break or even pitch a tent for the night.  From here the trail goes straight up, until you reach the Summit of Roy's Peak (3hr - Hard).  There are more options for camping once you reach the summit if you walk further along the trail.  Our plan was to see the sunrise, sunset, and night skies so we decided it would be best to carry in our camping gear.  The trail is not very exciting and is not easy on the ascent.  Carrying camping gear, plus camera equipment, doesn't make the trail any easier.  The morning view out of the tent window is worth every step and it was an amazing experience.  

There is only one overloaded drop toilet a few meters up the track, so please come prepared for #2's.  Camping here is prohibited.  So, camp at your own risk.  NZ is cracking down on "freedom camping" these days and Roys Peak is a controversial place to camp.   Staying here is frowned upon by the locals so please leave no trace so others can share this experience as well. 

In the busy season, expect people to be walking up basically all night.  Also, don't be surprised if you hear a group of young Germans boys bumping techno at 4am.  This is a very popular hike we headed up at around 5pm and had no problem finding an amazing campsite. Also we parked in the carpark at the trailhead and had no issues.  Whether you choose to do Roy's Peak for a day hike, a sunrise hike, or an over-nighter, it shouldn't be missed while in the Wanaka.  

Here are a few New Zealand Essentials

Support the kookz… Check out our Merch!

Liverpool Hut - Mount Aspiring National Park

Liverpool Hut, New Zealand, Mt Aspiring National Park

Located in the Mount Aspiring National Park, Liverpool Hut is a must do for anyone trying to see NZ's best huts that are outside the overly priced and marketed "Great Walks".  This is a 10 bunk serviced hut that was built in 2009. It is very new and cost $15 per night.  The hut sits right below the glaciated peaks of Mount Barff and Mount Liverpool, with incredible views of Mount Aspiring, Rob Roy peak, and the Matukituki River valley.  This hut also boast the most scenic shitter in all of NZ.

The 16 km hike to the hut is incredibly cruisy, as it follows along a river valley below stunning mountains and cascading waterfalls.  Then, you cross the Liverpool swing bridge and find yourself at an hour to two hour arduous climb straight up to the hut.  This section is more of a root ladder and rock scramble than a track, but it's 100% worth the effort to get there.

The hut is becoming more and more busy and we've heard that it will soon switch to a booking system.  Until then, there are two options to attack this hut to ensure you get a bed at the hut.  Option one is staying overnight at Mount Aspiring Hut, 9km into the hike. This is NZ oldest huts and it's quite expensive at $30pp/pn or you can use the campsite for more reasonable price $5pp/pn.  If you do split the hike in half, wake up at sunrise and start the hike to beat all the people coming from the car park. 

The second option is to sleep in the Raspberry Creek car park and get up at the butt crack of dawn.  The track is well marked and along an unsealed road for the first 8km. It's no problem to hike pre dawn in the dark.  Starting this track early, also lets you witness the gorgeous alpine glow light up the glaciers a pink/orange hue from the sunrise.  We had done this option but, looking back at it, we would recommend camping at Aspiring Hut to break up the hike, enjoy the amazing scenery in the area, and be first to the top. The hike to Aspiring Hut is very easy and is even recommended for kids.

There are two other huts ran by New Zealand Alpine Club in this area, The French Ridge Hut and Dart Hut.  Both huts look incredible, but do cost a bit more.  This area and also a 2/3hr walk to Rob Roy Glacier that starts about 5 minutes from the Raspberry Creek Car park.

Before you leave, purchase a $15 serviced hut pass from any DOC office, as the warden at Aspiring Hut will be waiting to collect your tickets.  Find out more about Aspiring Hut and the other NZAC huts in this area on their website.

Five Activities You Don't Want To Miss on New Zealand's South Island West Coast

Mt Brown Hut West Coast New Zealand. Remote Huts

New Zealand's West Coast isn't a primary tourist attraction for most travelers, unless you’re opening up your wallet for expensive heli-rides to the glaciers.  However, I reckon most of these people aren't stumbling across our wallet friendly blog anyways.  So, we put together five of our favorite activities on the west coast that are affordable or free.

Remote Huts -  If you're an experienced hiker and are keen to get into the wild wilderness of the West Coast, you'll find this region to be a Mecca for tracks off the beaten path.  You may find yourself trekking for a few days without even seeing a humanoid.  The tracks to the West Coast huts aren't for the faint of heart. Be ready to get muddy, bit by bugs, bush whack, and climb up steep terrain using roots as ladders.  There's tons of info and topo maps for the vast system of remote huts here www.remotehuts.co.nz.  It's important to know what you're getting into before you head out. GPS/maps are wise to have as DOC doesn't maintain many of these tracks and they are done through permolat, a community organization.  Also, must huts run from donation to $5 per night.  Honesty pays at these huts. So remember to pay it forward. 

Hokitika Gorge - While this is more of a major tourist attraction, it's definitely worth checking out.  Glacier melt and other factors make the water an amazing blue hue.  We highly recommend jumping into the cold water, off the rocks or the swing bridge, if you're brave enough.  Also, scrub your body with the rich mineral sand and rinse off in the cool waters to exfoliate your skin.  It's literally like spending a day at the spa after being deep in the West Coast wilderness. 

West Coast Glaciers - See them before they are gone.  The Franz Joesph Glacier is definitely the more impressive Glacier.  However, we preferred the scenery of the less popular Fox Glacier.  There are tons of tours offering chances to get on the glaciers, but since they have receded so much in the past ten years the tours are not as worth it since access is now so difficult.  A few of the tours literally go as far as a brave tourist can go in past the ropes.  We just recommend checking out the tracks at each glacier. There are some really cool and dense plant life and scenery. 

Matheson Lake - just a few kilometers outside of Fox Glacier is one of the most picturesque places in all of New Zealand.  On a clear day, more likely during sunrise or sunset, you can see amazing reflections of Mount Cook and Mount Tasman off the lake.  While most people hang out at Jetty point, we recommend walking around the lake to the Island Viewpoint or the View of all Views for less chances of being hit by selfie sticks.  If your lucky enough to catch the lake on a clear day, you will be enchanted by one of the most amazing sights and sought after photographs in NZ. 

Copland Track -  A 19 kilometer track up the Copland Valley will bring you to the Welcome Flat Hut, a 31 bunk two-story serviced hut.  The most attractive part of this Hut is definitely the hot pools right outside of the hut.  After a long hike, treat yourself to the West Coast best thermal pools. It's one of the best treats after a hike.  Although the Copland Track isn't the most scenic, it is quite long and really isn't recommend to people who don't have much backpacking experience. There are two river crossings and multiple swing bridges to cross.  Booking are mandatory and should be made well before either online or at an iSite either in Fox Glacier or Haast, as there is absolutely no service or other means to book in between the two places.  The hut is $15 per person, per night.  Bookings can be made at www.doc.govt.nz .

Two of our Favorite Campsites on the West Coast - We also found two awesome camp sites in the area while we weren't staying in huts.  The first one, Kapitea Reservoir. It is free and is on the way down from Arthur's Pass before you reach Greymouth.  This site is on the lake overlooking the Southern Alps. It is a free campsite on a reserve. In order to keep it free, make sure you leave no trace and encourage others to do the same. These spots are quickly disappearing because of irresponsible campers.

The next camp site we found, although not free, was incredible bargain. The Hari Hari Hotel accommodates all types of travelers with a hotel, bar, backpackers, and powered/unpowered campsites.  The best part about staying here is camp sites have access to the backpackers area for hot showers, wifi, and kitchen area, which was a blessing after 10 straight days on the road hiking through dense and humid west coast forest.  The campsites were around $12pp and was on of the best places we've come across on the South Island. Usually, places charge extra for showers and wifi. This was all in one package! Really nice people running the joint too. As a lot of free campsites have been shut down in this area, this place fills up around 3-5 pm. So get in and get a reservation as soon as you get to Harihari.

5 Hikes in Arthur's Pass National Park that are off the Beaten Track

Arthurs Pass Mount Rolleston Avalanche peak devils puchbowl

Just 175 kilometers out of Christchurch is the outdoor playground known as Arthur's Pass National Park.  This park consist of tons of trails ranging form five day tracks to 30 minute nature walks and is a must do on any South Island NZ itinerary.  We arrived to the area with no plans and were able to find heaps of activities in the five days we spent here.  Also if you ever need ideas in NZ always head to the i-site they are more than willing to offer any info about any activities in the area.  From free campsites to amazing basic and standard huts, you won’t have to worry about breaking the bank to have an amazing kiwi experience.

If you're coming in from Christchurch, we've put together an itinerary of a few things to check out ranging from overnight hikes to huts, to free camp sites, as well as, short day hikes all within 15-20 minutes of each other.

Castle Hill - Although this isn't technically in the Arthur's Pass region, this is a must stop on the way in.  The area is a rock climbers haven, but if you're not into rock climbing, you'll find plenty of things to do in this surreal landscape.  Once you're satisfied wondering around the bizarre rock formations, head to Lake Pearson reserve for a free camp about 20 minutes down the road.

Bealey Spur Track- Wake up and get your backpacking bags packed and head over to Bealey Top Hut. The hike is 3 hours along a ridge. It is a steady uphill climb, but it isn't too bad. This is a free historic hut. While you won't need your tent, you will need a camping mat and a warm sleeping bag, as the bunk and hut is very quaint pioneer style, for lack of a better description. Once you have set up camp, you can continue to climb to the summit or save that for morning--you will get epic views of Waimakarir River valley.

Otira Valley - Wake up and warm up with a hot beverage or three. Then, enjoy a quick two hour decent down Bealey Spur Track to your vehicle. Drive into Arthur's Pass Village for a quick snack or a wifi binge at the Spark Mobile hot-spot in town.  Once you're ready to get back at it, drive just a few kms to Otira Valley Track. This is a very easy track up a mellow valley to a bridge that claims you need mountaineering experience to advance, but I recommend you continue on till you feel comfortable. The views get better past that bridge and the trail is well marked.  On a nice day, you can get an amazing view of Mount Rolleston, the highest peak in the area.  Once you've soaked up the views take the easy hike back to the car park and head to Klondike Corner Campsite for some well deserved rest.

Temple Basin/O'Mally track - Sleep in this morning, you've been putting in some time on the trails.  Once you've whipped up breaky and are feeling ready for another big day on the trails, pack your backpacking gear now so you won't have to later.  If the weather isn't clear, you can plan on skipping the Temple Basin Ski Field.  However, if the weather is clear and nice, we recommend you do the quick hike (2 hours round trip) up to the ski area base.  You can get 360 degree mountain views, including an amazing view of Mount Rolleston, and you can get an idea of how the epic the Kiwi club ski fields are. 

Head down and drive over to the O'Mallys car park and start the hike to either Anti Crow Hut (2hr, easy) or Carrington Hut (5hr moderate).  Both tracks are along a river valley and not to arduous. It can be combined into a two night hike, if you walk to Carrington Hut for the first night. Then, for the second night, hike down to the more basic, but awesome Anti Crow hut, (bring sand fly/mozzie repellent) then out to the car park.

Angelus Hut - Nelson Lakes National Park

Angelus Hut New Zealand Nelson Lakes National Park

Our first experience on the South Island of New Zealand was exactly what we were looking for, dramatic peaks and amazing scenery.  What we didn't know was we would meet some of the most amazing people we've come across on our New Zealand travels.  

We arrived late to the Nelson Lakes visitors center around 2:30 we checked out some options for hiking to some basic huts to get familiar with the NZ hut system.  Luckily there was a cancellation at Angelus Hut a very popular serviced hut which we wanted to originally hike to but it was booked out thanks to the crazy NZ busy season.  The ladies at the visitor center booked us in and we were on our way. 

We started at the Mount Roberts car park and decided to approach the hut via the 13km Robert Ridge track.  Lucky for us it was an amazing day and even though it is not an easy hike if the weather is good we highly recommend the ridge.  After about 4 1/2 hours of non stop hiking and scrambling over ridges and rock slides we finally reached the majestic Angelus Hut.  It was quite the sight after a late start to know that we would have made it before sunset.  

We got the the hut cooked dinner had a chat with a few campers that were up late then we passed out for the night.  The next morning brought with it some interesting weather with low visability so motivation was at an all time low to start on the journey to the Speargrass hut which was our next planned destination.  But luck was on our side, the warden had let us know around noon that there were cancelations so we booked another night. 

We had a relaxing day and met some of the most amazing people that we actually ended up spending a week with in Christchurch after the hike.  We spent the whole day talking with our new friends and the day flew by.  The next morning we headed out back to the carpark. 

The weather was amazing on our return hike via the Speargrass but after doing this hike if you're not staying at the Speargrass Hut, I would recommend taking Roberts Ridge back to the car park. All in all we recommend this track and hut 10/10 and we felt that it was one of the South Islands hidden gems. 

There are also plenty of other awesome huts and hikes in this area. You could easily spend days out here.  

How to Buy a vehicle in New Zealand Complete Guide to Successfully Purchasing a Van in NZ

New Zealand Vehicle Purchase

Buying a car in NZ.

1. WOF

When looking for a vehicle, ask if their is a current WOF (Warrant of Fitness- this ensures that the car is safe to drive on the road) and be sure to ask when it expires. Typically, they last a year on older cars. Make sure your potential car has a remaining one or that is has received one in the past month. If it has neither, things to look out for that can stop your car from receiving WOF is rust, bald tires, cracked windshield, broken or chipped indicators, even wiper blades, and other engine issues. All this can add up to quite a bit of money so make sure you do a thorough inspection or make sure that your potential vehicle comes with a long enough WOF to cover your travels.

2. Registration

On top of a WOF, a car must also be registered. Registration usually runs $100 per 6 months. Changing ownership is $9 at any post office and the Buyer must fill out a MR13B form found at the post office as well. For piece of mind, write up a quick bill of sale on any piece of paper with name, contact info, signature, price of car, and date.

3. Diesel vs Unleaded

Another thing to keep in mind when buying a vehicle that unleaded petrol is twice the price of Diesel in NZ. We saw this as we were driving past petrol stations on our first day and quickly made diesel a requirement in our Van search. Then, at the post office, we found out they try to balance out the fuel prices by requiring Diesel cars to pay a diesel tax at the post office. You have to pre-pay for km that you will use. I think for 3,000km it was $198. I don't really understand why they don't just balance it out at the pump, but whatever. It's cool when filling up is half the price. We filled up our diesel van for $60. That would have been $110-$120 if we had an unleaded van, we celebrate that every time we fill up. So, I am pretty sure you will still be winning if you get a diesel.

4. Places to buy your vehicle in NZ:

Backpackersfourm,

There are heaps of vans and other cars on this site. And we had heaps of luck and call backs on this site. It is actually where we bought our van on the first day. They were a nice family of four from Ireland that travelled most countries vanlife style. They really hated on the BuyBack people (read more below)

Trademe,

This is an Auction website with starting bids and reserves. It is pretty popular in NZ for locals to sell anything and everything. Most the Vans we saw were pretty expensive or few and far between.

The Sunday Car Fair in Auckland,

If we didn't buy the van that we bought on Saturday night, this is where we were going Sunday morning. This is also the place our Family of four was planning on going in the morning if they didn't' sell the van to us on Saturday night in the pouring rain. So there are some gems to be found here for quick sale.

NZ Guaranteed Buyback associates in Auckland

From what we have heard, this is pretty much for travelers that don't really know what they are doing or travelers that need a long term rental for exact dates. While it is convenient to purchase vehicles from NZ Buyback Associates because they usually come with an up to date warrant of fitness and registration, it may not be the best for budget travelers with semi-flexible travel schedules. Here is why... Usually if you buy your own van, you can count on getting near to what you paid for it upon departure from private sales, if you secure registration, and WOF yourself. Thru the BuyBack programs, you throw down about $5,000 for a vehicle and they will buy it back after six months for around $2,000 and rent it out to the next travelers for $5,000. Basically your convenience cost you $3,000. Believe me, built-out camper vans hold their value and sell quick.

The best part about owning a vehicle is that is your asset. We buy a vehicle and know that if we maintain it regularly and do some modifications and upgrades to the living space (solar or aux batteries or just regular up-keep aka not running it into the ground, like most backpackers) you can sometimes get more for your vehicle. When we sell our van in one country, that is our budget to buy another van in the next country. So keep that in mind if you want to continue vanlife around the world.

Where did we have the most success?

We had the most success from Backpackers Forum as we didn't want to wait around for bids to end on TradeMe. Although I think you can contact the buyer on TradeMe to do an inspection and if you like it and make them an offer, I am sure that they will take it down and sell it to you to avoid the headache of selling it and answering emails about the vehicle.

Best Cell phone service options in New Zealand for Travelers

New Zealand Cell Phone Service Options Travel Backpackers

 Cell Phone Service options in New Zealand 

There are a couple to choose from, but to preface this section, I would check with your provider in your home country. We had our American T-Mobile phones in Australia and it would roam to any tower and was actually more reliable than our Oz phone. Without our T-mobile phones, we would have been stranded in Tasmania the entire time as our Vodaphone Oz phone didn't work anywhere, but Hobart.  For our T-mobile plans we pay $10 a month for unlimited data (at 2g speeds) and unlimited text pretty much anywhere abroad. That means we could FaceTime, Face Time voice, and Facebook Messenger call, Instagram, Facebook, etc. as much as we wanted.

Although it is convenient to buy SIM cards at the Airport, they only had two brands, Vodaphone and Spark, available and I am pretty sure they do not offer the full packages they do in their stores. But if you go to any information center, you can usually pick up a 2 degrees SIM card for free. They roam seamlessly between their towers and Vodaphone towers.

For our first round of phone plans when entering NZ, we took on the convenience of buying the Spark Traveller's plan at the airport. Who knows why, I think it was because we wanted to have a contact number for all the vans we were sussing out. But they got us and once again we found out that our American phone service was more reliable purely because it connected to any tower it could (usually Vodaphone).

Coming from America, we are quite spoiled with our Data plans and have noticed that data plans abroad can be a joke by comparison. With hardly as many cafes offering free wi-fi, I can eat thru the max 3gb data in a couple days. Here in NZ to top up on data, it is $50 for another 3gb. Steep as.

 Phone Companies in NZ:

Vodaphone NZ

Vodaphone seems to have some of the best coverage. When asking our family of four what service they used in their travels, they said they to also counted on their Canadian plans still rolling from their most recent van visit to Alaska, Canada and the USA. They said 90% of the time they always had Vodaphone service on their Canadian phones.

 2degrees

2 degrees seemed to have the cheapest bundle with the most data and unlimited calls to numerous countries abroad. The prices on bundles were more along the lines of the Australian prepaid, which was reasonable. They also have a data hunting app. Where you can pick up mb or gb's of data just around the area (If you are thinking this sounds like Pokémon Go, it kinda is) This data also rolls over to the next month if it goes unused. This is the service we chose in the long run.

 Spark

Spark doesn't even care if you are 5 years old asking for a SIM card for your mom's iPad. If your have a visa or other credit card, they will give it to you without taking down any personal information. Very different experience from Australia. They need to see a license, passport, or if you do it over the phone, they run your name thru some government website to approve your visa status. The max amount of data they offered was 3gb, but they had wifi hot-spots available to cell phone customers whenever they were in range. The wi-fi hot spot was reminiscent of Australia's Telstra service (and they had the best most convenient hot spots in Oz). Anyways, I think that is why we hopped on Spark in the beginning. Apparently, connecting to the wi-fi didn't require an app. When your phone was in range it was just supposed to connect and override using the data. We connected to the Wifi via settings on the phone and it sent our phone a code to punch in...then, we were able to connect and it remained connected every time we were in range! I noticed the code worked for my laptop connection as well, which was quite handy. When we ran out of our 3gb data within the first week, we kinda dumped topping up our Spark and used our trusty T-mobile to navigate, but we still hit up those wi-if spots. 

The Warehouse Phone Plans 

Although we have not looked into this, apparently, this is one of the best deals around. They have "pick & go" options where you pay $4 per 4 hours talk, $4 for unlimited text, and $4 per GB. To top up on your data, just pay another $4 per GB or talk. It sounds simple and some friends we met on a hike have one Spark phone and one Wharehouse phone. They have the spark phone strictly for the hot spots and Wharehouse to have cheap data. Sounds like they are doing it right. 

Hiking New Zealand's "Greatest Day Hike" The Tongariro Crossing for Free

Torongario Crossing New Zealand North Island Trecking

Walking the "World's Greatest day hike" for free.

In winter months, due to the snow,  this is a guided tour. So, I am not sure if there is a way around fees. But, in the summer months, this 20km + hike is a Freedom hike. You are welcome to start at the shuttle start point, Mangatepopo or the shuttle end point, Ketetahi. There is a paid shuttle is available for $30 dollars per person back to the start point car park.  We are here to help you avoid that shuttle and the crowd of people it drops off. We hate crowds of people especially when you make an all day effort to be out in nature. No joke, after 11am, be ready to encounter heaps of inexperienced hikers all over the trail.

1. Two car option

If you're hiking friends that also have a car and you're keen on doing the entire hike from start to finish, drop one car at the Ketetahi car park and drive back to Mangatepopo car park and begin. Sounds simple, but for some reason huge groups of people are still shelling out money for that shuttle together. I would do this very early in the morning if you want this place all to yourself for a couple hours. Make sure you're on the trail by 5-6am and you should be perfect.

2. Start at the "end point"

Second option for those that only have one car....Start at the end point, Ketetahi car park. You won't do the entire hike, but you will see all the good stuff and you won't see a single person until the summit (Red Crater), if you start your hike at 5-6am. (Risky tip: If you park and sleep in your car at Ketetahi and get up and on that trail by 5 am, you will catch the sunrise over the Rotoaira Forest and Lake on the trail just as you pop out of the trees. Yeah, it isn't allowed to park at the car park overnight, but who is going to catch you if you're up that early? The parking attendants come at 6am. They will knock on your steamy window and shake their finger at you. They were pretty chill.) Once you've seen all the good stuff and summited, u-turn and head back the way you came in. The hike is a tiny bit longer this way, but we did it in 7 hours with walking around the lakes, taking pictures, and sitting and eating our packed meal. If you aren't the fastest hiker, allow 8 hours.

3. Camping nearby 

If the risky tip in number 2 was too risky for you, don't worry we have 2 legitimate free campsites nearby. Waikoko Valley Campsite and Kaimanawa Roadside Camping. They are both about 20 minutes away from Ketetahi Car Park. If you don't mind being around a bunch of backpackers, park at either and get up early. There are about 6 parking spots at Ketetahi. Odds are people have dropped their car there the night before already or slept in their car there. So there won't be any spots. You will have to park on the side of the unsealed road you came in. Overflow parking lines the East side of the entire road all the way to SH47. It starts on the left side (East side) about 50 meters after you u-turn and find no spots in the 6 car lot. Look for the blue P sign with the arrow pointing in the direction you came in. It's easy to miss, but it's there. Sometimes there are cones right by it.

4. Going old school. Hitch hike.

Last option, start at the starting point park your car and do the entire hike. Then, go old school and hitch hike. We saw plenty of people doing it. I can't say how good your luck will be and I can't promise it will be safe these days, but in NZ, I am sure it probably is safe. When you hitchhike, always walk backwards facing on-coming traffic with your thumb up and making eye contact with the drivers, if you want to hit that soft spot in their heart. I don't recommend this tip, as you will be exhausted and you might have to walk an additional 7km to the car park, if someone drops you roadside at the turn off.

 Our Thoughts....

Alright, now that we gave you the lowdown on how to save some dough,  it's time to talk about that reigning title "World's Greatest Day hike." I think you might be walking through there as confused as were were as to how they even came up with the slogan. We’ve hiked in quite a few epic places that this place doesn't even touch. (Try Half Dome, in Yosemite, any day hike in Mt. Rainier, or plenty of Tassie hikes would knock this place out of the ballpark). I really don't feel like this place should even be a contender, but that just might be my high expectations for New Zealand hikes and "world's best hikes" for that matter. In the car park, at the end, we heard plenty of people expressing their confusion as well.

But if you are a LOR fan like me, then you'd probably wanna check out Mt Doom. I'm not at all saying this place sucked by any means. It was some of the craziest terrain I have seen and some of the craziest terrain I will probably see all in one place. With the earth steaming thru vents and crazy emerald colored pools, it sure is insane to see the power of Mother Nature,  but I still don't agree with the title it holds. I think it has a little something to do with the excellent marketing for the shuttle companies to drive you 15 minutes down the road for $30 per person. Due to its picturesque popularity, New Zealand has become a pay to play out in Nature and this is one of the Great Walks that you can still play for free. Although I am not sure for how much longer it will be like this, it sounds like this popular hike has reached its daily limit and might be regulated to how many people can cross the track in any given day. At that time, I don't know if there will be ways around not paying to play at Tongariro.